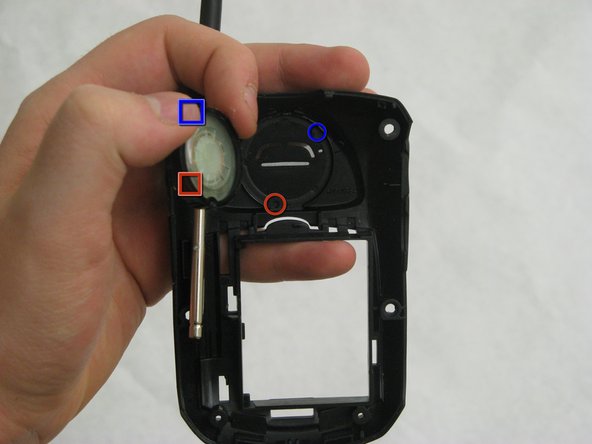
주요 콘텐츠로 건너뛰기

Blackberry 7520 Speaker Replacement

필요한 것

  1. Blackberry 7520 Speaker Replacement, Battery: 1 단계, 이미지 1/2 Blackberry 7520 Speaker Replacement, Battery: 1 단계, 이미지 2/2
    • Turn the phone upside down.

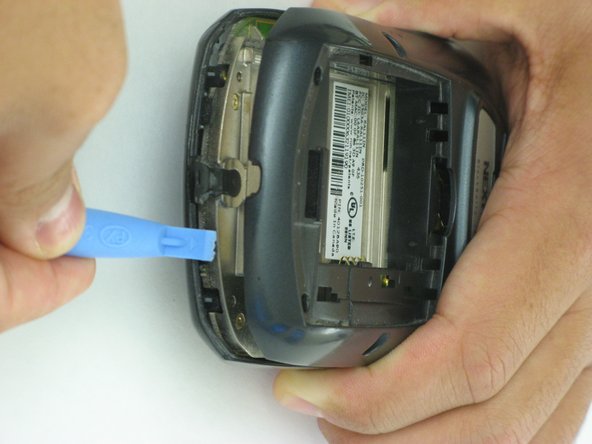
    • Push down on the black button on the back of the phone to slide the rear panel off.

    • The battery should be visible now.

  2. Blackberry 7520 Speaker Replacement: 2 단계, 이미지 1/3 Blackberry 7520 Speaker Replacement: 2 단계, 이미지 2/3 Blackberry 7520 Speaker Replacement: 2 단계, 이미지 3/3
    • Hold the BlackBerry in one hand face-up with the screen facing towards you.

    • Gently smack the phone against your hand to dislodge the battery.

  3. Blackberry 7520 Speaker Replacement, Speaker: 3 단계, 이미지 1/2 Blackberry 7520 Speaker Replacement, Speaker: 3 단계, 이미지 2/2
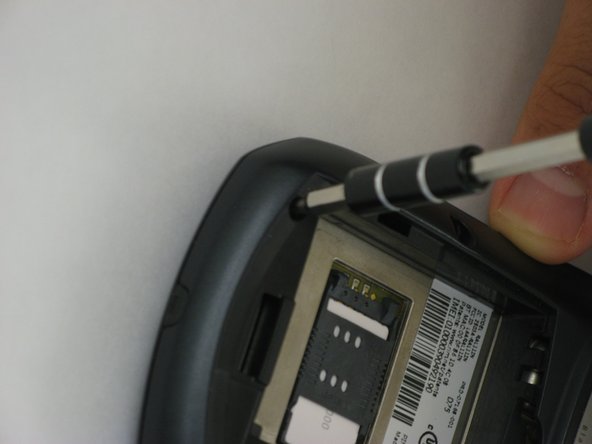
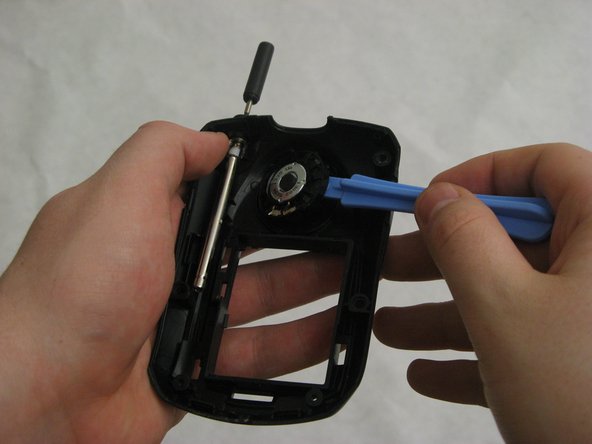
    • Use a T6 Torx screwdriver to remove the six screws located on the rear of the phone.

  4. Blackberry 7520 Speaker Replacement: 4 단계, 이미지 1/2 Blackberry 7520 Speaker Replacement: 4 단계, 이미지 2/2
    • Use a pick or plastic iPod opening tool to push the clips, that are holding the rear casing. Apply a firm pressure at a forty-five degree angle to dislodge the clips.

    • Applying too much pressure could break the plastic clips and permanently damage the casing, so be careful.

  5. Blackberry 7520 Speaker Replacement: 5 단계, 이미지 1/1
    • Repeat the process of unlatching the clips for the top section of the Blackberry.

  6. Blackberry 7520 Speaker Replacement: 6 단계, 이미지 1/1
    • Do not try to pull the two pieces apart. You may tear the antenna cable. Instead, fold the two pieces open to avoid stress on the cable.

  7. Blackberry 7520 Speaker Replacement: 7 단계, 이미지 1/1
    • Separating the two halves allows you to access the speaker. Which is located in the front half of the case.

  8. Blackberry 7520 Speaker Replacement: 8 단계, 이미지 1/3 Blackberry 7520 Speaker Replacement: 8 단계, 이미지 2/3 Blackberry 7520 Speaker Replacement: 8 단계, 이미지 3/3
    • Insert a plastic opening tool between the speaker and the case. Then pry the speaker out.

    • To reinsert the speaker, align the blue notch to the blue stud. Then the red notch to the red stud. As shown in the last picture.

결론

To reassemble your device, follow these instructions in reverse order.

Nathan

회원 가입일: 01/18/10

31 평판

안내서 6개 작성하였습니다

Cal Poly, Team 5-7, Forte Winter 2010 Cal Poly, Team 5-7, Forte Winter 2010 회원

CPSU-FORTE-W10S5G7

5 회원들

안내서 9개 작성하였습니다

댓글 0개

댓글 쓰기

조회 통계:

24 시간 전: 0

7일 전: 3

30일 전: 3

전체 시간: 2,457