이 버전에는 잘못된 편집 사항이 있을 수 있습니다. 최신 확인된 스냅샷으로 전환하십시오.
필요한 것
-
이 단계는 번역되지 않았습니다. 번역을 도와주십시오
-
The required tools are pictured on the left (Picture 1). The tools are, left to right, spudger, T6 screwdriver, plastic opening tool.
-
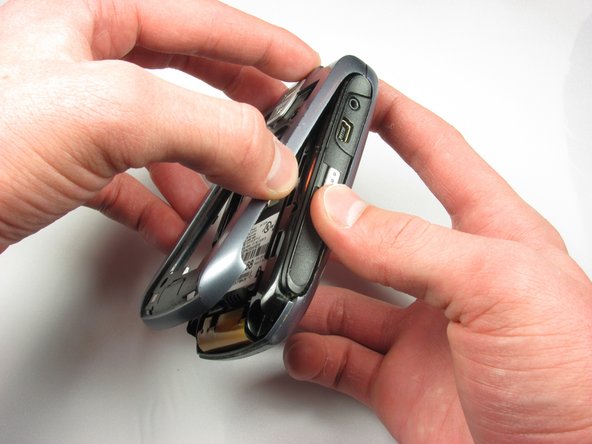
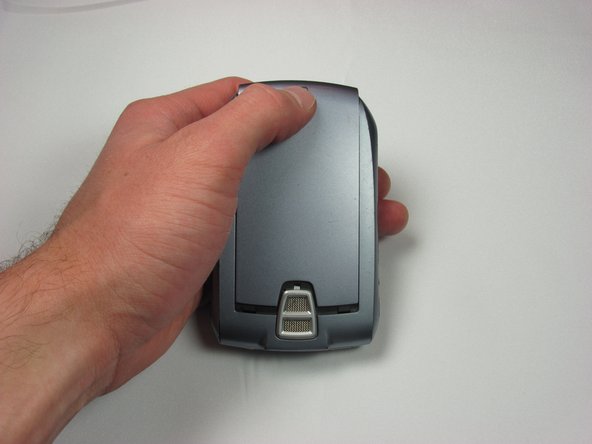
Remove the back cover by pushing the button near the bottom of the phone (Picture 2) and sliding the cover off (Picture 3).
-
-
이 단계는 번역되지 않았습니다. 번역을 도와주십시오
-
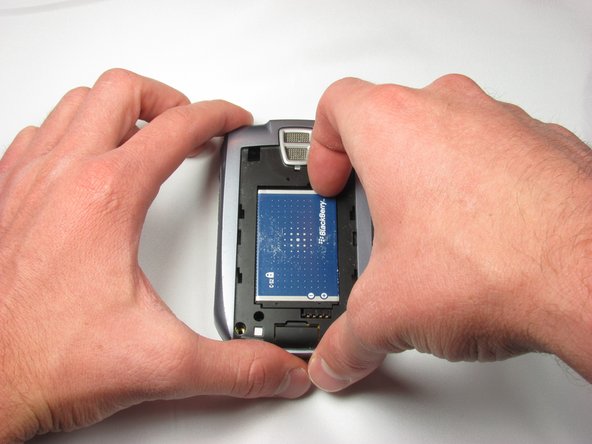
Using your fingernail, remove the battery by pulling on the notch on the top-right of the battery.
-
-
이 단계는 번역되지 않았습니다. 번역을 도와주십시오
-
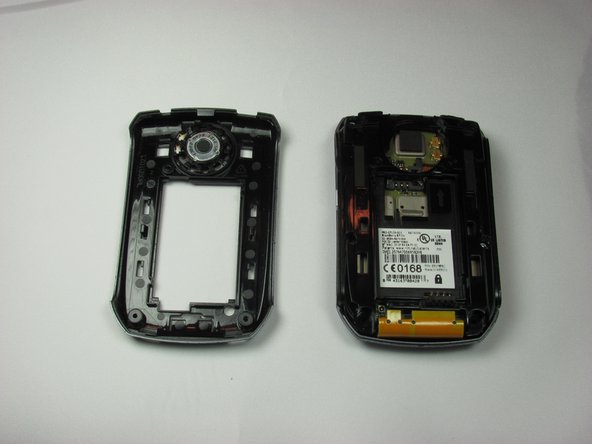
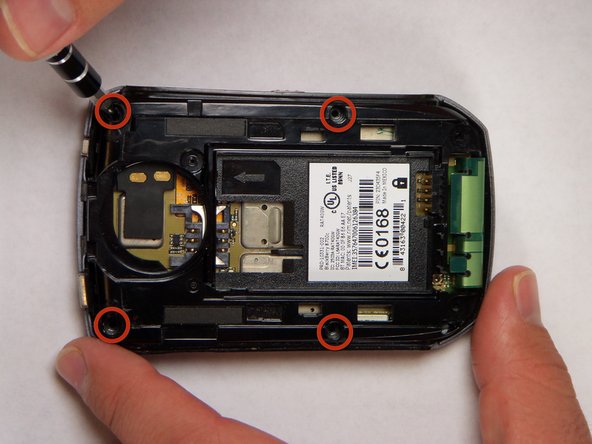
Remove the inner back cover by unscrewing all three T6 screws (circled in Picture 1) with a T6 Torx screwdriver.
-
Pull the inner back cover from the bottom towards you and up (Picture 2).
-
-
이 단계는 번역되지 않았습니다. 번역을 도와주십시오
-
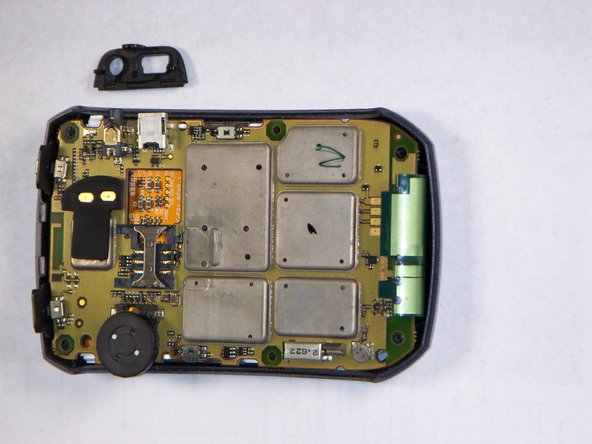
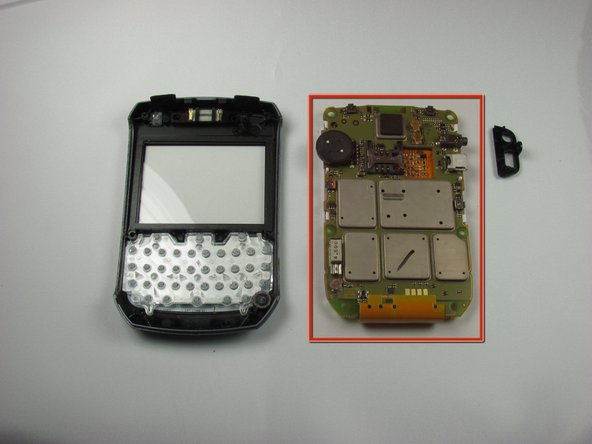
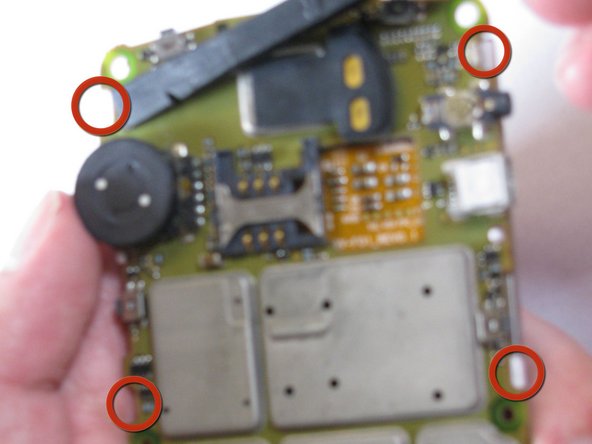
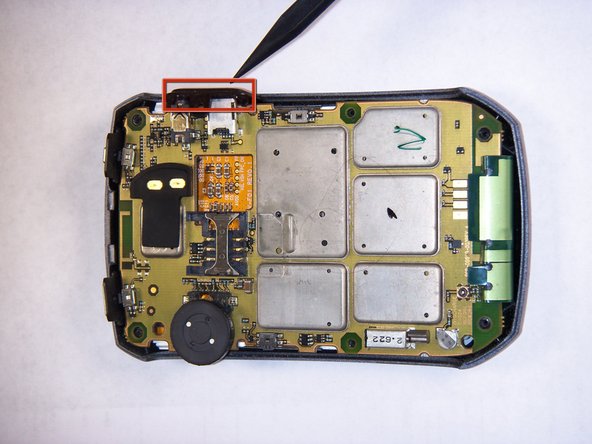
Remove the inner cover by unscrewing all four T6 screws with a T6 Torx screwdriver (circled in Picture 1).
-
Lift the inner cover off the phone.
-
-
-
이 단계는 번역되지 않았습니다. 번역을 도와주십시오
-
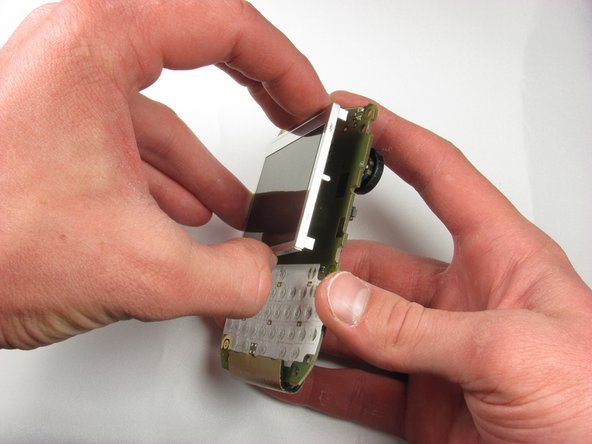
Detach the display screen from the logic board by using a spudger to unclip the four clips holding the display screen (circled in Picture 1). Gently pull the display screen away from the logic board so that none of the clips are engaged.
-
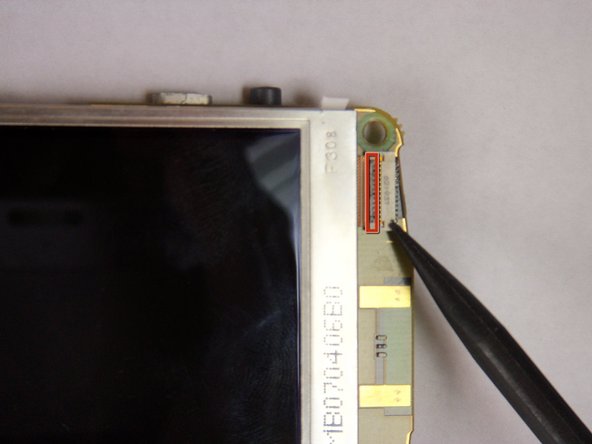
The display screen is attached to the logic board by a metal ribbon. Remove the display screen by disengaging the ribbon lock. Use a spudger to push the thin black bar down (circled in Picture 2). Gently pull the display screen and ribbon out of the logic board.
-
-
이 단계는 번역되지 않았습니다. 번역을 도와주십시오
-
Install the new display screen by reattaching it to the logic board. Reinsert the ribbon into the cable lock. Use the spudger to push the thin black bar up (circled in Picture 1).
-
Gently place the display screen against the logic board so that it is aligned with the clips. Use a spudger to engage all four clips (circled in Picture 3).
-
-
이 단계는 번역되지 않았습니다. 번역을 도와주십시오
-
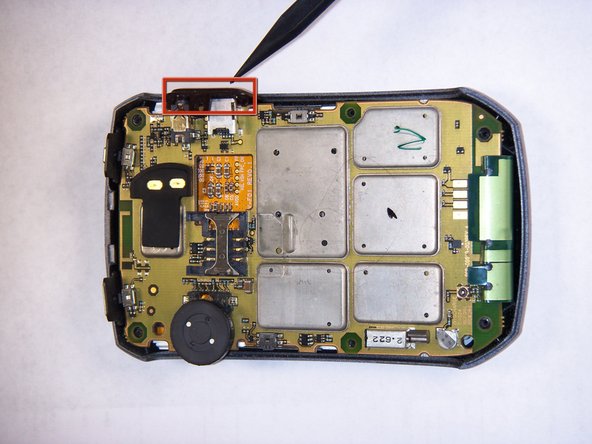
Position the small black piece that fell out in Step 2 against the headphone jack on the side of the phone (circled in Picture 2).
-
Replace the inner cover on the phone by screwing in all four T6 screws (circled in Picture 3) with a T6 Torx screwdriver.
-
-
이 단계는 번역되지 않았습니다. 번역을 도와주십시오
-
Replace the inner back cover by snapping the top of the cover against the phone. Push down on the bottom of the inner back cover to snap the entire cover into place.
-
Screw in all four T6 screws (circled in Picture 3) with a T6 Torx screwdriver.
-
-
이 단계는 번역되지 않았습니다. 번역을 도와주십시오
-
Replace the battery by positioning the top of the battery in the phone and snapping in the bottom.
-
-
이 단계는 번역되지 않았습니다. 번역을 도와주십시오
-
Replace the battery cover by sliding it against the device and snapping it into place.
-


팀

Cal Poly, Team 18-4, Maness Fall 2009 Cal Poly, Team 18-4, Maness Fall 2009 회원
CPSU-MANESS-F09S18G4
4 회원들
안내서 10개 작성하였습니다