이 버전에는 잘못된 편집 사항이 있을 수 있습니다. 최신 확인된 스냅샷으로 전환하십시오.
필요한 것
-
이 단계는 번역되지 않았습니다. 번역을 도와주십시오
-
Turn the device upside down.
-
Using your finger, slide the silver cover release button towards the top of the device.
-
Lift and remove the back cover.
-
-
이 단계는 번역되지 않았습니다. 번역을 도와주십시오
-
Using your fingernails, lift the sides of the battery.
-
Remove the battery.
-
-
이 단계는 번역되지 않았습니다. 번역을 도와주십시오
-
Orient the device so that the screen is facing the ground.
-
Using your finger, gently lift the top of the SIM card.
-
-
이 단계는 번역되지 않았습니다. 번역을 도와주십시오
-
Using a T6 Torx screwdriver, remove the four screws from the bottom half of the device.
-
-
이 단계는 번역되지 않았습니다. 번역을 도와주십시오
-
Orient the device so that the screen is facing you.
-
Using a spudger, remove the ear piece cover.
-
-
-
이 단계는 번역되지 않았습니다. 번역을 도와주십시오
-
Using a T6 Torx screwdriver, remove the two screws from the top corners of the device.
-
-
이 단계는 번역되지 않았습니다. 번역을 도와주십시오
-
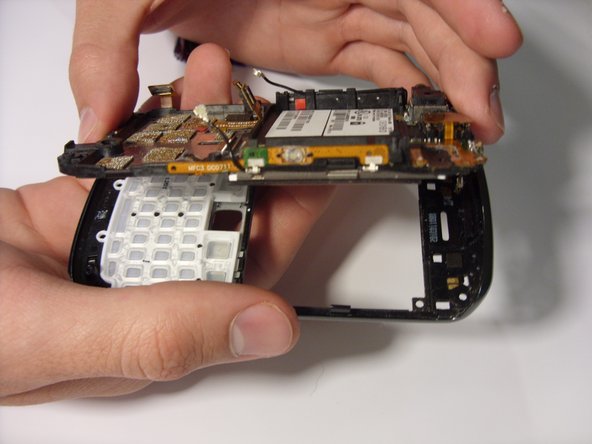
Orient the device so that the screen is facing the ground, and the top of the phone is facing you.
-
Using a pair of tweezers, lift and remove the following:
-
The two round connectors on the top of the mother board.
-
The flat connector in the lower corner of the mother board.
-
-
이 단계는 번역되지 않았습니다. 번역을 도와주십시오
-
Using a pry tool, lift up on the four tabs located on the edges of the faceplate.
-
Remove the faceplate by lifting the plate upward.
-
-
이 단계는 번역되지 않았습니다. 번역을 도와주십시오
-
Using a plastic pry tool, lift and remove the three tabs securing the trackpad restrainer to the trackpad.
-
-
이 단계는 번역되지 않았습니다. 번역을 도와주십시오
-
Flip the device over. The screen is facing upwards.
-
Remove the trackpad restrainer.
-
-
이 단계는 번역되지 않았습니다. 번역을 도와주십시오
-
Slowly remove the trackpad by gently pulling the trackpad away from the device.
-


다른 2명이 해당 안내서를 완성하였습니다.
팀

Clemson, Team 2-5, Benson Spring 2012 Clemson, Team 2-5, Benson Spring 2012 회원
CLEM-BENSON-S12S2G5
2 회원들
안내서 14개 작성하였습니다