주요 콘텐츠로 건너뛰기

Blackberry Torch 9800 Replacing rear camera

필요한 것

  1. Blackberry Torch 9800 Replacing rear camera, Replacing rear camera: 1 단계, 이미지 1/2 Blackberry Torch 9800 Replacing rear camera, Replacing rear camera: 1 단계, 이미지 2/2
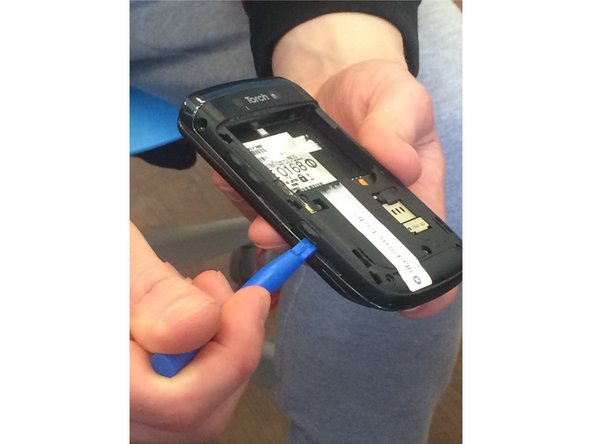
    • Remove the back cover and the battery.

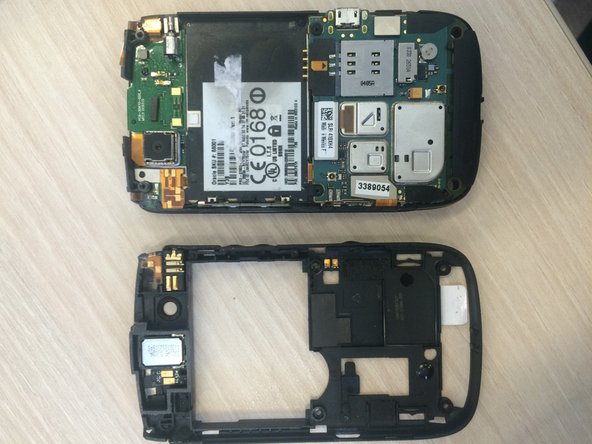
    • Remove the four exposed screws using a T7 screwdriver.

    • Warning: Removing the top right screw (with the blue cover) will void the warranty.

  2. Blackberry Torch 9800 Replacing rear camera: 2 단계, 이미지 1/2 Blackberry Torch 9800 Replacing rear camera: 2 단계, 이미지 2/2
    • Remove the side trim using the plastic opening tool.

    • When loose, push the top backwards and the bottom forwards to remove.

  3. Blackberry Torch 9800 Replacing rear camera: 3 단계, 이미지 1/3 Blackberry Torch 9800 Replacing rear camera: 3 단계, 이미지 2/3 Blackberry Torch 9800 Replacing rear camera: 3 단계, 이미지 3/3
    • Two new screws have been exposed near the top of the back.

    • Remove the two screws using the T7 screwdriver.

    • Remove the back panel using the plastic opening tool.

  4. Blackberry Torch 9800 Replacing rear camera: 4 단계, 이미지 1/2 Blackberry Torch 9800 Replacing rear camera: 4 단계, 이미지 2/2
    • Carefully use flathead screwdriver to free camera sensor.

    • Wiggle on the right and left sides, not the top and bottom sides.

  5. Blackberry Torch 9800 Replacing rear camera: 5 단계, 이미지 1/1
    • To install the new camera sensor, place in slot. Reassemble phone by doing steps 1-3 in reverse order.

결론

To reassemble your device, follow these instructions in reverse order.

다른 한 분이 해당 안내서를 완성하였습니다.

0delete

회원 가입일: 02/16/16

183 평판

안내서 1개 작성함

Ohio State, Team 1-5, Garvin Spring 2016 Ohio State, Team 1-5, Garvin Spring 2016 회원

OSU-GARVIN-S16S1G5

3 회원들

안내서 3개 작성하였습니다

댓글 0개

댓글 쓰기

조회 통계:

24 시간 전: 0

7일 전: 2

30일 전: 9

전체 시간: 274