주요 콘텐츠로 건너뛰기

Blu Studio 5.5 S Rear Facing Camera Replacement

필요한 것

  1. Blu Studio 5.5 S Rear Facing Camera Replacement, Back Casing: 1 단계, 이미지 1/1
    • In order to remove the back case, start by flipping the phone to the back side and look at it from the top.

  2. Blu Studio 5.5 S Rear Facing Camera Replacement, Applying Pressure: 2 단계, 이미지 1/3 Blu Studio 5.5 S Rear Facing Camera Replacement, Applying Pressure: 2 단계, 이미지 2/3 Blu Studio 5.5 S Rear Facing Camera Replacement, Applying Pressure: 2 단계, 이미지 3/3
    • Place your finger in the small notch on the left side of the charging port (facing from the back).

    • Once your finger is in the notch, pull the back case towards yourself to remove it.

  3. Blu Studio 5.5 S Rear Facing Camera Replacement, Battery: 3 단계, 이미지 1/3 Blu Studio 5.5 S Rear Facing Camera Replacement, Battery: 3 단계, 이미지 2/3 Blu Studio 5.5 S Rear Facing Camera Replacement, Battery: 3 단계, 이미지 3/3
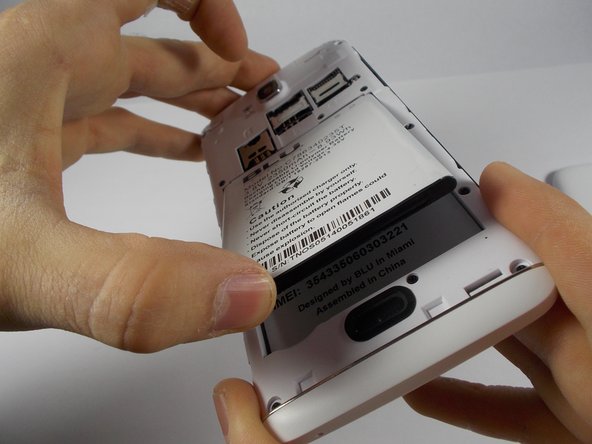
    • Once the back case is removed, locate the battery. It is the large brick embedded in the phone. It has BLU Products, a caution statement, and a barcode on it.

    • Insert your finger into the notch near the lower left of the battery, apply pressure and lift up.

  4. Blu Studio 5.5 S Rear Facing Camera Replacement, Midframe: 4 단계, 이미지 1/3 Blu Studio 5.5 S Rear Facing Camera Replacement, Midframe: 4 단계, 이미지 2/3 Blu Studio 5.5 S Rear Facing Camera Replacement, Midframe: 4 단계, 이미지 3/3
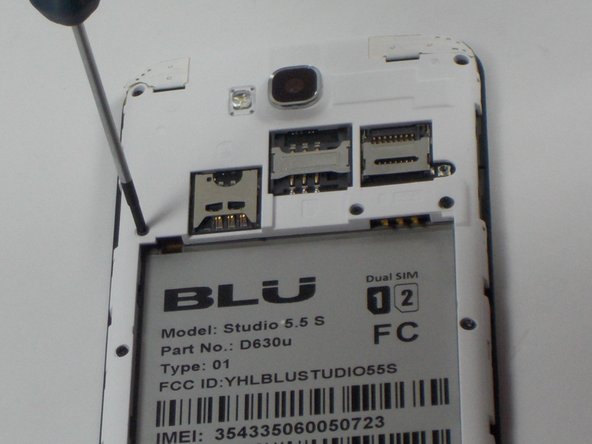
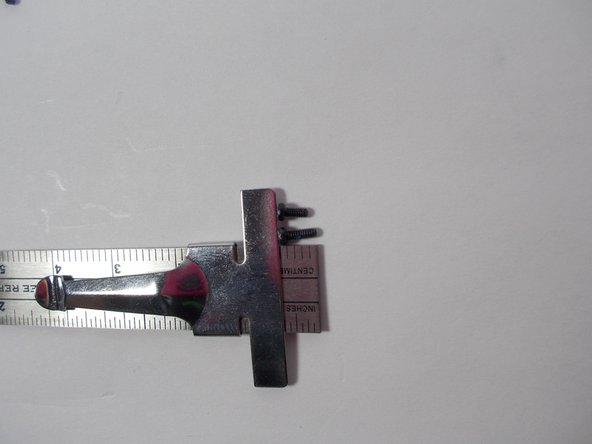
    • The speaker is located behind the inner back case. Using a Phillips #0 screwdriver, unscrew the 10, 7mm screws.

    • Using the Phillips #00 screwdriver, unscrew the two, 10mm screws at the bottom.

  5. Blu Studio 5.5 S Rear Facing Camera Replacement, Aesthetic Bottom Case: 5 단계, 이미지 1/1
    • Apply pressure and pop off the bottom aesthetic case, being careful not to break it.

  6. Blu Studio 5.5 S Rear Facing Camera Replacement: 6 단계, 이미지 1/3 Blu Studio 5.5 S Rear Facing Camera Replacement: 6 단계, 이미지 2/3 Blu Studio 5.5 S Rear Facing Camera Replacement: 6 단계, 이미지 3/3
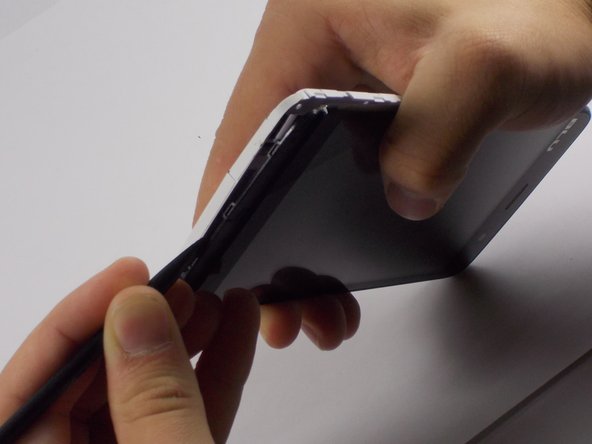
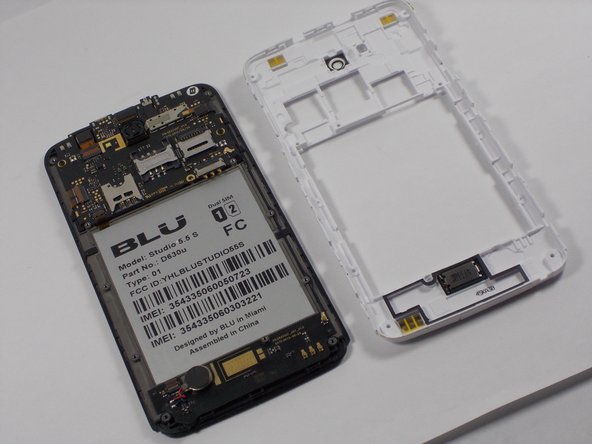
    • Use the Spudger to pop the inner back casing off. Do this by lightly raising the side of the battery housing, then sliding the Spudger around the case.

    • Pick up the inner back case and flip it over.

  7. Blu Studio 5.5 S Rear Facing Camera Replacement, Back Camera.: 7 단계, 이미지 1/3 Blu Studio 5.5 S Rear Facing Camera Replacement, Back Camera.: 7 단계, 이미지 2/3 Blu Studio 5.5 S Rear Facing Camera Replacement, Back Camera.: 7 단계, 이미지 3/3
    이 단계에 사용된 도구:
    Tweezers
    $4.99
    구매
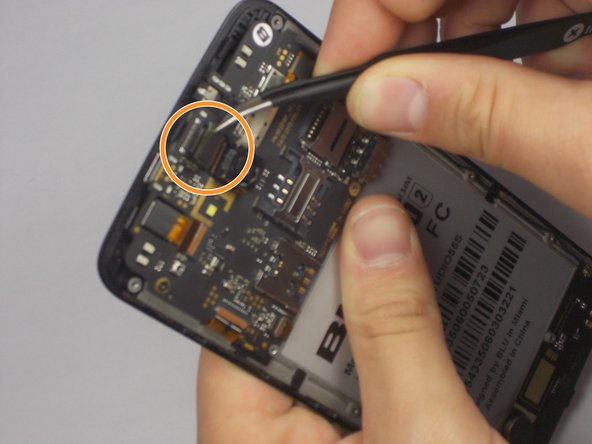
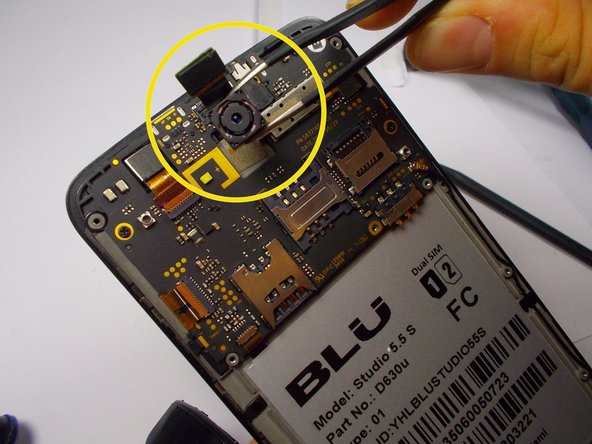
    • The rear camera is located in the center of the motherboard . It is connected by a ribbon wire / prong system.

    • Use tweezers to gently pop off the prong system, by pulling upwards on the black cap piece connected to the motherboard from the ribbon wire.

    • Use the Tweezers to pull the camera out of the housing.

    • When removing the back camera be careful not to scratch the lens, unless you are throwing it out.

결론

To reassemble your device, follow these instructions in reverse order.

다른 한 분이 해당 안내서를 완성하였습니다.

Cody Dyl

회원 가입일: 10/27/14

804 평판

안내서 5개 작성하였습니다

UMass Dartmouth, Team 4-8, Miles Fall 2014 UMass Dartmouth, Team 4-8, Miles Fall 2014 회원

UMASSD-MILES-F14S4G8

2 회원들

안내서 6개 작성하였습니다

댓글 0개

댓글 쓰기

조회 통계:

24 시간 전: 0

7일 전: 2

30일 전: 10

전체 시간: 1,484