주요 콘텐츠로 건너뛰기

Boombotix Boombot Mini Speaker Replacement

필요한 것

  1. Boombotix Boombot Mini Speaker Replacement, Speaker: 1 단계, 이미지 1/3 Boombotix Boombot Mini Speaker Replacement, Speaker: 1 단계, 이미지 2/3 Boombotix Boombot Mini Speaker Replacement, Speaker: 1 단계, 이미지 3/3
    • Twist the front panel of the speaker to the left.

    • Do not try to pry or pop off the front panel.

  2. Boombotix Boombot Mini Speaker Replacement: 2 단계, 이미지 1/3 Boombotix Boombot Mini Speaker Replacement: 2 단계, 이미지 2/3 Boombotix Boombot Mini Speaker Replacement: 2 단계, 이미지 3/3
    • Take out the four screws, then remove the panel that contains the speaker.

  3. Boombotix Boombot Mini Speaker Replacement: 3 단계, 이미지 1/3 Boombotix Boombot Mini Speaker Replacement: 3 단계, 이미지 2/3 Boombotix Boombot Mini Speaker Replacement: 3 단계, 이미지 3/3
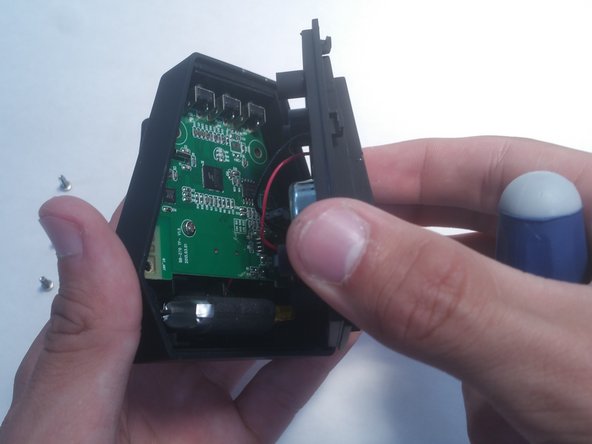
    • Take the speaker off of the base.

    • Expose the motherboard and place the speaker next to it.

    • Be careful not to tangle or damage the wires connecting the speaker.

    • This panel will be harder to get off. Use something small such as a card to creat a lip for leverage.

  4. Boombotix Boombot Mini Speaker Replacement: 4 단계, 이미지 1/1
    • Find the connection of the speaker by following the wires.

    • Do not damage the battery. Make sure not to use any metal object to poke around in the device because of possible shock.

  5. Boombotix Boombot Mini Speaker Replacement: 5 단계, 이미지 1/2 Boombotix Boombot Mini Speaker Replacement: 5 단계, 이미지 2/2
    • Now that you have found the wire connection to the motherboard, disconnect it.

    • Pull the wire straight out.

  6. Boombotix Boombot Mini Speaker Replacement: 6 단계, 이미지 1/1
    • Connect the white plug of the new speaker to the motherboard.

결론

To reassemble your device, follow these instructions in reverse order.

다른 한 분이 해당 안내서를 완성하였습니다.

Riley Grogg

회원 가입일: 05/31/16

116 평판

안내서 1개 작성함

댓글 0개

댓글 쓰기

조회 통계:

24 시간 전: 0

7일 전: 4

30일 전: 9

전체 시간: 1,415