소개
This guide shows the process of replacing a broken boot zipper.
Broken zippers are a common issue found on daily clothing, especially boots. Over time, zippers can wear out due to regular use. The teeth may become worn, or the slider may lose its grip, leading to malfunction. Sometimes, forcing the zipper when it’s stuck or overloading the boot can also cause the zipper to break, for zippers are designed to handle a certain amount of stress, and exceeding this can lead to damage. Broken zippers lead to the boots seen as unusable and open up the possibility for it to be thrown away.
Therefore, addressing these issues promptly can help extend the life of your boots and prevent the need for more extensive repairs or replacements.
With this guide, we will show how to replace a boot zipper, saving the overall boot and lessening the waste of thrown-out clothing.
필요한 것
-
-
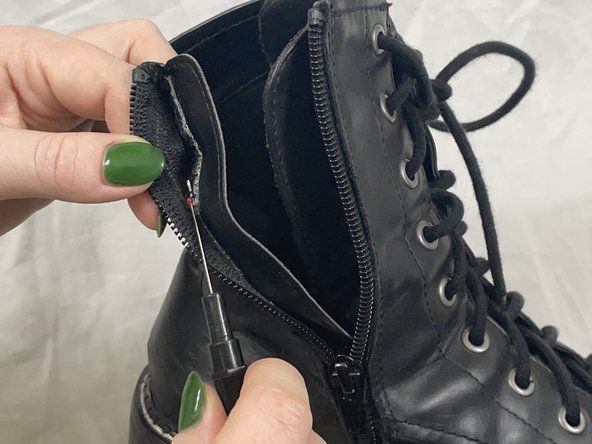
Using a seam ripper, carefully remove the stitching at the top of the boot on either side of the zipper.
 FixBot에 문의하기
-
-
-
Remove the stitching on the heel side of the zipper.
-
Work between the leather and the zipper by pulling apart the leather and zipper and inserting the seam ripper into the gap.
-
-
-
Remove the stitching on the toe side of the zipper.
-
Work between the leather and the zipper by pulling apart the leather and zipper and inserting the seam ripper into the gap.
-
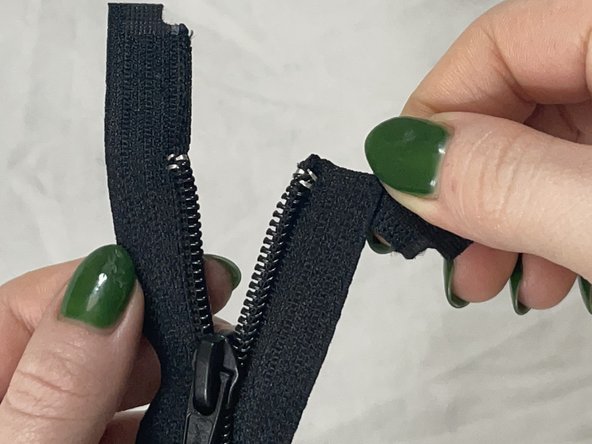
Set aside the original zipper.
-
-
-
-
Fold down the excess fabric at the top of the zipper twice to create a right angle.
-
-
-
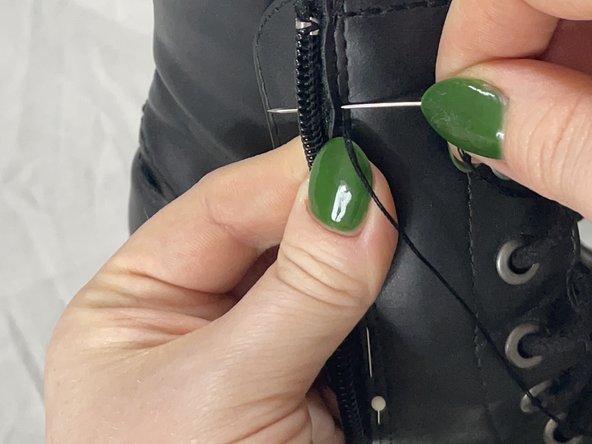
Using a backstitch, sew the zipper to the leather along the inner row of stitching.
-
-
-
Using a backstitch, sew the lining into place along the outer row of stitching.
-
-
-
Pin the lining and zipper underlay to the zipper and outer leather on the heel side.
-
-
-
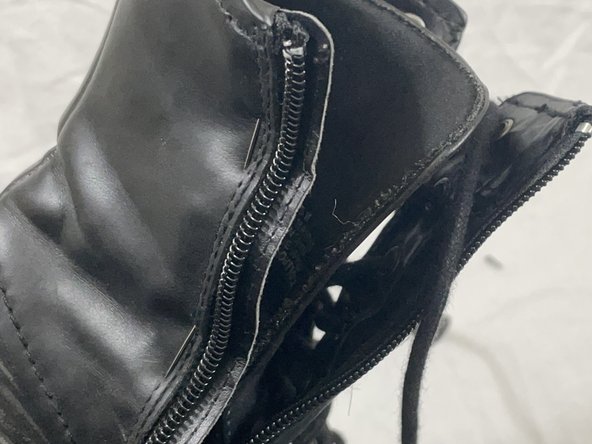
Using a backstitch, sew the lining and zipper underlay into place along the outer row of stitching.
-


팀

UC Davis, Team 4-2, Vidal-Chiesa Fall 2024 UC Davis, Team 4-2, Vidal-Chiesa Fall 2024 회원
UCD-VIDAL-CHIESA-F24S4G2
3 회원들
안내서 2개를 작성함