주요 콘텐츠로 건너뛰기

Bose SoundTouch Portable Subwoofer Replacement

필요한 것

  1. Bose SoundTouch Portable Subwoofer Replacement, Speaker Battery: 1 단계, 이미지 1/1
    • Remove the two T-10 machine screws at the bottom of the device.

  2. Bose SoundTouch Portable Subwoofer Replacement: 2 단계, 이미지 1/1
    • Turn the device around.

    • From the top, lightly push down the back cover to release it.

    • Lift the bottom of the cover and pull it up.

  3. Bose SoundTouch Portable Subwoofer Replacement: 3 단계, 이미지 1/1
    • Remove the two T-10 machine screws, then pull the battery straight out.

  4. Bose SoundTouch Portable Subwoofer Replacement, Grille: 4 단계, 이미지 1/1
    • Remove the two screws holding the speaker grille in place.

  5. Bose SoundTouch Portable Subwoofer Replacement: 5 단계, 이미지 1/1
    • Grip the sides of the device and push the speaker grille down and out.

  6. Bose SoundTouch Portable Subwoofer Replacement: 6 단계, 이미지 1/1
    • Gently release the ribbon from its connector and remove the grille.

  7. Bose SoundTouch Portable Subwoofer Replacement, Metal Trim: 7 단계, 이미지 1/1
    • Remove the two screws using a torx screwdriver.

  8. Bose SoundTouch Portable Subwoofer Replacement: 8 단계, 이미지 1/1
    • With the bottom of the device facing you, pull down the trim pieces to remove from the device body.

  9. Bose SoundTouch Portable Subwoofer Replacement, Subwoofer: 9 단계, 이미지 1/2 Bose SoundTouch Portable Subwoofer Replacement, Subwoofer: 9 단계, 이미지 2/2
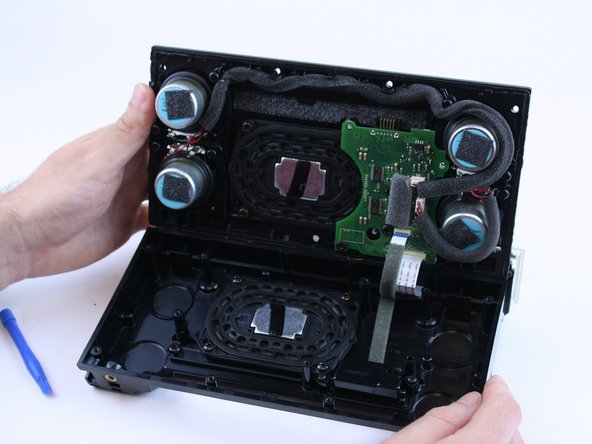
    • Separate the case that holds the subwoofer in place.

    • Be careful when doing this step because there are several connectors inside.

  10. Bose SoundTouch Portable Subwoofer Replacement: 10 단계, 이미지 1/1
    • Gently pull on the connectors at the circuit board to remove. Remove the screws from the circuit board and set the board aside.

  11. Bose SoundTouch Portable Subwoofer Replacement: 11 단계, 이미지 1/3 Bose SoundTouch Portable Subwoofer Replacement: 11 단계, 이미지 2/3 Bose SoundTouch Portable Subwoofer Replacement: 11 단계, 이미지 3/3
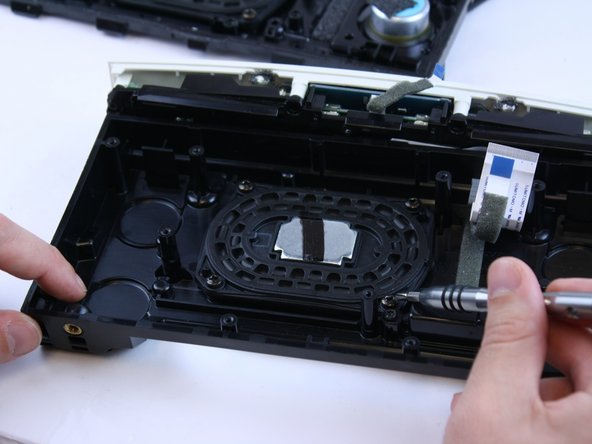
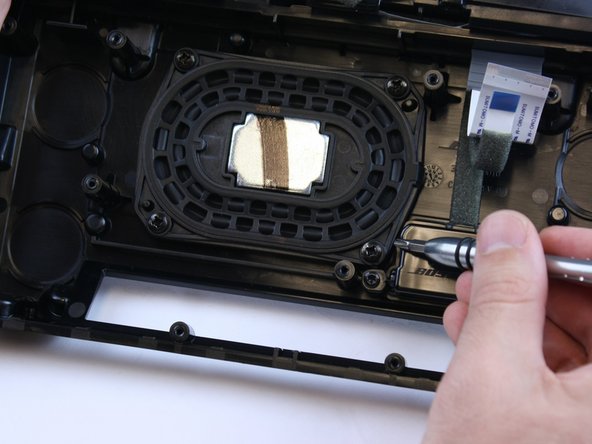
    • Remove the four screws from the subwoofer and lift it out of the casing.

결론

To reassemble your device, follow these instructions in reverse order.

Chelsea Martin

회원 가입일: 02/20/17

697 평판

안내서 6개 작성하였습니다

USF Tampa, Team S1-G3, Leahy Spring 2017 USF Tampa, Team S1-G3, Leahy Spring 2017 회원

USFT-LEAHY-S17S1G3

3 회원들

안내서 9개 작성하였습니다

댓글 2개

Thanks a lot for sharing your incredible ideas. It is an appreciated and pretty tip for all those music lovers. What a Fatal post for those who want to upgrade an existing subwoofer with a new one.

About more: www.outdoorsumo.com

Outdoor Sumo - 답글

Thanks a lot for sharing your incredible ideas. It is an appreciated and pretty tip for all those music lovers.

About more: ++https://compactcarsubwoofer.blogspot.com...

Outdoor Sumo - 답글

댓글 쓰기

조회 통계:

24 시간 전: 0

7일 전: 1

30일 전: 11

전체 시간: 1,398