주요 콘텐츠로 건너뛰기

Braven BRV-HD Speakers Replacement

필요한 것

  1. Braven BRV-HD Speakers Replacement, Battery: 1 단계, 이미지 1/2 Braven BRV-HD Speakers Replacement, Battery: 1 단계, 이미지 2/2
    • Placing the device on its back with the BRV-HD logo facing up, remove the eight 5mm hexagon 2.0 screws on the front panel.

    • Make sure the device is turned off before starting.

  2. Braven BRV-HD Speakers Replacement: 2 단계, 이미지 1/1
    • Lift the front panel off of the speaker using a plastic opening tool.

  3. Braven BRV-HD Speakers Replacement: 3 단계, 이미지 1/2 Braven BRV-HD Speakers Replacement: 3 단계, 이미지 2/2
    • Placing the device with the back panel facing up, remove the eight 5mm hexagon 2.0 screws from the back panel.

  4. Braven BRV-HD Speakers Replacement: 4 단계, 이미지 1/1
    • Lift the back panel off of the device with a plastic opening tool.

  5. Braven BRV-HD Speakers Replacement: 5 단계, 이미지 1/2 Braven BRV-HD Speakers Replacement: 5 단계, 이미지 2/2
    • Turning the device on its side, unscrew the four 15mm hexagon 2.0 screws on the charging port panel.

  6. Braven BRV-HD Speakers Replacement: 6 단계, 이미지 1/1
    • Remove the outer rubber flap and the plastic side port panel.

  7. Braven BRV-HD Speakers Replacement: 7 단계, 이미지 1/2 Braven BRV-HD Speakers Replacement: 7 단계, 이미지 2/2
    • Place the device on its front.

    • Loosen the four 12mm Phillips screws in the four corners with a J1 screwdriver.

    • Loosen the two 8mm Phillips screws in the center with a J1 screwdriver.

    • These screws are difficult to reach and will require a screwdriver extension piece.

  8. Braven BRV-HD Speakers Replacement: 8 단계, 이미지 1/1
    • Pull off the rubber sleeve surrounding the speaker using your hands.

    • There is adhesive binding the sleeve to the speaker and force will be required to remove the sleeve.

  9. Braven BRV-HD Speakers Replacement: 9 단계, 이미지 1/1
    • Lift the black covering off of the speaker using both hands.

    • Loose screws that you were unable to remove with the screwdriver will be removed when you lift off the black covering.

  10. Braven BRV-HD Speakers Replacement: 10 단계, 이미지 1/1
    • Remove the four 12mm Phillips screws securing the two battery brackets with a J1 screwdriver.

    • Move any wires aside to have better access to the screws securing the battery.

  11. Braven BRV-HD Speakers Replacement: 11 단계, 이미지 1/1
    • Remove the two brackets that hold down the battery using your hands.

  12. Braven BRV-HD Speakers Replacement: 12 단계, 이미지 1/2 Braven BRV-HD Speakers Replacement: 12 단계, 이미지 2/2
    • Use the plastic opening tool to lift up the battery.

    • Remove the battery using your hands.

    • The wires connecting the battery to the motherboard are still plugged in. Avoid pulling on the battery or these wires may break.

  13. Braven BRV-HD Speakers Replacement: 13 단계, 이미지 1/1
    • Disconnect the wire attaching the battery to the motherboard.

    • There is green glue on the wire ports preventing the wires from falling out. Peel and remove this glue as necessary.

    • Be careful when pulling out the wires from their ports. The metal stems attached to the ports can break. A spudger or tweezers may help.

  14. Braven BRV-HD Speakers Replacement, Speakers: 14 단계, 이미지 1/2 Braven BRV-HD Speakers Replacement, Speakers: 14 단계, 이미지 2/2
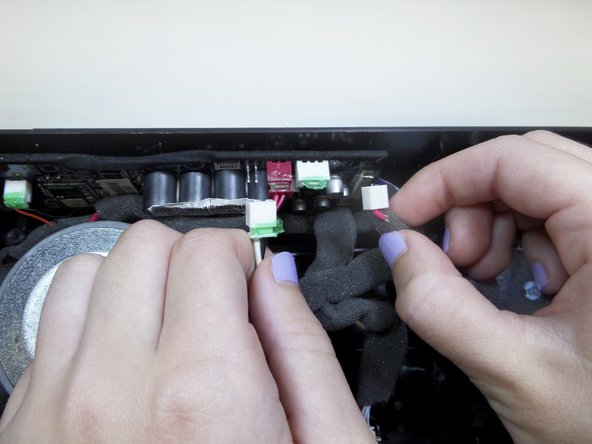
    • Locate the two wires that connect the right speaker to the motherboard.

    • Gently disconnect the wires from the motherboard.

  15. Braven BRV-HD Speakers Replacement: 15 단계, 이미지 1/2 Braven BRV-HD Speakers Replacement: 15 단계, 이미지 2/2
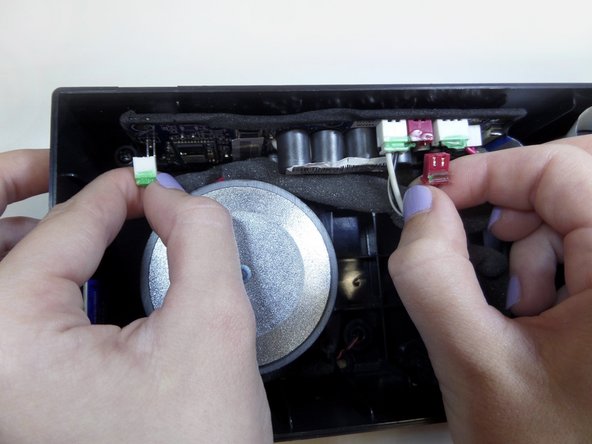
    • Locate the two wires that connect the left speaker to the motherboard.

    • Gently disconnect the wires from the motherboard.

  16. Braven BRV-HD Speakers Replacement: 16 단계, 이미지 1/2 Braven BRV-HD Speakers Replacement: 16 단계, 이미지 2/2
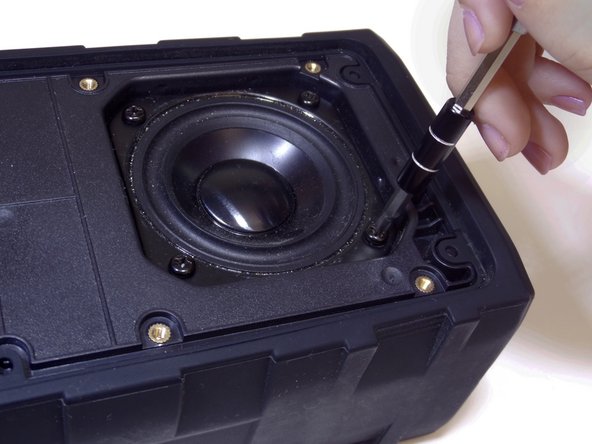
    • Position the device facing up and remove eight 10mm Phillips head screws using a J1 Phillips head screwdriver.

  17. Braven BRV-HD Speakers Replacement: 17 단계, 이미지 1/3 Braven BRV-HD Speakers Replacement: 17 단계, 이미지 2/3 Braven BRV-HD Speakers Replacement: 17 단계, 이미지 3/3
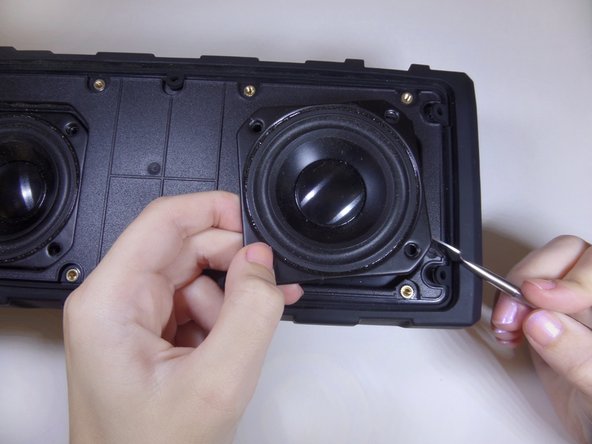
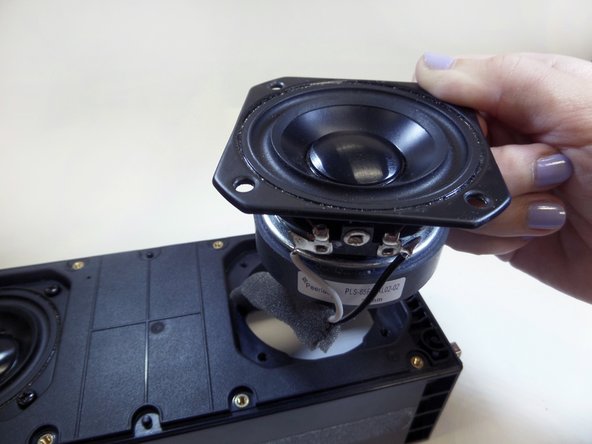
    • Lift the speaker out using the metal spudger and complete lifting by using your hands.

    • Remove the speakers with your hands and replace with new ones.

결론

To reassemble your device, follow these instructions in reverse order.

다른 2명이 해당 안내서를 완성하였습니다.

Matthew Nguyen

회원 가입일: 09/15/16

297 평판

안내서 2개 작성하였습니다

CSU Fullerton, Team 1-5, Bruce Fall 2016 CSU Fullerton, Team 1-5, Bruce Fall 2016 회원

CSUF-BRUCE-F16S1G5

5 회원들

안내서 5개 작성하였습니다

댓글 3개

Where can I find a replacement speaker?

dillon0987 - 답글

Peerless by Tymphany PLS-65F25AL01-02

Alex -

Where can I find or order a replacement speaker for BRV PRO

jvp_hunter28 - 답글

댓글 쓰기

조회 통계:

24 시간 전: 1

7일 전: 4

30일 전: 12

전체 시간: 1,662