주요 콘텐츠로 건너뛰기

Brother PT-1290 Face Plate Replacement

필요한 것

  1. Brother PT-1290  Face Plate Replacement, Turn over device to remove batteries.: 1 단계, 이미지 1/3 Brother PT-1290  Face Plate Replacement, Turn over device to remove batteries.: 1 단계, 이미지 2/3 Brother PT-1290  Face Plate Replacement, Turn over device to remove batteries.: 1 단계, 이미지 3/3
    • Turn the device to it's side toward the bottom of the keyboard. Then pop open the case and remove the batteries.

  2. Brother PT-1290  Face Plate Replacement, Back of device: 2 단계, 이미지 1/3 Brother PT-1290  Face Plate Replacement, Back of device: 2 단계, 이미지 2/3 Brother PT-1290  Face Plate Replacement, Back of device: 2 단계, 이미지 3/3
    • Remove back of device and set aside.

  3. Brother PT-1290  Face Plate Replacement, Remove screws: 3 단계, 이미지 1/3 Brother PT-1290  Face Plate Replacement, Remove screws: 3 단계, 이미지 2/3 Brother PT-1290  Face Plate Replacement, Remove screws: 3 단계, 이미지 3/3
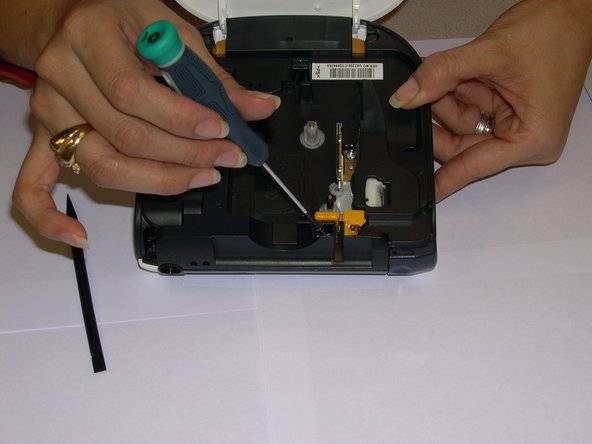
    • Remove all 1/4 inch screws(6 total) with a (+PH00) screwdriver. Open slowly not to damage the display data cable.

  4. Brother PT-1290  Face Plate Replacement, Remove flat panel: 4 단계, 이미지 1/3 Brother PT-1290  Face Plate Replacement, Remove flat panel: 4 단계, 이미지 2/3 Brother PT-1290  Face Plate Replacement, Remove flat panel: 4 단계, 이미지 3/3
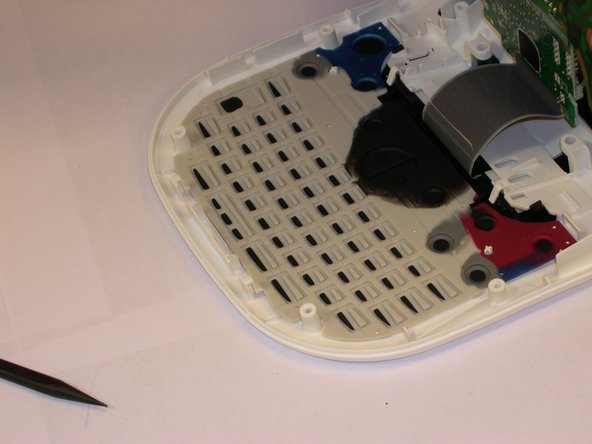
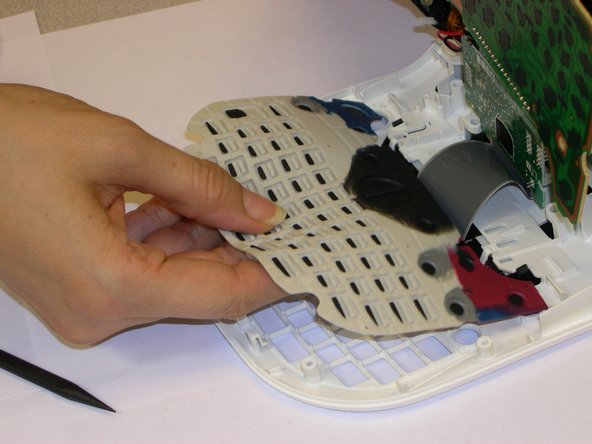
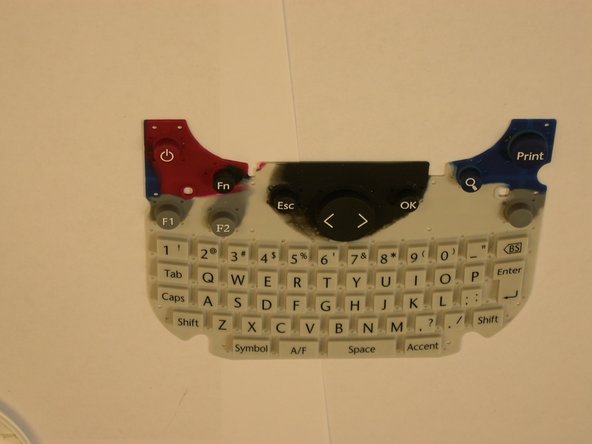
    • Use a plastic opening tool to remove the flat-panel membrane keyboard. Lift up and set aside.

  5. Brother PT-1290  Face Plate Replacement, Remove: 5 단계, 이미지 1/3 Brother PT-1290  Face Plate Replacement, Remove: 5 단계, 이미지 2/3 Brother PT-1290  Face Plate Replacement, Remove: 5 단계, 이미지 3/3
    • Use a spudger to aid in removing the keyboard.

    • Gently lift out while removing the LCD screen that is connected to the data cable and finishing removing.

  6. Brother PT-1290  Face Plate Replacement, Removing the LCD screen.: 6 단계, 이미지 1/3 Brother PT-1290  Face Plate Replacement, Removing the LCD screen.: 6 단계, 이미지 2/3 Brother PT-1290  Face Plate Replacement, Removing the LCD screen.: 6 단계, 이미지 3/3
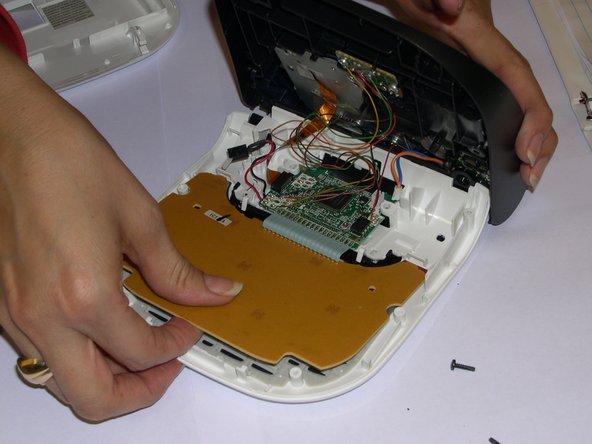
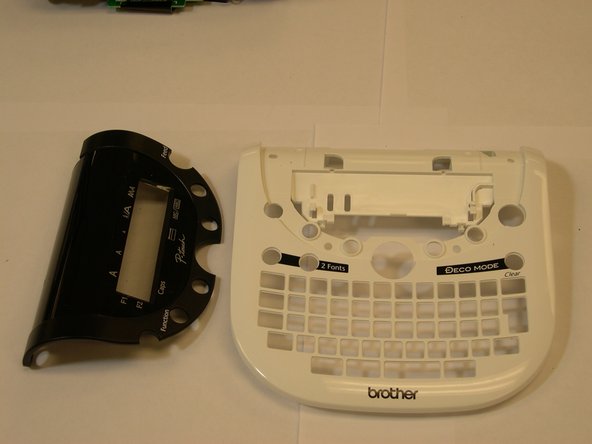
    • Now that you have removed your keyboard. Turn the device over carefully.

    • Pop of LCD black cover.

    • Use the spudger to gently press out the LCD screen.

  7. Brother PT-1290  Face Plate Replacement, Switching out faceplate.: 7 단계, 이미지 1/1
    • Change out old damaged face plate with your new face plate.

결론

To reassemble your device, follow these instructions in reverse order.

Lorraine Canez

회원 가입일: 10/25/14

318 평판

안내서 3개 작성하였습니다

Gateway, Team 1-4, Johnson Fall 2014 Gateway, Team 1-4, Johnson Fall 2014 회원

GCC-JOHNSON-F14S1G4

3 회원들

안내서 6개 작성하였습니다

댓글 0개

댓글 쓰기

조회 통계:

24 시간 전: 0

7일 전: 0

30일 전: 0

전체 시간: 151