주요 콘텐츠로 건너뛰기

Brother PT-D200 Faceplate Replacement

필요한 것

  1. Brother PT-D200 Faceplate Replacement, Battery: 1 단계, 이미지 1/1
    • Flip the device over and press down on the indication arrows located at the top center of the back cover and pull it open.

  2. Brother PT-D200 Faceplate Replacement: 2 단계, 이미지 1/1
    • Remove the six AAA batteries.

  3. Brother PT-D200 Faceplate Replacement, Back of Device: 3 단계, 이미지 1/1
    • Use the Helping Hand 1/4" screwdriver to unscrew the six 3/16" corner screws.

  4. Brother PT-D200 Faceplate Replacement: 4 단계, 이미지 1/1
    • Close the back cover and then flip the device over and separate the top half from the bottom half as shown.

    • Be gentle when lifting the top of the device, there is a ribbon cable attaching the two halves together.

  5. Brother PT-D200 Faceplate Replacement, Circuit Board Cables: 5 단계, 이미지 1/1
    • Gently pull out the ribbon cable from the circuit board.

    • The ribbon cable is very fragile.

  6. Brother PT-D200 Faceplate Replacement: 6 단계, 이미지 1/1
    • Remove two-pin plastic connector from the circuit board.

    • Gently pull the two-pin connector from the circuit board to avoid damaging the board.

  7. Brother PT-D200 Faceplate Replacement, Face Plate: 7 단계, 이미지 1/1
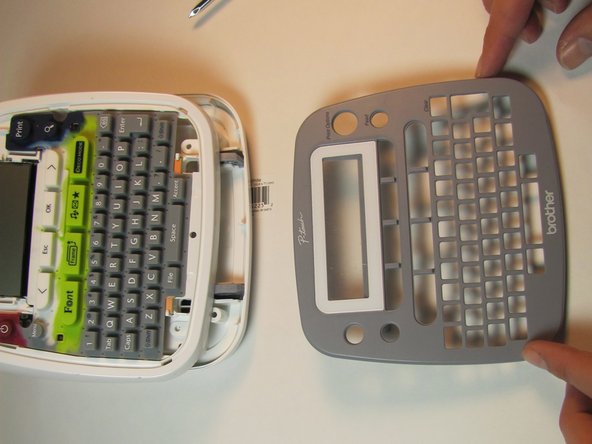
    • On the top portion of the device there are four grey clips locking the faceplate in place. The two top clips are circled in the image. The two others are located in the other corners of the device.

  8. Brother PT-D200 Faceplate Replacement: 8 단계, 이미지 1/2 Brother PT-D200 Faceplate Replacement: 8 단계, 이미지 2/2
    • Pull the clips inward two at a time, first the top then the bottom, to snap the face plate off.

결론

To reassemble your device, follow these instructions in reverse order.

다른 한 분이 해당 안내서를 완성하였습니다.

[deleted]

회원 가입일: 01/24/14

301 평판

안내서 3개 작성하였습니다

댓글 0개

댓글 쓰기

조회 통계:

24 시간 전: 0

7일 전: 1

30일 전: 3

전체 시간: 642