주요 콘텐츠로 건너뛰기

필요한 것

  1. 이 단계는 번역되지 않았습니다. 번역을 도와주십시오

    : 1 단계, 이미지 1/1
    • Place the machine on a solid surface.

    • Remove the 14mm Phillips #2 screw holding on the face cover.

  2. 이 단계는 번역되지 않았습니다. 번역을 도와주십시오

    : 2 단계, 이미지 1/1
    • Remove the two 14mm Phillips #2 screws and two 22mm Phillips #2 screws that secure the rear casing.

  3. 이 단계는 번역되지 않았습니다. 번역을 도와주십시오

    : 3 단계, 이미지 1/1
    • Lay the machine on its side.

    • Remove the four 10mm Phillips #2 screws that hold the bottom panel in place.

    • The feet will come off with the screws.

  4. 이 단계는 번역되지 않았습니다. 번역을 도와주십시오

    : 4 단계, 이미지 1/1
    • Remove the bottom panel.

  5. 이 단계는 번역되지 않았습니다. 번역을 도와주십시오

    : 5 단계, 이미지 1/1
    • Place the machine upright.

    • Remove the rear casing.

    • You may have to wiggle the panel and pull at the same time.

  6. 이 단계는 번역되지 않았습니다. 번역을 도와주십시오

    : 6 단계, 이미지 1/1
    • Using scissors, clip the two zip ties securing the lightbulb wire.

  7. 이 단계는 번역되지 않았습니다. 번역을 도와주십시오

    : 7 단계, 이미지 1/1
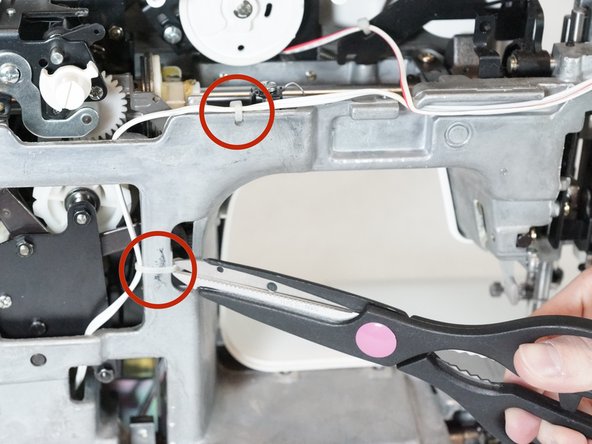
    • Place the machine on its side, with access to the bottom.

    • Gently pull out the white wire connecting the bulb to the machine.

  8. 이 단계는 번역되지 않았습니다. 번역을 도와주십시오

    : 8 단계, 이미지 1/1
    • Move the wire out from under the plastic hook.

  9. 이 단계는 번역되지 않았습니다. 번역을 도와주십시오

    : 9 단계, 이미지 1/1
    • Place the machine upright.

    • Using the flathead screwdriver, remove the 5mm Flathead screw holding on the lightbulb bracket.

  10. 이 단계는 번역되지 않았습니다. 번역을 도와주십시오

    : 10 단계, 이미지 1/1
    • Remove the lightbulb assembly.

결승점

다른 한 분이 해당 안내서를 완성하였습니다.

Kevin Bickers

회원 가입일: 02/05/14

673 평판

안내서 4개 작성하였습니다

Cal Poly, Team 2-12, Amido Winter 2014 Cal Poly, Team 2-12, Amido Winter 2014 회원

CPSU-AMIDO-W14S2G12

4 회원들

안내서 12개 작성하였습니다

댓글 0개

댓글 쓰기

조회 통계:

24 시간 전: 0

7일 전: 2

30일 전: 23

전체 시간: 3,087