소개
If your CHI Spin N Curl Rotating Curler(model CA2288A) is not spinning correctly or if the buttons keep getting stuck, use this guide to replace the directional buttons.
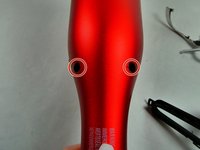
The buttons that are being replaced are supposed to spin the chamber when pressed, so that the hair is able to go inside of the chamber and be spun. If the buttons are stuck, the curler could bring no hair inside or could get stuck with your hair inside of the chamber.
Before using this guide, be sure to inspect the buttons for any debris around the buttons. You can use isopropyl alcohol on a cotton swab to clean any debris found.
Before beginning this repair, be sure that your curler is unplugged from the power source and it has cooled off if it has been used recently.
필요한 것
-
-
-
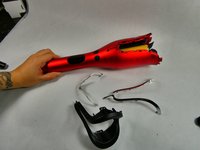
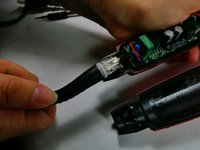
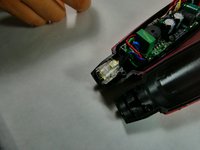
After the motherboard is removed, use the metal spudger to push and remove the directional buttons, and wipe underneath with a slightly damp alcohol cotton pad.
-


To reassemble your device, follow these instructions in reverse order.
다른 한 분이 해당 안내서를 완성하였습니다.

팀

UMass Dartmouth, Team 2-7, Petersen Fall 2022 UMass Dartmouth, Team 2-7, Petersen Fall 2022 회원
UMASSD-PETERSEN-F22S2G7
3 회원들
안내서 6개를 작성함