소개
Canary is not so easy to disassemble. But fiddle with the rubber foot until it pops off, and you're on your way...
필요한 것
-
-
The key to cracking open Canary is in the base. First pop off the rubber foot, and remove four screws.
-
Canary uses multiple screw types. If you ever hope to get it back together, consider a screw management system (here plastic bags for each section of the disassembly).
-
Once you get the base off, you'll need to peel off the front plate (held on with double sticky tape).
-
-
-
The base does not do all that much. It holds Ethernet, audio jack, and USB power plugs, along with a steel plate for heft.
-
Note the attention to detail: there's a second PCB board for no apparent purpose other than making the audio jack line up with the USB jack. That's obsession!
-
The little chimney is, in fact, a chimney. The idea is that hot air from the electronics rises, drawing room air. This is an older approach (see grated US patent http://patents.justia.com/patent/6347747 ).
-
-
-
-
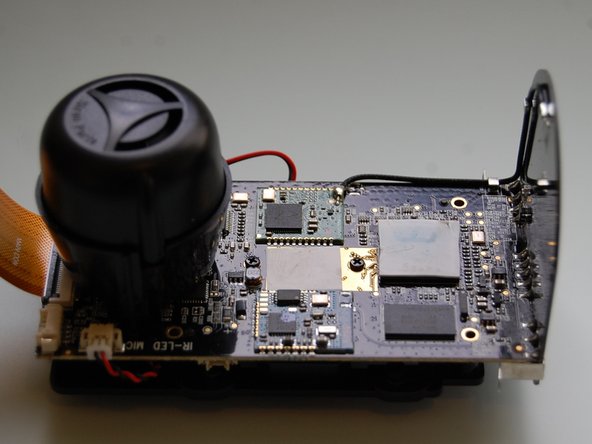
The inside is dominated by a aluminum plate with dimples for the Ambarella A5S CPU and the back of the image sensor. The heat sink presses against the outer case, through a squishy thermal interface material (TIM).
-
The huge round thing is a buzzer. The round PCB board hosts the 2.4Ghz WiFi and bluetooth antennas (there is no 5Ghz).
-
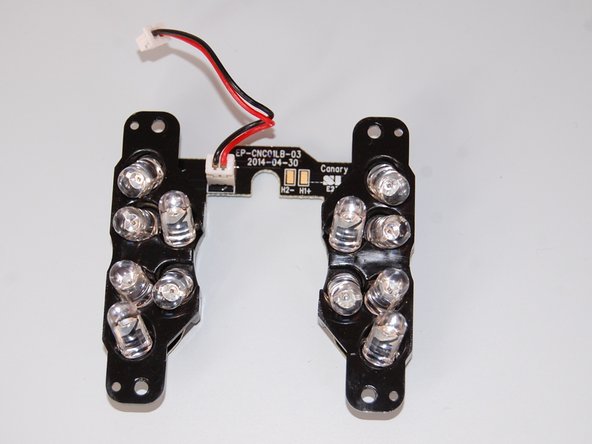
The infrared LED board sports a plastic frame to aim each LED separately.
-
-
-
Canary achieves its flat lens front with an extra sheet of glass that's not optically active. Buried inside is a conventionally shaped M12 security lens.
-
A switchable IR blocking filter is included for day/night mode. This blocks IR light during the day, but switches to be transparent at night.
-
The lens holder is unremarkable. Components are placed within the light chamber to allow the back to support the heat sink.
-
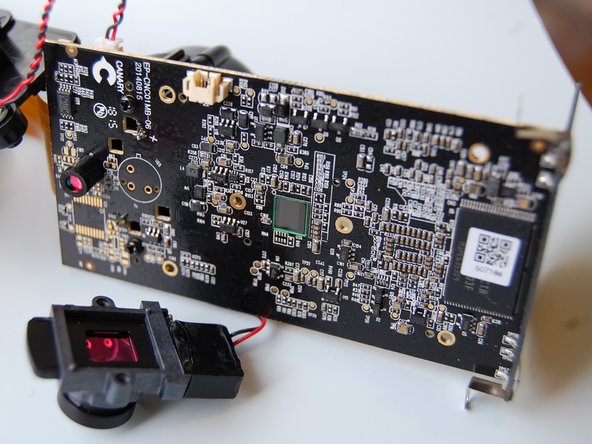
Note the empty holes for... some sort of sensor, not stuffed. Maybe air quality?
-
That's it. I hope you've enjoyed this tour into the insides of Canary.
-


댓글 3개
Could this act as a siren replacement?
Would like to know WiFi module model? Artheros?
Chihwei Lu - 답글