소개
The DM-100 is still the go-to microphone for all Legria / Vixia camcorders. This basically includes all Canon camcorders starting with "HF". The mic has a high price point of about 190$, and has a design flaw that will render it unusable after only a couple of years of use.
Symptoms: The microphone produces a rattling noise when the camera is being moved, basically rendering it useless for all other than stationary shots. This guide will give a quick fix to the problem for less than a dollar.
필요한 것
-
-
You access the internals by removing the grill in the front, which is held in place by a small amount of adhesive.
-
Use a set of tweezers (or a pointy metallic object, I used a tiny screwdriver) and gently pull in a circular fashion not to destroy the metal girder.
-
-
-
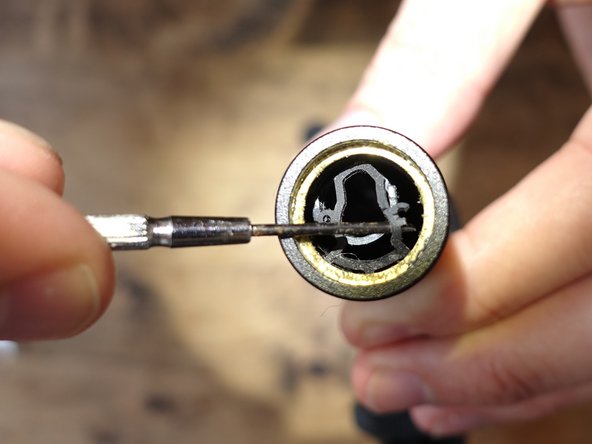
Canon has used an elastic band for vibration reduction of the directional "sound pipe" (seen as a circle behind the elastic band).
-
The pipe visible behind the elastic is supposed to be mounted toe the inner wall with the two marked circular joints.
-
These incredibly weak joints are bound to break as the rubber loses its elasticity.
-
-
-
Rubber band is irreparable and needs to go. I scratched it out using a small, sharp screwdriver.
-
-
-
-
The culprit of the rattling noise is now apparent. A plastic cylinder stretches through the whole of the microphone, enabling the microphones forward focused / directional sound.
-
When the rubber band breaks because of the bad joints, this thing hits the inner side of the cylinder.
-
-
-
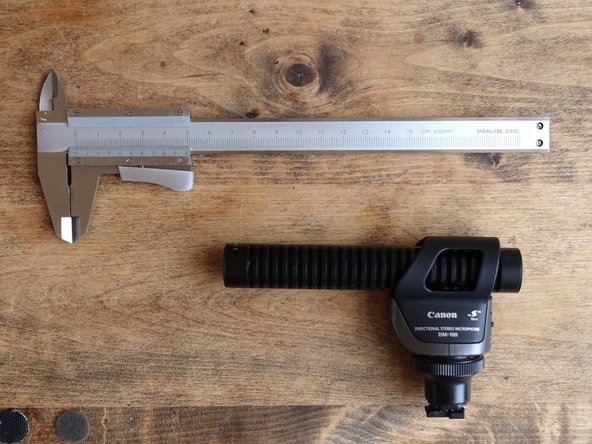
I measured the internal diameter, and found that there in total was a void of about 2mm in between the tube and the mic cylinder.
-
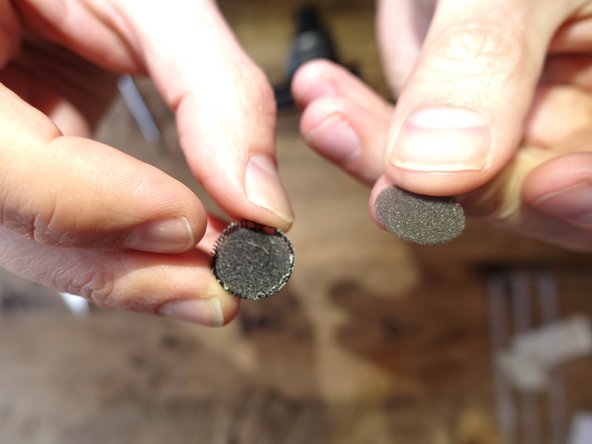
After some searching, I found a 2mm thick foam sheet for about 50 cents at a hobbyist shop.
-
Use this to cut a small sheet of depth of about 2 cm and length matching the inner circumference.
-
-
-
Add a thin layer of glue to the yellow circle and reattach the grill and windstopper.
-
-
-
There! 190$ microphone fixed for less than a dollar.
-
The audio quality isn't affected at all.
-


The DM-100 is a good, but expensive microphone for all Canon camcorders. The internal suspension is broken by design, and will render the microphone unusable after 2-3 years of use.
This fix is a permanent fix to Canons poor design. Since the pipe is solid, and the foam is only reaching about 2cm into the pipe, audio quality is not affected at all.
다른 한 분이 해당 안내서를 완성하였습니다.

댓글 2개
Good work, good tutorial! Can you help me? I have DM-50. How to connect it to Mini Advanced Hot Shoe? Do you have an electric circuit DM-50?
raoul.luigend@gmail.com
Hi, Raoul. I’m not sure what you’re trying to accomplish on what sort of equipment. I don’t know the DM-50, but if you have a camera with the mini hot shoe like the Legria / Vixia, you just need to slide open the compartment on the top of the camera and insert the mic firmly into the hot shoe.