주요 콘텐츠로 건너뛰기

Canon EOS 60D Rear LCD screen protective plastic cover Replacement

필요한 것

  1. Canon EOS 60D Rear LCD screen protective plastic cover Replacement, Rear LCD Screen Dissasembly: 1 단계, 이미지 1/1
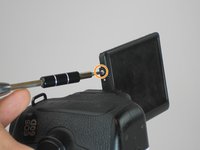
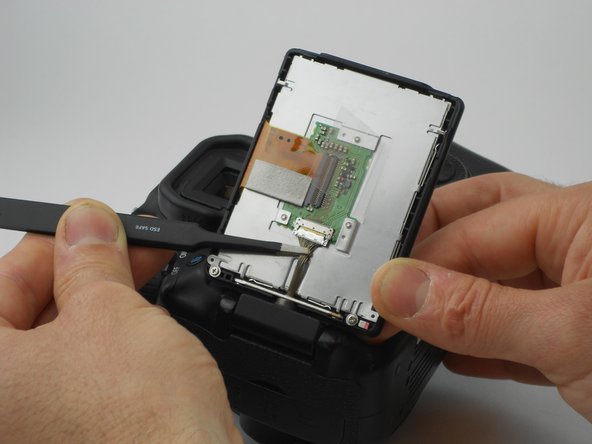
    • Take the LCD out of its place to expose the Phillips #PH00 screws.

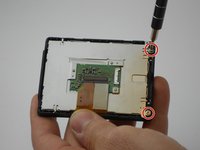
    • Remove the two 2.5 mm Phillips #PH00 black screws on both sides of the LCD screen.

    • Next remove the two 3 mm Phillips #PH00 black screws near both sides of the base where the screen swivels.

  2. Canon EOS 60D Rear LCD screen protective plastic cover Replacement: 2 단계, 이미지 1/1
    • Using a plastic opening tool, carefully pry off the back cover of the LCD.

  3. Canon EOS 60D Rear LCD screen protective plastic cover Replacement: 3 단계, 이미지 1/2 Canon EOS 60D Rear LCD screen protective plastic cover Replacement: 3 단계, 이미지 2/2
    • Remove the 3 mm Phillips #PH00 silver screw on the side of the screen.

    • Turn the screen to remove the second 3 mm Phillips #PH00 silver screw.

  4. Canon EOS 60D Rear LCD screen protective plastic cover Replacement: 4 단계, 이미지 1/1
    • Using the tweezers, carefully disconnect the rear connector by pulling it away from the screen.

  5. Canon EOS 60D Rear LCD screen protective plastic cover Replacement, Rear LCD Screen: 5 단계, 이미지 1/2 Canon EOS 60D Rear LCD screen protective plastic cover Replacement, Rear LCD Screen: 5 단계, 이미지 2/2
    • Remove the two 2.5 mm Phillips #PH00 silver screws using the PH00 screwdriver.

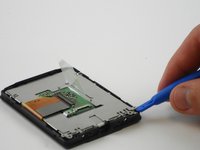
    • Using the plastic Spudger opening tool, carefully lift up on the medal tabs next to where the screws were located.

  6. Canon EOS 60D Rear LCD screen protective plastic cover Replacement: 6 단계, 이미지 1/1
    • Finally, remove the LCD screen by grabbing the clear plastic tab and lifting it carefully.

  7. Canon EOS 60D Rear LCD screen protective plastic cover Replacement, Rear LCD screen protective plastic cover: 7 단계, 이미지 1/1
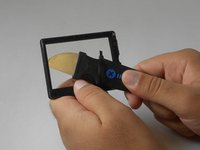
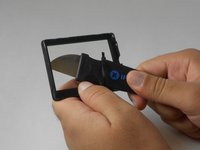
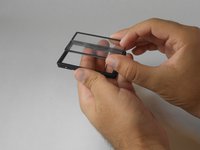
    • Slowly insert the tip of the Jimmy between the damaged plastic cover and the plastic frame, which holds it, to loosen the connection between them.

    • The Jimmy is sharp, so take special care when using it to avoid damaging the plastic frame or causing personal injury.

  8. Canon EOS 60D Rear LCD screen protective plastic cover Replacement: 8 단계, 이미지 1/2 Canon EOS 60D Rear LCD screen protective plastic cover Replacement: 8 단계, 이미지 2/2
    • Carefully slide the Jimmy through all corners of the plastic frame until it is detached from the plastic cover.

  9. Canon EOS 60D Rear LCD screen protective plastic cover Replacement: 9 단계, 이미지 1/2 Canon EOS 60D Rear LCD screen protective plastic cover Replacement: 9 단계, 이미지 2/2
    • Using your hand, lift the detached plastic cover off the plastic frame.

    • To place a new plastic cover, simply stick it to the frame in the appropriate position.

결론

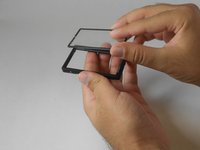
To reassemble your device, follow these instructions in reverse order.

다른 2명이 해당 안내서를 완성하였습니다.

Nazmi Bargouthi

회원 가입일: 08/26/15

591 평판

안내서 2개 작성하였습니다

USF Tampa, Team 16-6, Wollert Fall 2015 USF Tampa, Team 16-6, Wollert Fall 2015 회원

USFT-WOLLERT-F15S16G6

3 회원들

안내서 14개 작성하였습니다

댓글 2개

I followed all the steps and was able to dis- and reassamble everything in under 30min. When you reassamble make sure that in step 4 the metalplate of the housing is turned correctly and the connector is in the right position. Both could be turned 180° and mounted incorrectly. Other than that easy repair.

Thanks guys

Oliver Stietz - 답글

Hi there, can anyone send me some amazon link so I can order the correct glass? Thanks so far.

Claudio Dantas - 답글

댓글 쓰기

조회 통계:

24 시간 전: 0

7일 전: 3

30일 전: 11

전체 시간: 2,128