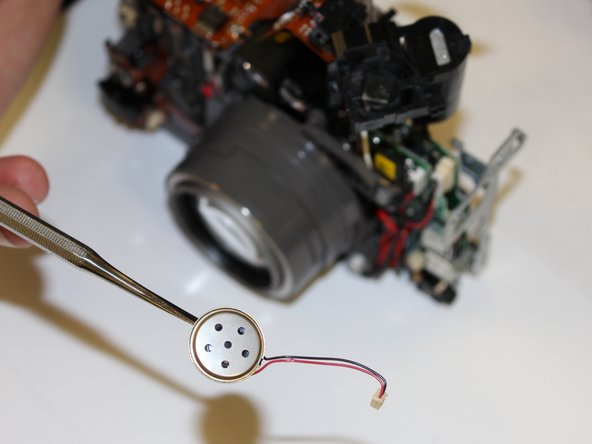
주요 콘텐츠로 건너뛰기

Canon PowerShot G3 Speaker Replacement

필요한 것

  1. Canon PowerShot G3 Speaker Replacement, Speaker: 1 단계, 이미지 1/1
    • Start to remove the screws around the camera: from the front, back, sides, and bottom.

  2. Canon PowerShot G3 Speaker Replacement: 2 단계, 이미지 1/1
    • Once the screws are removed, remove the back panel. The panel should be able to be removed by hand.

  3. Canon PowerShot G3 Speaker Replacement: 3 단계, 이미지 1/1
    • Next remove the front and right side panels (the left is attached to the front panel).

  4. Canon PowerShot G3 Speaker Replacement: 4 단계, 이미지 1/1
    • Finally, remove the top panel as shown.

  5. Canon PowerShot G3 Speaker Replacement: 5 단계, 이미지 1/2 Canon PowerShot G3 Speaker Replacement: 5 단계, 이미지 2/2
    • The front of the camera should now resemble the picture shown. (Image 1)

    • Remove the capacitor/speaker housing using your finger nail or other thin object to lift it up around the edges. (Image 2)

  6. Canon PowerShot G3 Speaker Replacement: 6 단계, 이미지 1/1
    • To remove the circuit ribbon (brown strip) pull it out of the plastic piece it is connected to.

  7. Canon PowerShot G3 Speaker Replacement: 7 단계, 이미지 1/1
    • You should now be able to see how the capacitor/speaker housing slides out of the frame.

  8. Canon PowerShot G3 Speaker Replacement: 8 단계, 이미지 1/2 Canon PowerShot G3 Speaker Replacement: 8 단계, 이미지 2/2
    • Disconnect the speaker wires from the camera, then use a small flat head screw driver to lift the speaker out of its housing.

    • Order a new speaker from the manufacturer or take it to a local electronics store to see if they have one.

결론

To reassemble your device, follow these instructions in reverse order.

Ryan Riales

회원 가입일: 10/22/15

201 평판

안내서 2개 작성하였습니다

University of Memphis, Team 3-2, Kim Fall 2015 University of Memphis, Team 3-2, Kim Fall 2015 회원

UM-KIM-F15S3G2

4 회원들

안내서 5개 작성하였습니다

댓글 0개

댓글 쓰기

조회 통계:

24 시간 전: 0

7일 전: 0

30일 전: 8

전체 시간: 244