주요 콘텐츠로 건너뛰기

Canon PowerShot S110 Display Replacement

필요한 것

  1. Canon PowerShot S110 Display  Replacement, Display: 1 단계, 이미지 1/2 Canon PowerShot S110 Display  Replacement, Display: 1 단계, 이미지 2/2
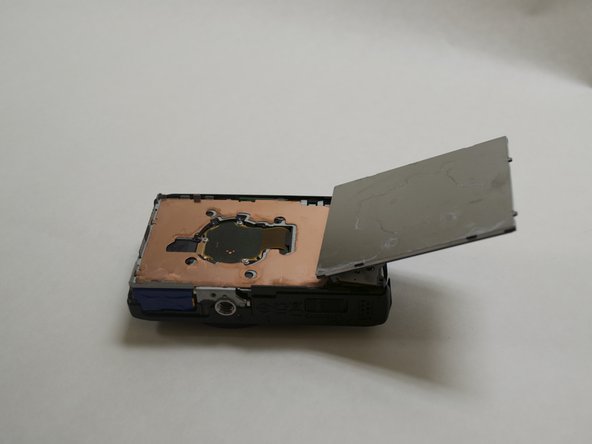
    • Slide open the battery cover on the bottom of the camera.

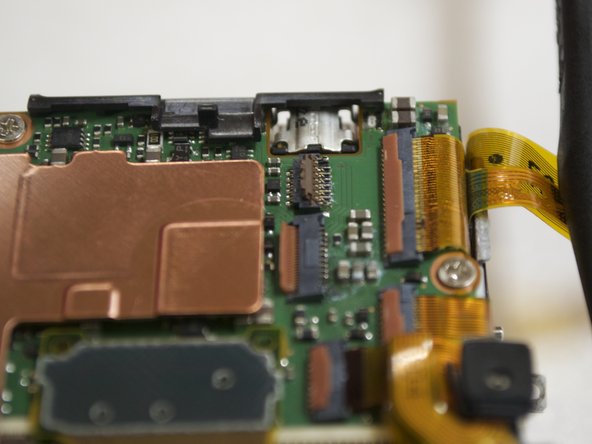
    • Eject the battery by pulling the red release latch.

    • Battery must be removed to avoid shorting any part of the camera

  2. Canon PowerShot S110 Display  Replacement: 2 단계, 이미지 1/3 Canon PowerShot S110 Display  Replacement: 2 단계, 이미지 2/3 Canon PowerShot S110 Display  Replacement: 2 단계, 이미지 3/3
    • Use a #0 Phillips screwdriver to remove the following screws:

    • the 2 screws on the side of the camera near the HDMI input panel,

    • the 2 screws on the opposite side of the camera,

    • and the 2 screws on the bottom of the camera near the tripod mounting hole.

  3. Canon PowerShot S110 Display  Replacement: 3 단계, 이미지 1/1
    • Once the screws are removed, use a spudger to carefully detach the cover.

  4. Canon PowerShot S110 Display  Replacement: 4 단계, 이미지 1/2 Canon PowerShot S110 Display  Replacement: 4 단계, 이미지 2/2
    • Before we are able to remove the display, we must take off the mounting bracket that holds it in place.

    • Remove the single screw indicated in red.

    • Detach the bracket and set it aside.

    • In preparation for the next step, remove the screw indicated in yellow.

  5. Canon PowerShot S110 Display  Replacement: 5 단계, 이미지 1/3 Canon PowerShot S110 Display  Replacement: 5 단계, 이미지 2/3 Canon PowerShot S110 Display  Replacement: 5 단계, 이미지 3/3
    • To detach the first logic ribbon:

    • Use a small, relatively soft pointed tool to slowly pull out the ribbon using the hole shown in the image.

    • Completely remove the ribbon.

    • The display is now partially disconnected from the back side of the camera.

  6. Canon PowerShot S110 Display  Replacement: 6 단계, 이미지 1/3 Canon PowerShot S110 Display  Replacement: 6 단계, 이미지 2/3 Canon PowerShot S110 Display  Replacement: 6 단계, 이미지 3/3
    • To remove the front camera case in order to access the remaining ribbons:

    • Slowly pry around the edges using a spudger.

    • A circular ring pad will detach. Set this aside.

    • You now have access to the logic ribbons on the front of the camera.

  7. Canon PowerShot S110 Display  Replacement: 7 단계, 이미지 1/3 Canon PowerShot S110 Display  Replacement: 7 단계, 이미지 2/3 Canon PowerShot S110 Display  Replacement: 7 단계, 이미지 3/3
    • Using the spudger, flip the small tab that is holding down the logic ribbon located at the top left corner.

    • Flip the larger tab that is holding down the logic ribbon located directly to the right of the previous ribbon.

    • Detach both ribbons from the circuit board.

  8. Canon PowerShot S110 Display  Replacement: 8 단계, 이미지 1/3 Canon PowerShot S110 Display  Replacement: 8 단계, 이미지 2/3 Canon PowerShot S110 Display  Replacement: 8 단계, 이미지 3/3
    • Flip the tab and remove the last ribbon.

    • This ribbon is revealed after Step 7.

    • The display can now be lifted off the camera and the logic ribbons attached in the front can slide out.

    • Prepare your replacement display and move on to reassembly.

결론

Reassembly

To reassemble your device, follow these instructions in reverse order.

다른 3명이 해당 안내서를 완성하였습니다.

akac92

회원 가입일: 07/14/15

298 평판

안내서 2개 작성하였습니다

UW Tacoma, Team 1-2, Liner SU 2015 UW Tacoma, Team 1-2, Liner SU 2015 회원

UWT-LINER-SU15S1G2

4 회원들

안내서 3개 작성하였습니다

댓글 10개

Oh My God, it works!!! Thanks for the great instructions, very clear and easy.

Thank you!!!

robertmadsen2000 - 답글

Caution, the re-assembly is much more challenging than the dear-down. Masking tape (to temporarily hold the screen and func. set dial assembly in place while attaching the ribbon cables), tooth picks (the ends fit nicely in the ribbon cable holes) and a small plastic putty knife (for raising cable hold-downs) nay come in handy. You will find that the camera face has a ribbon cable for the control ring. When reassembling, note that there are anchor nobs over which holes in the cables go - front side of camera. Reinserting the func set cable under the control ring after attaching the screen cables is difficult (tight fit). Try inserting tooth picks to make room. My new screen cost $30 from D H Cameras on eBay.

Dennis - 답글

댓글 쓰기

조회 통계:

24 시간 전: 0

7일 전: 0

30일 전: 17

전체 시간: 3,376