주요 콘텐츠로 건너뛰기

Canon PowerShot SD1000 Motherboard Replacement

필요한 것

  1. Canon PowerShot SD1000 Motherboard Replacement, Back Panel: 1 단계, 이미지 2개 중 1개 Canon PowerShot SD1000 Motherboard Replacement, Back Panel: 1 단계, 이미지 2개 중 2개
    • Remove the two 2.9 mm screws from the side panel closest to the camera lens.

  2. Canon PowerShot SD1000 Motherboard Replacement: 2 단계, 이미지 1개 중 1개
    • Remove the two 2.9 mm screws from the camera bottom panel.

  3. Canon PowerShot SD1000 Motherboard Replacement: 3 단계, 이미지 1개 중 1개
    • Remove the two 2.9 mm screws from the side panel farthest from the lens.

  4. Canon PowerShot SD1000 Motherboard Replacement: 4 단계, 이미지 1개 중 1개
    • Pull the back panel away from the camera body, starting at the end with the function buttons.

  5. Canon PowerShot SD1000 Motherboard Replacement: 5 단계, 이미지 1개 중 1개
    • Remove the small cover panel and the attached wrist strap mount.

  6. Canon PowerShot SD1000 Motherboard Replacement, Front Case: 6 단계, 이미지 1개 중 1개
    • Remove the front cover by gently pulling it away from the camera body.

  7. Canon PowerShot SD1000 Motherboard Replacement: 7 단계, 이미지 1개 중 1개
    • Place the front cover, back cover, and wrist strap mount in a safe place until you are ready for reassembly.

  8. Canon PowerShot SD1000 Motherboard Replacement, LCD Screen: 8 단계, 이미지 1개 중 1개
    • Remove the two 2.4 mm screws located at the top of the LCD panel.

  9. Canon PowerShot SD1000 Motherboard Replacement: 9 단계, 이미지 2개 중 1개 Canon PowerShot SD1000 Motherboard Replacement: 9 단계, 이미지 2개 중 2개
    • Pull up the metal frame surrounding the LCD screen starting at the side of the camera.

  10. Canon PowerShot SD1000 Motherboard Replacement: 10 단계, 이미지 1개 중 1개
    • Push the metal frame away from the metal tab using the spudger to detach the frame.

    • Rotate the metal frame upwards.

    • The metal framing should be attached by a metal tab towards the bottom of the camera, near the function buttons.

  11. Canon PowerShot SD1000 Motherboard Replacement: 11 단계, 이미지 2개 중 1개 Canon PowerShot SD1000 Motherboard Replacement: 11 단계, 이미지 2개 중 2개
    • Carefully lift the metal frame from the camera.

    • Remove the black LCD screen, leaving the thin lens pieces in place.

    • BE CAREFUL; both components are attached by an orange connector ribbon and cannot be removed yet.

  12. Canon PowerShot SD1000 Motherboard Replacement: 12 단계, 이미지 3개 중 1개 Canon PowerShot SD1000 Motherboard Replacement: 12 단계, 이미지 3개 중 2개 Canon PowerShot SD1000 Motherboard Replacement: 12 단계, 이미지 3개 중 3개
    이 단계에 사용된 도구:
    Tweezers
    $4.99
    • Carefully pull on the orange connector ribbon to disconnect the LCD screen.

    • The LCD screen can be pulled out of the frame before disconnecting its connector ribbon.

    • Tweezers are helpful to disconnect the ribbon.

  13. Canon PowerShot SD1000 Motherboard Replacement, Flash Unit: 13 단계, 이미지 2개 중 1개 Canon PowerShot SD1000 Motherboard Replacement, Flash Unit: 13 단계, 이미지 2개 중 2개
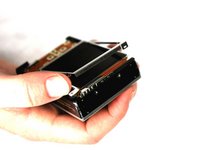
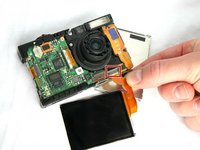
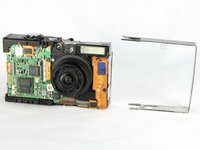
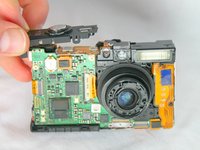
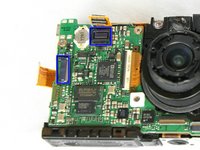
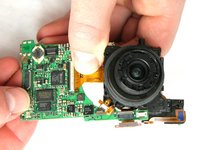
    • Slide the metal frame off of the camera on the side that is closest to the flash mechanism.

  14. Canon PowerShot SD1000 Motherboard Replacement: 14 단계, 이미지 1개 중 1개
    • Use a Phillips #00 screwdriver to remove the 2.4 mm screw that secures the flash assembly.

  15. Canon PowerShot SD1000 Motherboard Replacement: 15 단계, 이미지 1개 중 1개
    • Use the spudger to gently and carefully disconnect the flash assembly ribbon from the black connector lock.

  16. Canon PowerShot SD1000 Motherboard Replacement: 16 단계, 이미지 2개 중 1개 Canon PowerShot SD1000 Motherboard Replacement: 16 단계, 이미지 2개 중 2개
    • Pull the flash assembly forward out of the camera to remove it.

    • BE CAREFUL when handling the flash assembly. Touching the capacitor (the black cylinder attached to the flash assembly) could shock you.

  17. Canon PowerShot SD1000 Motherboard Replacement, Shutter Button: 17 단계, 이미지 2개 중 1개 Canon PowerShot SD1000 Motherboard Replacement, Shutter Button: 17 단계, 이미지 2개 중 2개
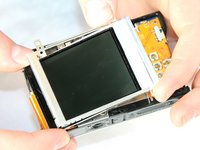
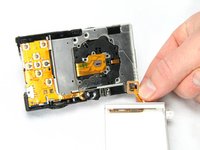
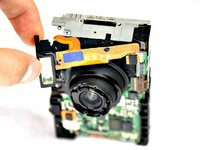
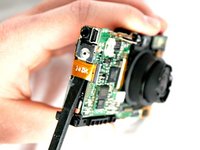
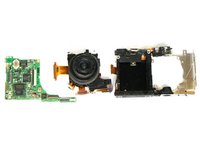
    • Using the spudger, take off the shutter button by prying the small tab on the front side of the camera.

  18. Canon PowerShot SD1000 Motherboard Replacement, Lens: 18 단계, 이미지 1개 중 1개
    • Remove the 2.90mm screw from the lens, near the motherboard.

  19. Canon PowerShot SD1000 Motherboard Replacement: 19 단계, 이미지 2개 중 1개 Canon PowerShot SD1000 Motherboard Replacement: 19 단계, 이미지 2개 중 2개
    • Using the spudger remove the shutter button by prying the small tab on the front side of the camera.

  20. Canon PowerShot SD1000 Motherboard Replacement: 20 단계, 이미지 2개 중 1개 Canon PowerShot SD1000 Motherboard Replacement: 20 단계, 이미지 2개 중 2개
    • With a spudger disconnect the orange connector ribbon as shown.

    • Disconnect the orange connector ribbon that is located under the now removed shutter button.

  21. Canon PowerShot SD1000 Motherboard Replacement: 21 단계, 이미지 1개 중 1개
    • Remove the two 2.90 mm screws from the motherboard.

  22. Canon PowerShot SD1000 Motherboard Replacement: 22 단계, 이미지 1개 중 1개
    이 단계에 사용된 도구:
    Tweezers
    $4.99
    • With Tweezers detach the bottom orange ribbon.

  23. Canon PowerShot SD1000 Motherboard Replacement: 23 단계, 이미지 1개 중 1개
    • Remove the screws shown. Start with the outside 6 (3-2.90mm & 3-2.40mm) screws on the metal frame. Then remove the 6 (2.40mm) screws on the back of the lens piece

  24. Canon PowerShot SD1000 Motherboard Replacement: 24 단계, 이미지 1개 중 1개
    • With spudger gently remove the Viewfinder Window that is directly above the lens.

  25. Canon PowerShot SD1000 Motherboard Replacement: 25 단계, 이미지 3개 중 1개 Canon PowerShot SD1000 Motherboard Replacement: 25 단계, 이미지 3개 중 2개 Canon PowerShot SD1000 Motherboard Replacement: 25 단계, 이미지 3개 중 3개
    • Detach the mother board with lens from body of camera.

    • Carefully remove the lens from the motherboard. Use tweezers to remove any of the 4 connecting ribbons from the lens.

    • Your lens has been removed from the motherboard and bottom framing.

  26. Canon PowerShot SD1000 Motherboard Replacement, Motherboard: 26 단계, 이미지 1개 중 1개
    • The motherboard (left) is now separated from the lens.

결론

To reassemble your device, follow these instructions in reverse order.

다른 2명이 해당 안내서를 완성하였습니다.

작성자

5다른 기여자 명과 함께

Phillip Phung

회원 가입일: 01/19/12

666 평판

안내서 9개를 작성함

Cal Poly, Team 8-18, Maness Winter 2012 Cal Poly, Team 8-18, Maness Winter 2012 회원

CPSU-MANESS-W12S8G18

4 회원들

안내서 12개를 작성함

1가이드 댓글

Which part is the CCD sensor?

yakksoho - 답글

댓글 쓰기

조회 통계:

지난 24시간: 1

지난 7일: 4

지난 30일: 38

전체 시간: 7,315