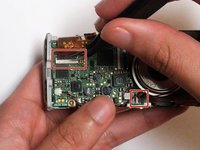
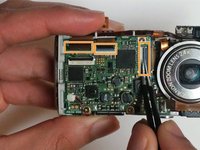
주요 콘텐츠로 건너뛰기

Canon PowerShot SD30 Motherboard Replacement

필요한 것

  1. Canon PowerShot SD30 Motherboard Replacement, Back Cover: 1 단계, 이미지 1/3 Canon PowerShot SD30 Motherboard Replacement, Back Cover: 1 단계, 이미지 2/3 Canon PowerShot SD30 Motherboard Replacement, Back Cover: 1 단계, 이미지 3/3
    • Remove the wrist strap and battery before removing the back cover.

    • Remove the 2mm screw from the back of the camera.

    • Remove two 2mm screws from the bottom of the camera.

    • Remove two 2mm screws the left side of camera.

  2. Canon PowerShot SD30 Motherboard Replacement: 2 단계, 이미지 1/1
    • Gently remove the back cover.

  3. Canon PowerShot SD30 Motherboard Replacement, Front Cover: 3 단계, 이미지 1/2 Canon PowerShot SD30 Motherboard Replacement, Front Cover: 3 단계, 이미지 2/2
    • Be sure to remove the wrist strap and battery before removing the cover.

    • Remove the two 2mm black screws that are located on the underside of the camera.

    • Remove the two 3mm silver screws from the right side of camera.

  4. Canon PowerShot SD30 Motherboard Replacement: 4 단계, 이미지 1/1
    • Gently remove the front cover.

  5. Canon PowerShot SD30 Motherboard Replacement, Motherboard: 5 단계, 이미지 1/2 Canon PowerShot SD30 Motherboard Replacement, Motherboard: 5 단계, 이미지 2/2
    • Unscrew the 3mm silver screw from the top of the camera.

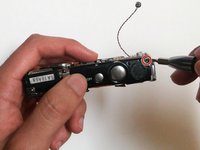
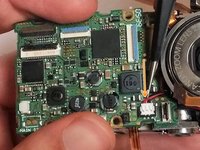
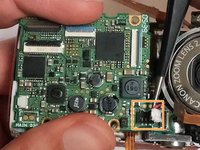
    • Gently remove the top button panel.

  6. Canon PowerShot SD30 Motherboard Replacement: 6 단계, 이미지 1/2 Canon PowerShot SD30 Motherboard Replacement: 6 단계, 이미지 2/2
    이 단계에 사용된 도구:
    Tweezers
    $4.99
    구매
    • Using the tweezers, carefully lift up the 2 folds where the ribbon connects to the motherboard.

    • Now, lift up the three remaining ribbon connectors to disconnect them.

  7. Canon PowerShot SD30 Motherboard Replacement: 7 단계, 이미지 1/1
    • Unscrew the three 3mm silver screws from the motherboard.

  8. Canon PowerShot SD30 Motherboard Replacement: 8 단계, 이미지 1/3 Canon PowerShot SD30 Motherboard Replacement: 8 단계, 이미지 2/3 Canon PowerShot SD30 Motherboard Replacement: 8 단계, 이미지 3/3
    • Gently pull the left wire out and disconnect it from the device.

    • Use the tweezers to pop the right set of wires out of the connector. Do this by positioning the tweezers under the connector and lifting up.

  9. Canon PowerShot SD30 Motherboard Replacement: 9 단계, 이미지 1/1
    • Remove the motherboard from the device.

    • The motherboard will have nothing connecting it to anything, so be sure to have it grasped.

결론

To reassemble your device, follow these instructions in reverse order.

다른 한 분이 해당 안내서를 완성하였습니다.

Ime Ekpo

회원 가입일: 09/21/18

479 평판

안내서 3개 작성하였습니다

댓글 0개

댓글 쓰기

조회 통계:

24 시간 전: 0

7일 전: 0

30일 전: 8

전체 시간: 180