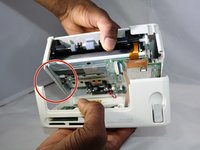
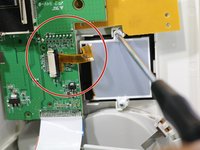
주요 콘텐츠로 건너뛰기

Canon Selphy CP720 Circuit Boards Replacement

필요한 것

  1. Canon Selphy CP720 Circuit Boards Replacement, Screen: 1 단계, 이미지 1/1
    • Remove the three 6mm Phillips #1 screws.

  2. Canon Selphy CP720 Circuit Boards Replacement: 2 단계, 이미지 1/2 Canon Selphy CP720 Circuit Boards Replacement: 2 단계, 이미지 2/2
    • Remove the four 8mm Phillips #1 screws, located in each corner of the device.

  3. Canon Selphy CP720 Circuit Boards Replacement: 3 단계, 이미지 1/1
    • Grasp one half of the device's shell in each hand, and pull them apart. They are connected, so don't separate them completely.

  4. Canon Selphy CP720 Circuit Boards Replacement: 4 단계, 이미지 1/2 Canon Selphy CP720 Circuit Boards Replacement: 4 단계, 이미지 2/2
    • Lift the side panel off to expose the inside of the printer.

  5. Canon Selphy CP720 Circuit Boards Replacement: 5 단계, 이미지 1/1
    • Remove the four 8mm Phillips #00 screws that hold the upper circuit board to the shell.

  6. Canon Selphy CP720 Circuit Boards Replacement: 6 단계, 이미지 1/1
    • Remove two 8mm Phillips #00 screws from the yellow board.

  7. Canon Selphy CP720 Circuit Boards Replacement: 7 단계, 이미지 1/1
    • Remove the two 8mm Phillips #00 screws from the screen.

    • Lift off the circuit board, yellow board, and screen.

  8. Canon Selphy CP720 Circuit Boards Replacement: 8 단계, 이미지 1/3 Canon Selphy CP720 Circuit Boards Replacement: 8 단계, 이미지 2/3 Canon Selphy CP720 Circuit Boards Replacement: 8 단계, 이미지 3/3
    • To separate the screen from the circuit board, grasp the data ribbon cable near the base of the black connector on the circuit board and pull parallel to the surface of the board, toward the screen.

  9. Canon Selphy CP720 Circuit Boards Replacement, Circuit Boards: 9 단계, 이미지 1/1
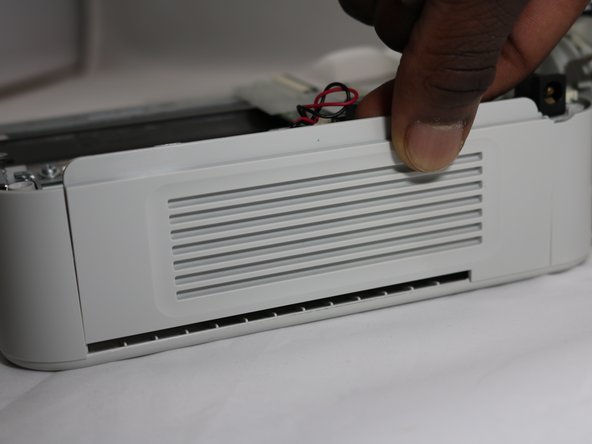
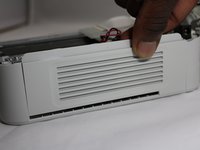
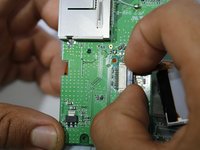
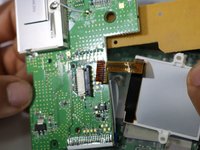
    • Turning to the lower half of the printer, remove the two 6mm Philips screws, and the 8mm Philips screw in the hole in the metal plate. Remove the metal plate.

  10. Canon Selphy CP720 Circuit Boards Replacement: 10 단계, 이미지 1/1
    • Remove the flanged Philips screw from the circuit board, located just under the large data ribbon connecting both boards.

  11. Canon Selphy CP720 Circuit Boards Replacement: 11 단계, 이미지 1/1
    • Locate the connector on the edge of the board near the first two screws that you removed.

    • To unplug the connector from its socket, grasp it by the white plastic connection, and pull out from the circuit board, away from the center.

  12. Canon Selphy CP720 Circuit Boards Replacement: 12 단계, 이미지 1/1
    • Locate a second connector further down the same edge of the board .

    • Grasp the white plastic connector by the sides and pull it out, smoothly and firmly.

  13. Canon Selphy CP720 Circuit Boards Replacement: 13 단계, 이미지 1/1
    • Locate the third connector hidden under the broad data ribbon.

    • Grab the ribbon cable by the body and pull it out.

  14. Canon Selphy CP720 Circuit Boards Replacement: 14 단계, 이미지 1/1
    • Lift the circuit board up off the lower assembly of the printer, exposing the wide, white data ribbon.

  15. Canon Selphy CP720 Circuit Boards Replacement: 15 단계, 이미지 1/2 Canon Selphy CP720 Circuit Boards Replacement: 15 단계, 이미지 2/2
    • Pull the ribbon connector out of its socket parallel to the circuit board. All of the circuit boards should now be free of the device.

결론

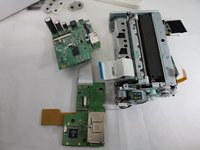
To reassemble your device, follow these instructions in reverse order.

Peter Ely

회원 가입일: 09/26/18

836 평판

안내서 5개 작성하였습니다

댓글 0개

댓글 쓰기

조회 통계:

24 시간 전: 0

7일 전: 3

30일 전: 12

전체 시간: 880