주요 콘텐츠로 건너뛰기

이 버전에는 잘못된 편집 사항이 있을 수 있습니다. 최신 확인된 스냅샷으로 전환하십시오.

필요한 것

  1. 이 단계는 번역되지 않았습니다. 번역을 도와주십시오

    : 1 단계, 이미지 1/1
    • Lay the device on its back, and rotate so the base is facing away from you.

  2. 이 단계는 번역되지 않았습니다. 번역을 도와주십시오

    : 2 단계, 이미지 1/1
    • Grip the frame with your fingers under the edge of the frame, and thumbs pushing down on the front of the device.

  3. 이 단계는 번역되지 않았습니다. 번역을 도와주십시오

    : 3 단계, 이미지 1/1
    • Lift up the frame with your fingers and push down the rest of the device with your thumbs.

  4. 이 단계는 번역되지 않았습니다. 번역을 도와주십시오

    : 4 단계, 이미지 1/1
    • Remove the frame and matte from the device.

  5. 이 단계는 번역되지 않았습니다. 번역을 도와주십시오

    : 5 단계, 이미지 1/1
    • Remove the four 7mm Torx T6 screws.

  6. 이 단계는 번역되지 않았습니다. 번역을 도와주십시오

    : 6 단계, 이미지 1/2 : 6 단계, 이미지 2/2
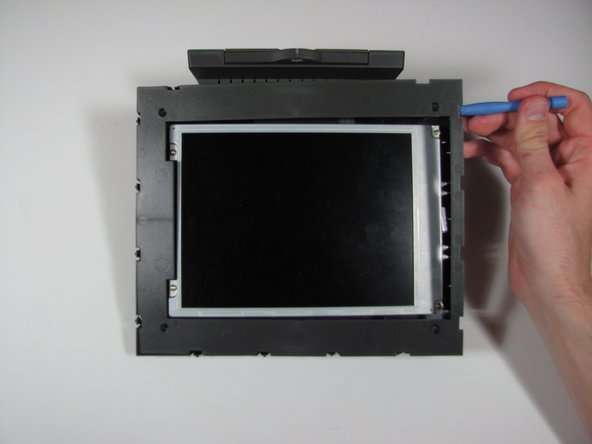
    • Using the plastic opening tool or your fingers, lift up the frame from any edge.

    • Remove the frame from the device.

  7. 이 단계는 번역되지 않았습니다. 번역을 도와주십시오

    : 7 단계, 이미지 1/3 : 7 단계, 이미지 2/3 : 7 단계, 이미지 3/3
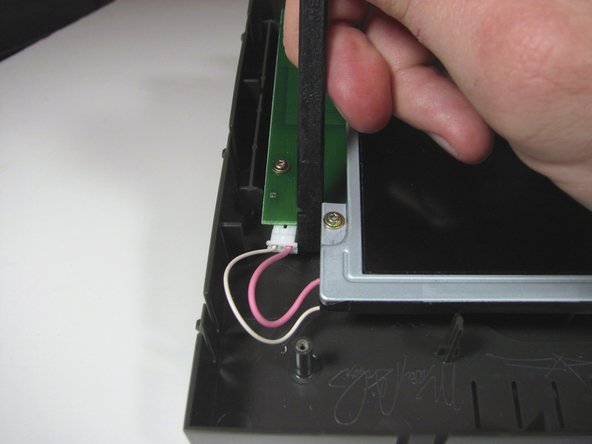
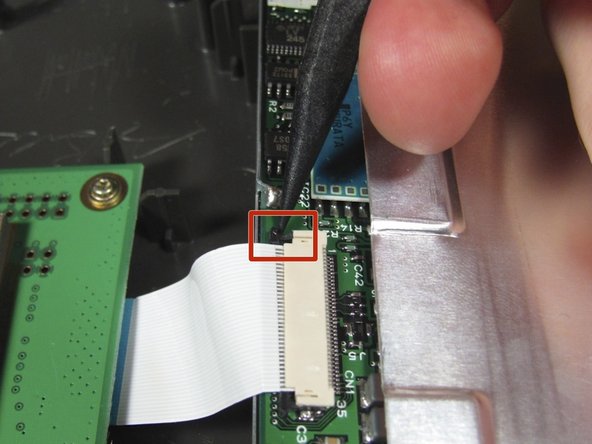
    • Unplug the cable connecting the display to the power supply using the flat end of the spudger to pry the connector away from the circuit board.

    • Alternate applying pressure to the left and right side of the connector to ensure that it does not break.

  8. 이 단계는 번역되지 않았습니다. 번역을 도와주십시오

    : 8 단계, 이미지 1/1
    • Remove the four 7mm Torx T6 screws.

  9. 이 단계는 번역되지 않았습니다. 번역을 도와주십시오

    : 9 단계, 이미지 1/2 : 9 단계, 이미지 2/2
    • Lift up the display from the left edge and flip display over.

    • Do not lift the display too quickly, as the display is still connected to the main circuit board on the right.

  10. 이 단계는 번역되지 않았습니다. 번역을 도와주십시오

    : 10 단계, 이미지 1/3 : 10 단계, 이미지 2/3 : 10 단계, 이미지 3/3
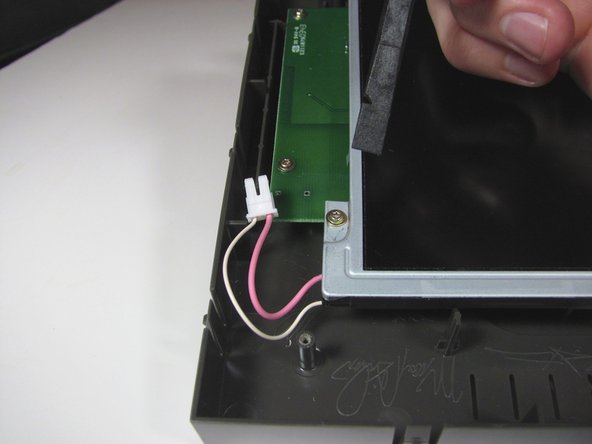
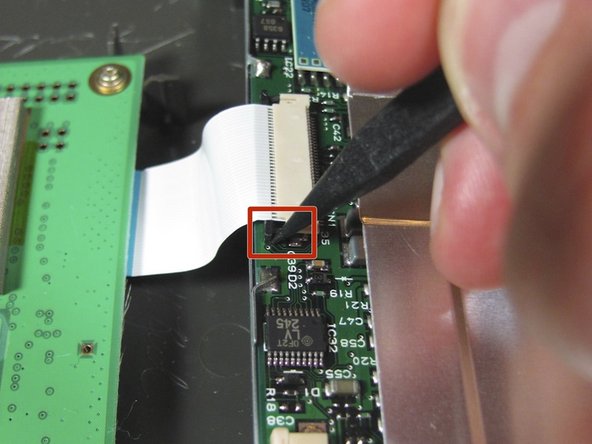
    • Use the spudger to disconnect the ribbon cable from the display by the black pins away from the connector. There is a pin on either side of the connector.

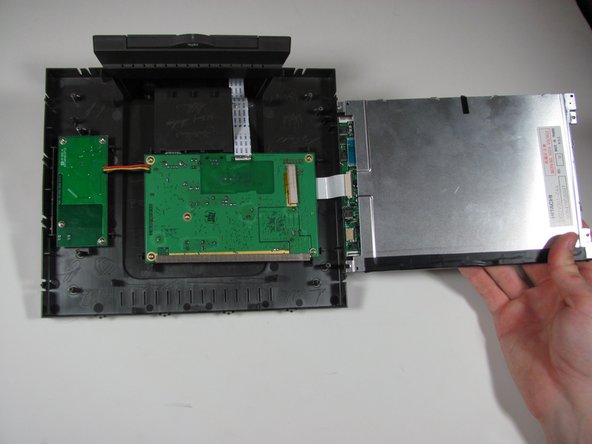
    • Once both pins are released, the ribbon cable should slide easily out.

    • It may be easier if someone else holds the display so the cable does not get ripped out.

  11. 이 단계는 번역되지 않았습니다. 번역을 도와주십시오

    : 11 단계, 이미지 1/1
    • Remove the display assembly from the device.

  12. 이 단계는 번역되지 않았습니다. 번역을 도와주십시오

    : 12 단계, 이미지 1/1
    • Remove the five 7mm Torx T6 screws.

  13. 이 단계는 번역되지 않았습니다. 번역을 도와주십시오

    : 13 단계, 이미지 1/1
    • Desolder the three wires attaching the board to the power supply.

    • In the pictures, the wires are not actually desoldered.

  14. 이 단계는 번역되지 않았습니다. 번역을 도와주십시오

    : 14 단계, 이미지 1/1
    • Desolder all the ribbon cable attachments from the board.

    • In the pictures, the wires are not actually desoldered.

  15. 이 단계는 번역되지 않았습니다. 번역을 도와주십시오

    : 15 단계, 이미지 1/1
    • Remove the circuit board from the device.

    • The picture shows the board still attached to the wires, but after desoldering, the board will be completely free from the device.

결승점

다른 한 분이 해당 안내서를 완성하였습니다.

Casey Glasgow

회원 가입일: 01/26/14

510 평판

안내서 5개 작성하였습니다

Cal Poly, Team 9-25, Maness Winter 2014 Cal Poly, Team 9-25, Maness Winter 2014 회원

CPSU-MANESS-W14S9G25

4 회원들

안내서 5개 작성하였습니다

댓글 0개

댓글 쓰기

조회 통계:

24 시간 전: 1

7일 전: 9

30일 전: 10

전체 시간: 125