주요 콘텐츠로 건너뛰기

Cirago M9030 Hard Drive Replacement

필요한 것

  1. Cirago M9030 Hard Drive Replacement, Cover: 1 단계, 이미지 1/1
    • Use a Phillips #00 screwdriver to unscrew the four 1.1mm long screws on each corner located at the top of the cover.

  2. Cirago M9030 Hard Drive Replacement: 2 단계, 이미지 1/1
    • Similar to the last step, flip the cover over and use a Phillips #00 screwdriver to unscrew the four 1.1mm long screws on each corner located at the bottom of the cover.

    • Remove the warranty sticker across the bottom.

  3. Cirago M9030 Hard Drive Replacement: 3 단계, 이미지 1/2 Cirago M9030 Hard Drive Replacement: 3 단계, 이미지 2/2
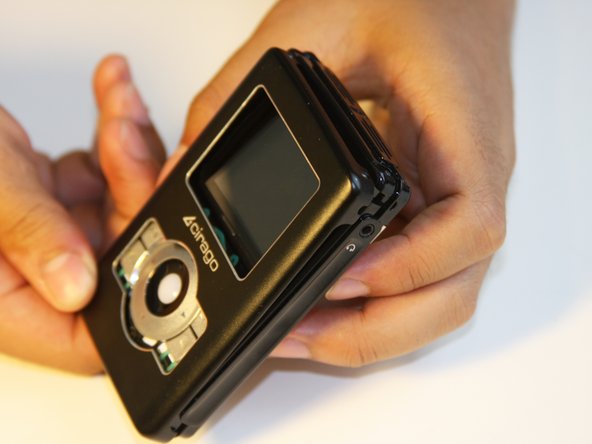
    • Gently take the cover apart using your hands separating the top and bottom.

    • The outer shell is expected to easily come apart.

  4. Cirago M9030 Hard Drive Replacement, Hard Drive: 4 단계, 이미지 1/1
    • Make sure that the screen of the device is facing down.

  5. Cirago M9030 Hard Drive Replacement: 5 단계, 이미지 1/3 Cirago M9030 Hard Drive Replacement: 5 단계, 이미지 2/3 Cirago M9030 Hard Drive Replacement: 5 단계, 이미지 3/3
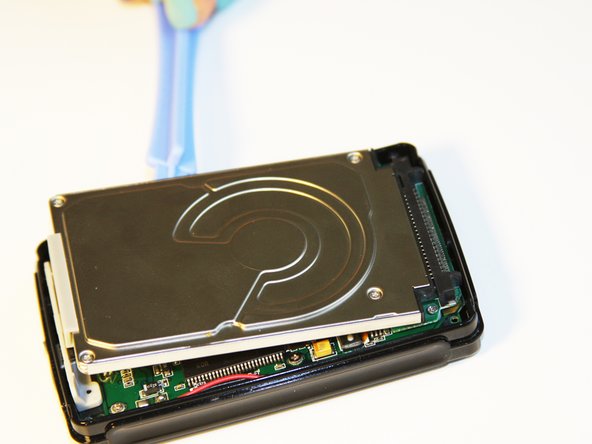
    • Using the plastic opening tool, wedge the tool underneath the bottom left edge of the hard drive.

    • Raise the bottom edge of the hard drive 15 degrees up from the device.

  6. Cirago M9030 Hard Drive Replacement: 6 단계, 이미지 1/3 Cirago M9030 Hard Drive Replacement: 6 단계, 이미지 2/3 Cirago M9030 Hard Drive Replacement: 6 단계, 이미지 3/3
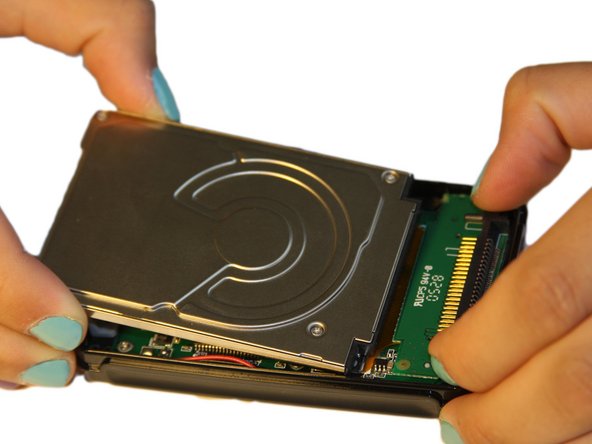
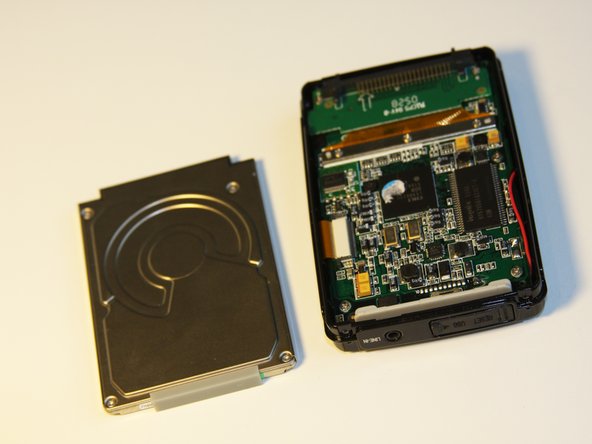
    • Place fingers on the IDE connectors gently picking up and sliding the hard drive out from the IDE module.

결론

To reassemble your device, follow these instructions in reverse order.

다른 한 분이 해당 안내서를 완성하였습니다.

Ryan Sutardji

회원 가입일: 06/29/12

171 평판

안내서 7개 작성하였습니다

Cal Poly, Team 1-4, Regan SU 2012 Cal Poly, Team 1-4, Regan SU 2012 회원

CPSU-REGAN-SU12S1G4

4 회원들

안내서 7개 작성하였습니다

댓글 0개

댓글 쓰기

조회 통계:

24 시간 전: 0

7일 전: 0

30일 전: 5

전체 시간: 929