주요 콘텐츠로 건너뛰기

ColecoVision Motherboard Replacement

필요한 것

  1. ColecoVision Motherboard Replacement, Motherboard: 1 단계, 이미지 1/1
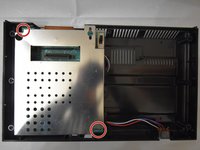
    • Start by laying the console face down.

    • Remove the eight 15mm Phillips #1 screws from the bottom of the device.

  2. ColecoVision Motherboard Replacement: 2 단계, 이미지 1/2 ColecoVision Motherboard Replacement: 2 단계, 이미지 2/2
    • Flip the console back over.

    • Lift the front panel off. I would reccomended using a metal spudger along the rim of the top to safely remove it and set it aside.

  3. ColecoVision Motherboard Replacement: 3 단계, 이미지 1/2 ColecoVision Motherboard Replacement: 3 단계, 이미지 2/2
    • Remove the two 15mm Phillips #1 screws holding the casing in place.

    • Carefully lift the casing from the motherboard.

  4. ColecoVision Motherboard Replacement: 4 단계, 이미지 1/1
    • Remove the center Phillips #1 screw near the cartridge slot.

    • Remove the second Phillips #1 screw near the RAM chips.

    • Carefully lift and remove the motherboard.

결론

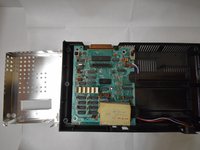
To reassemble your device, follow these instructions in reverse order.

다른 한 분이 해당 안내서를 완성하였습니다.

Krystalina

회원 가입일: 10/24/18

121 평판

안내서 1개 작성함

UW Tacoma, Team S1-G2, Rose Fall 2018 UW Tacoma, Team S1-G2, Rose Fall 2018 회원

UWT-ROSE-F18S1G2

4 회원들

안내서 12개 작성하였습니다

댓글 0개

댓글 쓰기

조회 통계:

24 시간 전: 0

7일 전: 7

30일 전: 17

전체 시간: 1,555