주요 콘텐츠로 건너뛰기

Compaq Presario CQ62 Motherboard Replacement

필요한 것

  1. Compaq Presario CQ62  Motherboard Replacement, Motherboard: 1 단계, 이미지 1/1
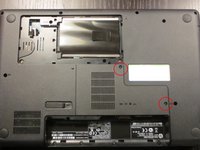
    • Turn the computer over as shown in the image.

    • Remove the two M2.5x5 screws that secure the cover of the hard drive.

  2. Compaq Presario CQ62  Motherboard Replacement: 2 단계, 이미지 1/2 Compaq Presario CQ62  Motherboard Replacement: 2 단계, 이미지 2/2
    • Remove the hard drive by carefully pushing upwards on the metal supports.

    • When free, carefully release the hard drive's connector.

  3. Compaq Presario CQ62  Motherboard Replacement: 3 단계, 이미지 1/3 Compaq Presario CQ62  Motherboard Replacement: 3 단계, 이미지 2/3 Compaq Presario CQ62  Motherboard Replacement: 3 단계, 이미지 3/3
    • Unscrew the two screws securing the lid for WLAN & RAM.

    • Remove the screw holding the WLAN module in place.

    • Release the two RF connectors on the WLAN module.

  4. Compaq Presario CQ62  Motherboard Replacement: 4 단계, 이미지 1/1
    • Lift up on the WLAN module to forty-five degrees, and gently pull it out.

  5. Compaq Presario CQ62  Motherboard Replacement: 5 단계, 이미지 1/1
    • Remove the thirteen bottom screws.

    • Remove the screws holding in the keyboard.

  6. Compaq Presario CQ62  Motherboard Replacement: 6 단계, 이미지 1/2 Compaq Presario CQ62  Motherboard Replacement: 6 단계, 이미지 2/2
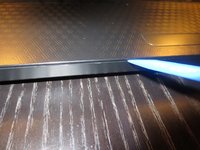
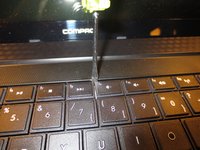
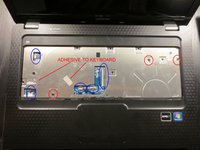
    • To remove the keyboard, use the spudger to release the snaps between the casing and the keyboard top. Remove the snaps all the way around the device except around the LDC area.

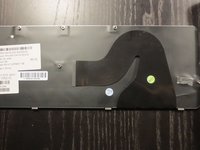
    • Using a spudger, firmly press the keyboard from the function keys downward towards the bottom of the keyboard to remove the board.

  7. Compaq Presario CQ62  Motherboard Replacement: 7 단계, 이미지 1/3 Compaq Presario CQ62  Motherboard Replacement: 7 단계, 이미지 2/3 Compaq Presario CQ62  Motherboard Replacement: 7 단계, 이미지 3/3
    • When pressing down on the keyboard, make sure to use enough force to overcome the adhesive.

    • When lifting out the keyboard be mindful of the keyboard's flex cables that need to be disconnected when the keyboard is loose.

    • Remove the flex cables by opening the connectors and removing them (there are 5 in total).

    • Remove the three screws.

    • Remove the top cover with a spudger.

결론

To reassemble your device, follow these instructions in reverse order. To dissasemble the logic board see the other ifixit guide for this laptop.

다른 5명이 해당 안내서를 완성하였습니다.

Carsten Dahl Hjarup

회원 가입일: 11/04/13

2,796 평판

안내서 8개 작성하였습니다

댓글 한 개

댓글 쓰기

조회 통계:

24 시간 전: 1

7일 전: 3

30일 전: 7

전체 시간: 5,932