주요 콘텐츠로 건너뛰기

Compaq Presario V2414NR Hard Drive Replacement

필요한 것

  1. Compaq Presario V2414NR Hard Drive Replacement, Battery: 1 단계, 이미지 1/1
    • Shutdown the computer.

    • Remove all external devices.

    • Unplug the power, and any other cords, from the laptop.

    • Turn the laptop upside down, with the front towards you.

  2. Compaq Presario V2414NR Hard Drive Replacement: 2 단계, 이미지 1/2 Compaq Presario V2414NR Hard Drive Replacement: 2 단계, 이미지 2/2
    • Slide the battery release latch to the left until the battery pops up.

    • Lift the front edge of the battery pack and swing it back to remove it.

    • When reassembling, first align the back of the battery with the chassis, then press the front downwards until it latches.

  3. Compaq Presario V2414NR Hard Drive Replacement, Hard Drive: 3 단계, 이미지 1/2 Compaq Presario V2414NR Hard Drive Replacement, Hard Drive: 3 단계, 이미지 2/2
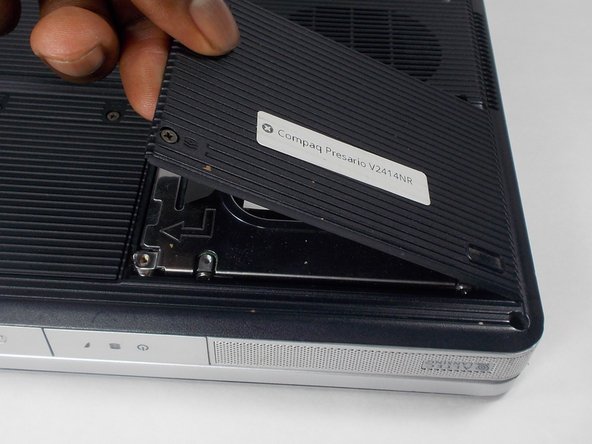
    • Loosen the two 5mm Philips #1 screws that secure the hard drive cover to the computer.

    • These screws are captured to the cover panel.

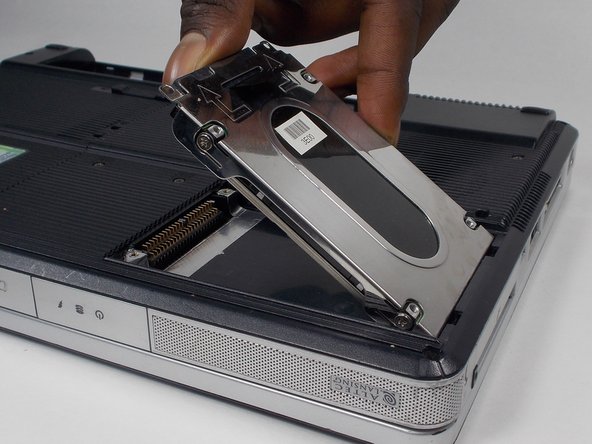
    • Lift the left side of the cover and swing it to the right to remove it.

  4. Compaq Presario V2414NR Hard Drive Replacement: 4 단계, 이미지 1/2 Compaq Presario V2414NR Hard Drive Replacement: 4 단계, 이미지 2/2
    • Grasp the black Mylar tab on the hard drive frame and pull firmly straight up until the hard drive disconnects from the computer, and remove it.

    • When reassembling: First, align the two tabs on the hard drive with the slots in the chassis, then press down on the left edge of the hard drive to seat the contacts.

  5. Compaq Presario V2414NR Hard Drive Replacement: 5 단계, 이미지 1/2 Compaq Presario V2414NR Hard Drive Replacement: 5 단계, 이미지 2/2
    • Remove the four 4mm Philips #1 screws, two on each side, that secure the hard drive frame to the hard drive.

    • These screws are different from the rest of the laptop screws. You can damage the drive using the wrong screws.

    • Lift the frame to remove if from the hard drive.

  6. Compaq Presario V2414NR Hard Drive Replacement: 6 단계, 이미지 1/1
    • Slide the hard drive connector straight off of the hard drive.

    • Be sure not to tilt the connector while removing it to avoid bending the delicate hard drive connector pins.

    • When reassembling, position the contacts towards the top of the drive (metal covered side).

결론

To reassemble your device, follow these instructions in reverse order.

Rylie Schmidt

회원 가입일: 04/19/15

765 평판

안내서 7개 작성하였습니다

UMass Dartmouth, Team 2-1, Isaacson Fall 2016 UMass Dartmouth, Team 2-1, Isaacson Fall 2016 회원

UMASSD-ISAACSON-F16S2G1

3 회원들

안내서 9개 작성하였습니다

댓글 0개

댓글 쓰기

조회 통계:

24 시간 전: 0

7일 전: 2

30일 전: 11

전체 시간: 728