이 버전에는 잘못된 편집 사항이 있을 수 있습니다. 최신 확인된 스냅샷으로 전환하십시오.
필요한 것
-
이 단계는 번역되지 않았습니다. 번역을 도와주십시오
-
Loosen the two screws of the hard drive cover
-
Remove the cover, then pull straight up on the pull tab to remove the hard drive
-
-
이 단계는 번역되지 않았습니다. 번역을 도와주십시오
-
Loosen the two screws on the ram cover and remove
-
Loosen the one screw on the wireless card cover and remove
-
-
이 단계는 번역되지 않았습니다. 번역을 도와주십시오
-
Remove 16 bottom cover screws (dark coloured 6mm screws)
-
Remove 5 screws from inside the battery bay (silver coloured 4mm screws)
-
-
이 단계는 번역되지 않았습니다. 번역을 도와주십시오
-
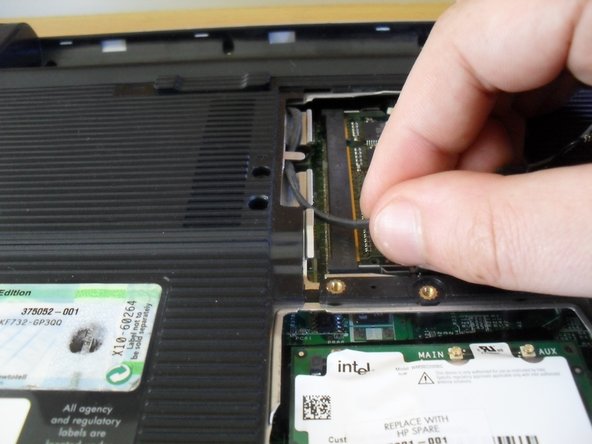
Using a small flat blade screwdriver pop off the wireless aerial connectors from the wireless card
-
Unroute the cables from the bottom of the case
-
Slide out the dvd drive
-
-
-
이 단계는 번역되지 않았습니다. 번역을 도와주십시오
-
Flip the laptop over and open the display to start removing the keyboard
-
Slide a small flat blade screwdriver between the insert and delete keys and lever the button board cover off
-
Remove the four keyboard screws (dark coloured 4mm screws)
-
Lift up the keyboard, but beware of the cable underneath still to be removed
-
Loosen the socket for the keyboard cable and remove the keyboard
-
-
이 단계는 번역되지 않았습니다. 번역을 도와주십시오
-
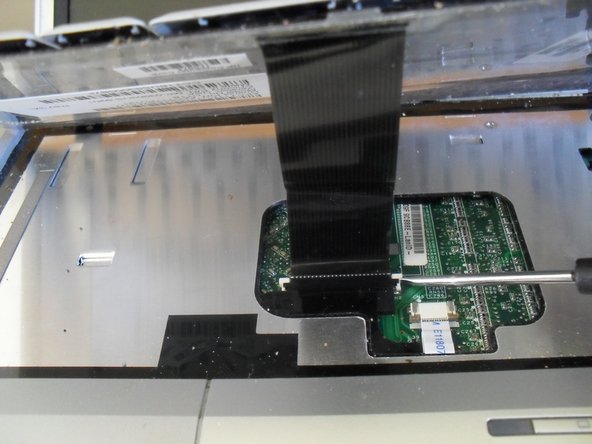
Remove the display cable connector by lifting it straight up
-
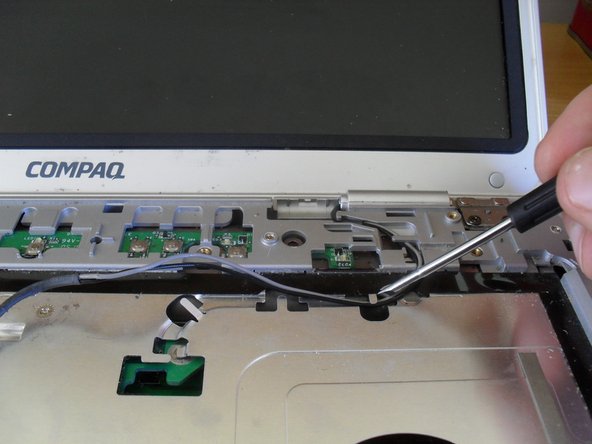
Un-route the wireless aerial cables from the top cover
-
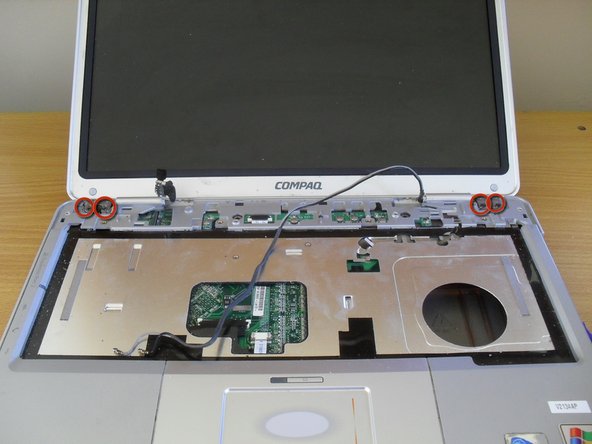
Remove the four display screws (dark coloured 5mm screws). Lift the display up and off
-
-
이 단계는 번역되지 않았습니다. 번역을 도와주십시오
-
Flip the laptop over and grip the bottom case where the dvd drive used to be
-
Lift off the bottom case
-
-
이 단계는 번역되지 않았습니다. 번역을 도와주십시오
-
Remove two screws from the s-video/usb board (silver coloured 4mm screws)
-
Lift the board from the right hand side
-
-
이 단계는 번역되지 않았습니다. 번역을 도와주십시오
-
Remove the speaker cable and lift out the speaker module
-
Use a flat blade screw driver to loosen the button board connecter
-
Push the two wireless card arms outwards to remove the wireless card
-
-
이 단계는 번역되지 않았습니다. 번역을 도와주십시오
-
Remove the four screws holding the mother board in place (silver coloured 4mm screws)
-
-
이 단계는 번역되지 않았습니다. 번역을 도와주십시오
-
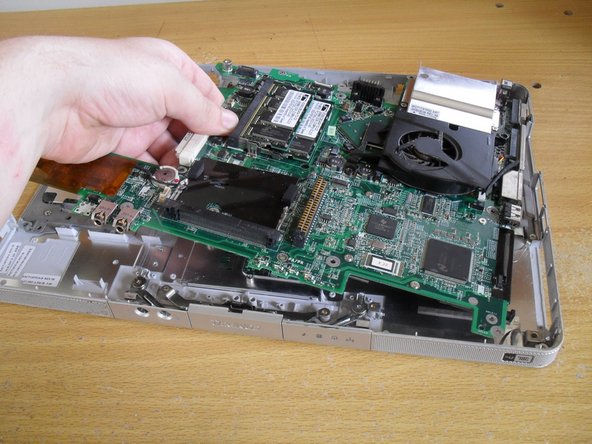
Remove the left side of the motherboard first. It may be necessary to bent the case a little to get the firewire and USB port away from the case
-
Pull on the middle of the board next, angling up to clear the front audio jacks from the case
-
Pull the board away from the right side of the case
-
-
이 단계는 번역되지 않았습니다. 번역을 도와주십시오
-
Remove the three screws holding the heatsink to the mother board (silver coloured 4mm screws)
-
Remove the heatsink fan connecter
-
Lift the heatsink off the board
-
Use a flat blade screwdriver to turn the CPU lock and remove the CPU
-


다른 7명이 해당 안내서를 완성하였습니다.
댓글 한 개
How to clean the fan cooler? do i have to disassemble it whole or can i just blow it from the outside, no tools?