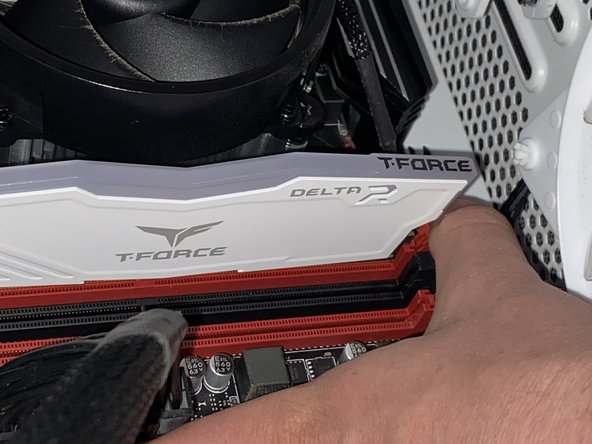
주요 콘텐츠로 건너뛰기

Computer RAM Replacement

필요한 것

  1. Computer RAM Replacement, RAM: 1 단계, 이미지 1/1
    • Press the power button on the case of your PC to turn it off.

  2. Computer RAM Replacement: 2 단계, 이미지 1/1
    • Turn off the computer from the power supply in the back, and unplug the cable from the PSU.

    • This step is important as not doing so means the computer is still receiving power and can damage your computer parts or even shock you.

  3. Computer RAM Replacement: 3 단계, 이미지 1/1
    • Lay the case on its side.

    • For this case model (Cooler Master TD 500 Mesh) it has two thumb screws on the top corners which can be removed with your fingers.

    • Remove the side panel.

  4. Computer RAM Replacement: 4 단계, 이미지 1/1
    • Your RAM sticks are the two long cards with T-FORCE written on the top of them.

  5. Computer RAM Replacement: 5 단계, 이미지 1/3 Computer RAM Replacement: 5 단계, 이미지 2/3 Computer RAM Replacement: 5 단계, 이미지 3/3
    • Each motherboard is different. This motherboard (MSI B450 Gaming Plus Max) has two pull tabs on each side. Push down on them to release each card.

    • If you are not using this motherboard, your motherboard may only have one pull tab instead of one on each side. Please refer to the manual for your motherboard.

  6. Computer RAM Replacement: 6 단계, 이미지 1/1
    • Once the pull tabs are released, remove the RAM from the RAM slots and set to the side.

  7. Computer RAM Replacement: 7 단계, 이미지 1/3 Computer RAM Replacement: 7 단계, 이미지 2/3 Computer RAM Replacement: 7 단계, 이미지 3/3
    • Repeat Steps 5 & 6 to remove the second RAM card from the RAM slot.

    • If you only have one RAM card, skip to the next step.

  8. Computer RAM Replacement: 8 단계, 이미지 1/2 Computer RAM Replacement: 8 단계, 이미지 2/2
    • To install new RAM, line up the notch of the RAM slot with the notch of the RAM slot on the motherboard.

    • For this motherboard, insert the RAM in the 2nd slot from left to right and the furthest one to the right.

  9. Computer RAM Replacement: 9 단계, 이미지 1/2 Computer RAM Replacement: 9 단계, 이미지 2/2
    • Push down with even pressure on both sides until you hear two clicks since on this motherboard there are two tabs, one on each side.

  10. Computer RAM Replacement: 10 단계, 이미지 1/1
    • Repeat Steps 8 and 9 to install the second RAM stick.

  11. Computer RAM Replacement: 11 단계, 이미지 1/2 Computer RAM Replacement: 11 단계, 이미지 2/2
    • Power your PC by turning on the power switch on the back.

    • Press the power button on the top of the case.

  12. Computer RAM Replacement: 12 단계, 이미지 1/2 Computer RAM Replacement: 12 단계, 이미지 2/2
    • Stand your computer back up.

    • See if the computer powers up and into windows and shows up on your display. If it does, put the side panel back on.

    • If you do not see anything on your monitor’s display, you did not install the RAM correctly and must check to see if it's fully secured. Remove the RAM again and install again.

  13. Computer RAM Replacement: 13 단계, 이미지 1/2 Computer RAM Replacement: 13 단계, 이미지 2/2
    • Check to see if your RAM is running at its rated speed.

    • Restart your PC and spam click your delete key on your keyboard until you get into the MSI BIOS.

  14. Computer RAM Replacement: 14 단계, 이미지 1/2 Computer RAM Replacement: 14 단계, 이미지 2/2
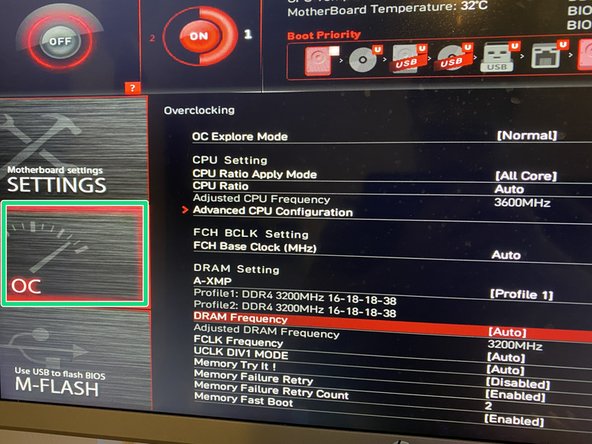
    • You will know you got into your BIOS if see a screen like this. On the top section, for this RAM, it should say the DDR speed is 3200 Mhz. If you do see this, skip to the final step.

    • If you do not, with your arrow keys go to the OC section, scroll to DRAM frequency and instead of auto, select the rated speed of your RAM. (Don't forget to save this setting.)

  15. Computer RAM Replacement: 15 단계, 이미지 1/1
    • Press your Esc key until the message in the picture pops out. Navigate to exit and your PC should restart and you are good to go. You have successfully remove and replaced or upgraded your RAM!

    • Navigate to "Exit," and your PC will restart. You are good to go!

결론

This is how you replace/repair your RAM, and how to check it is running at the rated speed.

다른 2명이 해당 안내서를 완성하였습니다.

Eden rodriguez

회원 가입일: 10/21/20

292 평판

안내서 1개 작성함

Texas Tech, Team S14-G8, Cowan Fall 2020 Texas Tech, Team S14-G8, Cowan Fall 2020 회원

TTU-COWAN-F20S14G8

2 회원들

안내서 3개 작성하였습니다

댓글 0개

댓글 쓰기

조회 통계:

24 시간 전: 4

7일 전: 21

30일 전: 74

전체 시간: 2,694