주요 콘텐츠로 건너뛰기

Conair Infiniti Pro Model 259NP Back Panel Replacement

필요한 것

  1. Conair Infiniti Pro Model 259NP Back Panel Replacement, Back Panel: 1 단계, 이미지 1/1
    • Caution: Unplug the hair dryer before attempting this guide. Leaving the device plugged in may result in electrocution and damage to the device.

    • Hold the hair dryer by the handle so that the back panel faces up.

  2. Conair Infiniti Pro Model 259NP Back Panel Replacement: 2 단계, 이미지 1/2 Conair Infiniti Pro Model 259NP Back Panel Replacement: 2 단계, 이미지 2/2
    • Remove the two 15.875 mm Phillips #2 screws from the back panel.

  3. Conair Infiniti Pro Model 259NP Back Panel Replacement: 3 단계, 이미지 1/3 Conair Infiniti Pro Model 259NP Back Panel Replacement: 3 단계, 이미지 2/3 Conair Infiniti Pro Model 259NP Back Panel Replacement: 3 단계, 이미지 3/3
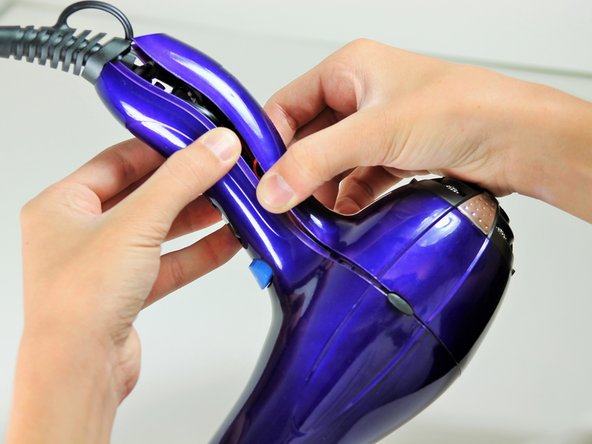
    • Starting from where the cord attaches to the handle, pull apart the two plastic panels.

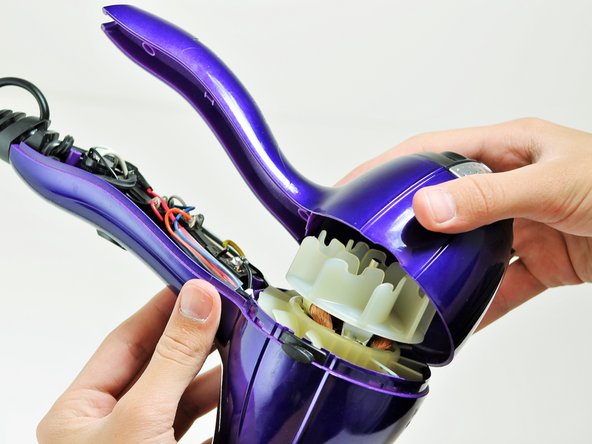
    • Continue separating the back panel, working along the seam.

    • With moderate force, completely remove the back panel from the hair dryer.

결론

To reassemble your device, follow these instructions in reverse order.

다른 6명이 해당 안내서를 완성하였습니다.

Timothy Lo

회원 가입일: 04/22/14

1,172 평판

안내서 7개 작성하였습니다

Cal Poly, Team 10-58, Amido Spring 2014 Cal Poly, Team 10-58, Amido Spring 2014 회원

CPSU-AMIDO-S14S10G58

4 회원들

안내서 7개 작성하였습니다

댓글 0개

댓글 쓰기

조회 통계:

24 시간 전: 0

7일 전: 11

30일 전: 46

전체 시간: 6,324