주요 콘텐츠로 건너뛰기

Conventional Electric Stovetop Plug-in Burner Replacement

필요한 것

  1. Conventional Electric Stovetop Plug-in Burner Replacement, Plug-in Burner: 1 단계, 이미지 1/1
    • Check that the burner is turned off or your stove is unplugged.

  2. Conventional Electric Stovetop Plug-in Burner Replacement: 2 단계, 이미지 1/1
    • Detach the stove burner by gently lifting it up (you can use a flat head screwdriver to lift the burner if it is stuck).

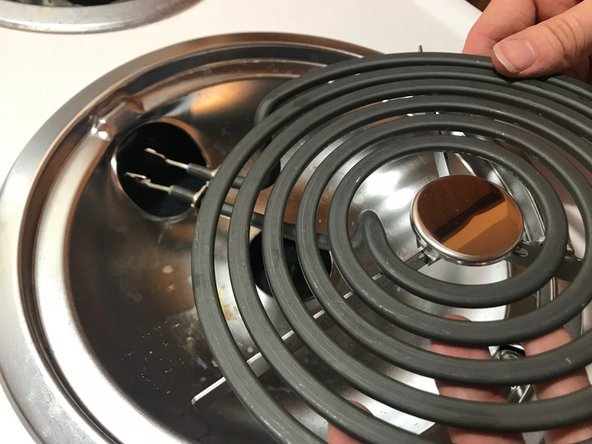
  3. Conventional Electric Stovetop Plug-in Burner Replacement: 3 단계, 이미지 1/2 Conventional Electric Stovetop Plug-in Burner Replacement: 3 단계, 이미지 2/2
    • Gently pull the burner from the plug in (straight back towards you). The plug in is better depicted in the second picture of this step.

  4. Conventional Electric Stovetop Plug-in Burner Replacement: 4 단계, 이미지 1/1
    • Dispose of your old burner and take your new burner out of its packaging. It is ready to attach.

  5. Conventional Electric Stovetop Plug-in Burner Replacement: 5 단계, 이미지 1/1
    • Gently insert the burner into the plug in, you should feel it click into place.

  6. Conventional Electric Stovetop Plug-in Burner Replacement: 6 단계, 이미지 1/1
    • Gently set the burner back onto the stovetop.

  7. Conventional Electric Stovetop Plug-in Burner Replacement: 7 단계, 이미지 1/1
    • Now the stove is ready to be plugged back into the wall (if you detached it) and the burner is ready to be tested to see if it is working.

결론

To reassemble your device, follow these instructions in reverse order.

다른 한 분이 해당 안내서를 완성하였습니다.

Chloe Martin

회원 가입일: 10/29/18

172 평판

안내서 1개 작성함

댓글 0개

댓글 쓰기

조회 통계:

24 시간 전: 0

7일 전: 8

30일 전: 51

전체 시간: 2,073