주요 콘텐츠로 건너뛰기

Coolpix S01 Zoom Trigger Replacement

필요한 것

  1. Coolpix S01 Zoom Trigger Replacement, Zoom Trigger: 1 단계, 이미지 1/3 Coolpix S01 Zoom Trigger Replacement, Zoom Trigger: 1 단계, 이미지 2/3 Coolpix S01 Zoom Trigger Replacement, Zoom Trigger: 1 단계, 이미지 3/3
    • Before starting, make sure the camera is powered off.

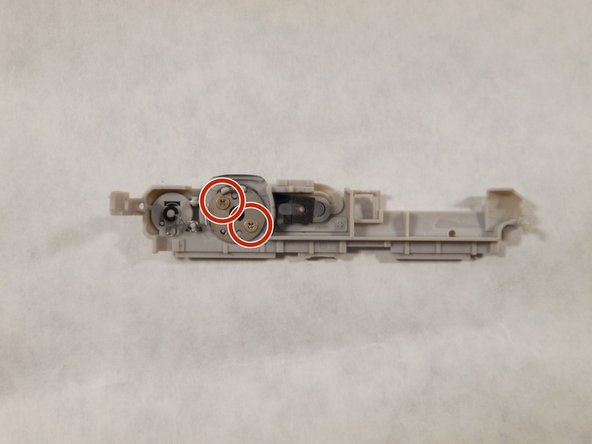
    • Take the Hex and PH000 bit to remove a 2mm screw from the left side of the camera.

    • Next, remove the 2mm screw from the right side.

    • Lastly, remove the 3mm screw from the bottom of the camera.

  2. Coolpix S01 Zoom Trigger Replacement: 2 단계, 이미지 1/3 Coolpix S01 Zoom Trigger Replacement: 2 단계, 이미지 2/3 Coolpix S01 Zoom Trigger Replacement: 2 단계, 이미지 3/3
    • Once the two 2mm screws and the 3 mm screw have been removed, use the smallest plastic opening tool and pull up on the sides to reveal the inside of the camera.

    • Be sure to remove the battery before continuing your repair.

  3. Coolpix S01 Zoom Trigger Replacement: 3 단계, 이미지 1/2 Coolpix S01 Zoom Trigger Replacement: 3 단계, 이미지 2/2
    • After the battery is out, remove the gray button bar from the top of the camera with the smallest opening tool.

    • With the gray bar detached from the camera, turn it upside down. With the Hex and the J000 bit remove the two 1mm screws.

  4. Coolpix S01 Zoom Trigger Replacement: 4 단계, 이미지 1/2 Coolpix S01 Zoom Trigger Replacement: 4 단계, 이미지 2/2
    이 단계에 사용된 도구:
    Tweezers
    $4.99
    구매
    • Take the needle nose tweezers to remove the black ring in the middle of the button.

    • You have successfully removed the zoom trigger and can replace with a new one if needed.

    • To reassemble follow steps in reverse.

결론

To reassemble your device, follow these instructions in reverse order.

angelica fitzgerald

회원 가입일: 10/13/15

216 평판

안내서 2개 작성하였습니다

Sam Houston State, Team 2-3, Blackburne Fall 2015 Sam Houston State, Team 2-3, Blackburne Fall 2015 회원

SHSU-BLACKBURNE-F15S2G3

4 회원들

안내서 9개 작성하였습니다

댓글 0개

댓글 쓰기

조회 통계:

24 시간 전: 0

7일 전: 5

30일 전: 10

전체 시간: 324