주요 콘텐츠로 건너뛰기

Cowon iAudio U2 Microphone Replacement

필요한 것

  1. Cowon iAudio U2 Microphone Replacement, Microphone: 1 단계, 이미지 1/1
    • Before starting the disassemble, make sure the device is powered off.

    • Unscrew the 4 screws using the PH000 drill bit from the iFixit toolkit.

    • Don't forget to place the screws aside in a safe location, perhaps use a magnetic board to store them. You will need the screws to put the device back together.

  2. Cowon iAudio U2 Microphone Replacement: 2 단계, 이미지 1/2 Cowon iAudio U2 Microphone Replacement: 2 단계, 이미지 2/2
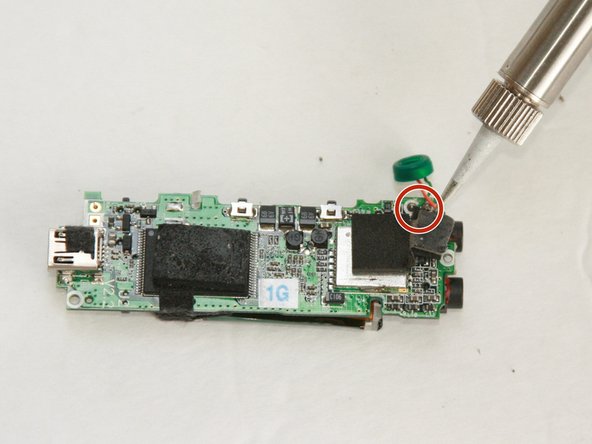
    • Use the plastic opening tool from the iFixit toolkit to separate the back from the front of the device. This can be done by wedging the opening tool in the crack where the two sides of the device cover meet.

    • After it is wedged in push down on the exposed end until the two sides come apart.

  3. Cowon iAudio U2 Microphone Replacement: 3 단계, 이미지 1/3 Cowon iAudio U2 Microphone Replacement: 3 단계, 이미지 2/3 Cowon iAudio U2 Microphone Replacement: 3 단계, 이미지 3/3
    • In order to get to the wires of the microphone you will need to peel back the battery.

    • You will need to pull out both of the wires of the microphone connected to the motherboard in order to replace the microphone.

  4. Cowon iAudio U2 Microphone Replacement: 4 단계, 이미지 1/2 Cowon iAudio U2 Microphone Replacement: 4 단계, 이미지 2/2
    • Next, you will need to take the new microphone and solder it to the motherboard using a soldering iron.

    • Note when using the soldering tool that the sliver bar may become too hot, so that is a part of the tool to avoid touching while in use.

결론

To reassemble your device, follow these instructions in reverse order.

다른 3명이 해당 안내서를 완성하였습니다.

Justin Proshka

회원 가입일: 01/14/16

624 평판

안내서 5개 작성하였습니다

USF Sarasota-Manatee, Team 1-2, Stewart Spring 2016 USF Sarasota-Manatee, Team 1-2, Stewart Spring 2016 회원

USFSM-STEWART-S16S1G2

4 회원들

안내서 5개 작성하였습니다

댓글 0개

댓글 쓰기

조회 통계:

24 시간 전: 3

7일 전: 5

30일 전: 5

전체 시간: 279