주요 콘텐츠로 건너뛰기

Cr-48 Chromebook SSD Replacement

필요한 것

  1. Cr-48 Chromebook SSD Replacement, Battery: 1 단계, 이미지 1/3 Cr-48 Chromebook SSD Replacement, Battery: 1 단계, 이미지 2/3 Cr-48 Chromebook SSD Replacement, Battery: 1 단계, 이미지 3/3
    • Slide the switch on the bottom of the laptop until the battery pops out.

    • Once the battery pops out, you can remove it.

  2. Cr-48 Chromebook SSD Replacement, Remove Rear Rubber Feet: 2 단계, 이미지 1/2 Cr-48 Chromebook SSD Replacement, Remove Rear Rubber Feet: 2 단계, 이미지 2/2
    이 단계에 사용된 도구:
    Tweezers
    $4.99
    구매
    • Using a pair of tweezers, remove the two rear rubber feet to expose two hidden screws.

  3. Cr-48 Chromebook SSD Replacement, Remove Screws: 3 단계, 이미지 1/3 Cr-48 Chromebook SSD Replacement, Remove Screws: 3 단계, 이미지 2/3 Cr-48 Chromebook SSD Replacement, Remove Screws: 3 단계, 이미지 3/3
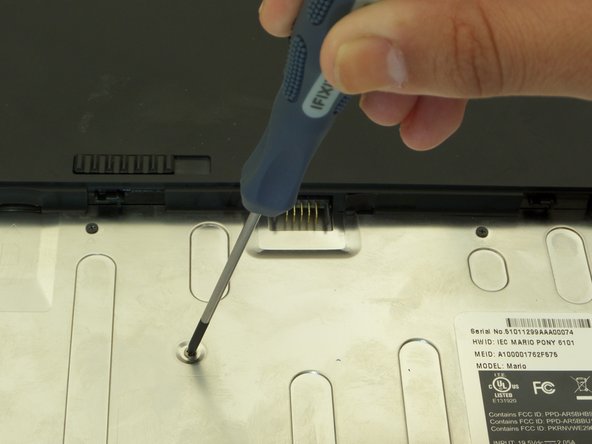
    • Remove ten 3 mm screws in the battery compartment using a Phillips #00 screwdriver.

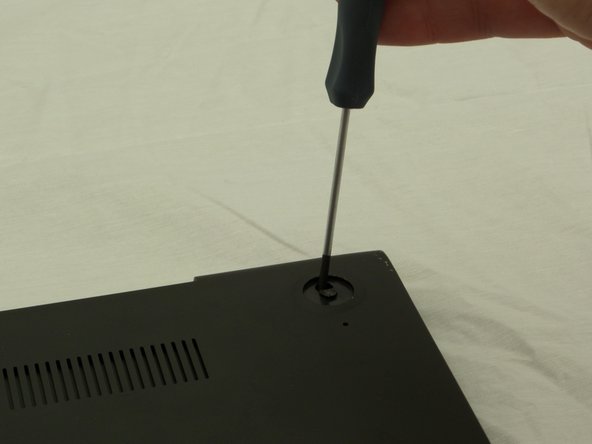
    • Remove two 4.5 mm screws under the rubber feet using a Phillips #00 screwdriver.

  4. Cr-48 Chromebook SSD Replacement: 4 단계, 이미지 1/3 Cr-48 Chromebook SSD Replacement: 4 단계, 이미지 2/3 Cr-48 Chromebook SSD Replacement: 4 단계, 이미지 3/3
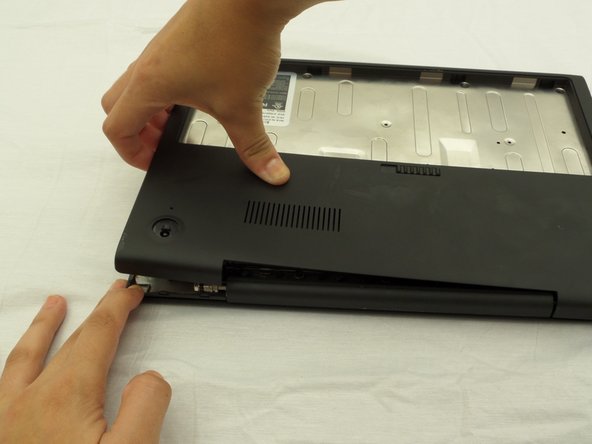
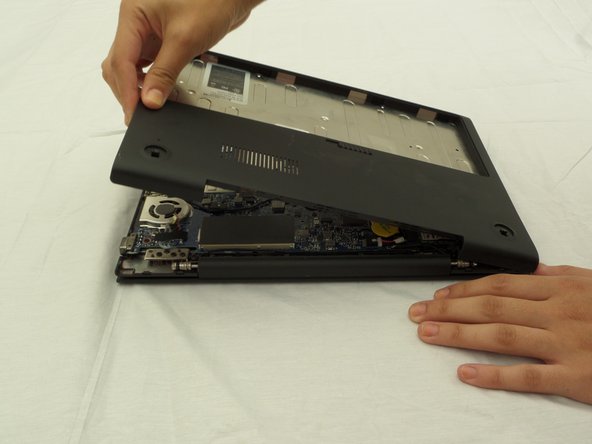
    • Starting where the body of the laptop and the laptop screen meet, pry apart the lower case from the rest of the laptop.

    • The case is easier to remove when separating in a clockwise motion, as seen in the pictures.

  5. Cr-48 Chromebook SSD Replacement, Locate SSD and Remove Screw: 5 단계, 이미지 1/3 Cr-48 Chromebook SSD Replacement, Locate SSD and Remove Screw: 5 단계, 이미지 2/3 Cr-48 Chromebook SSD Replacement, Locate SSD and Remove Screw: 5 단계, 이미지 3/3
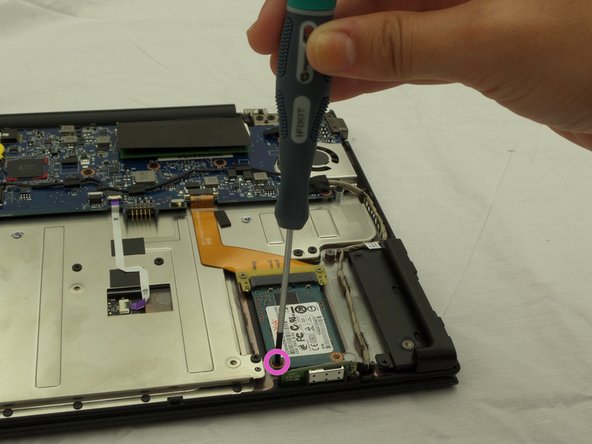
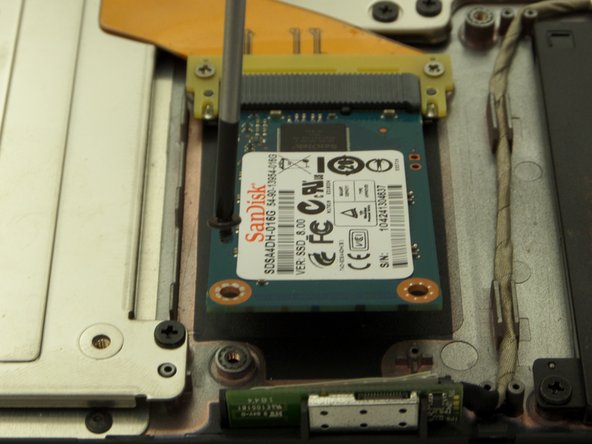
    • Find the SSD located on a corner of the side directly opposite where the laptop screen and device body are connected.

    • Remove one black screw on the SSD using a PH #00 screwdriver.

    • Size ph#00, approximately 3 mm long.

    • Once unscrewed, the SSD will pop up from the device.

  6. Cr-48 Chromebook SSD Replacement, Remove SSD: 6 단계, 이미지 1/2 Cr-48 Chromebook SSD Replacement, Remove SSD: 6 단계, 이미지 2/2
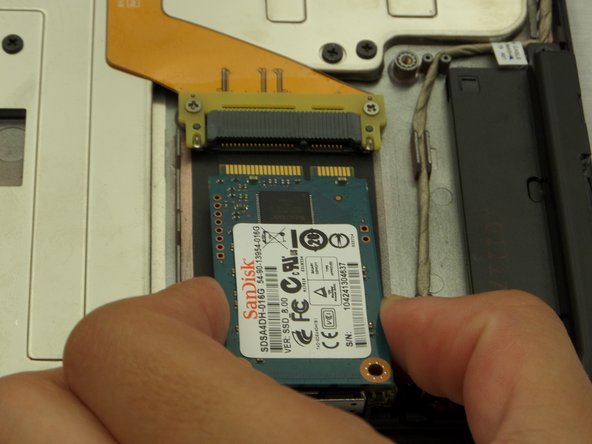
    • Firmly grasp the SSD with two fingers slightly upwards and pull.

결론

To reassemble your device, follow these instructions in reverse order.

다른 5명이 해당 안내서를 완성하였습니다.

Athar

회원 가입일: 09/09/14

365 평판

안내서 2개 작성하였습니다

CSU Fullerton, Team 2-2, Bruce Fall 2014 CSU Fullerton, Team 2-2, Bruce Fall 2014 회원

CSUF-BRUCE-F14S2G2

3 회원들

안내서 10개 작성하였습니다

댓글 0개

댓글 쓰기

조회 통계:

24 시간 전: 3

7일 전: 21

30일 전: 87

전체 시간: 3,110