주요 콘텐츠로 건너뛰기

Cuisinart DCC-1100 Heating Element Replacement

필요한 것

  1. Cuisinart DCC-1100 Heating Element Replacement, Heating Element: 1 단계, 이미지 1/3 Cuisinart DCC-1100 Heating Element Replacement, Heating Element: 1 단계, 이미지 2/3 Cuisinart DCC-1100 Heating Element Replacement, Heating Element: 1 단계, 이미지 3/3
    • Remove the coffee pot and unplug the maker.

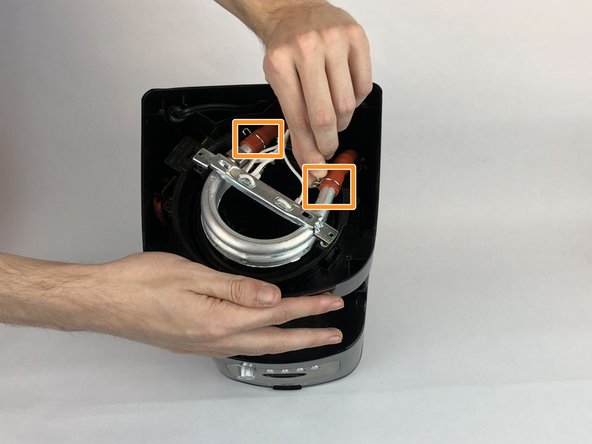
    • Flip the coffee maker over so that way the bottom is facing you.

  2. Cuisinart DCC-1100 Heating Element Replacement: 2 단계, 이미지 1/3 Cuisinart DCC-1100 Heating Element Replacement: 2 단계, 이미지 2/3 Cuisinart DCC-1100 Heating Element Replacement: 2 단계, 이미지 3/3
    • Remove the five 1.6mm Phillips #1 screws from the bottom.

    • Remove the bottom cover.

  3. Cuisinart DCC-1100 Heating Element Replacement: 3 단계, 이미지 1/2 Cuisinart DCC-1100 Heating Element Replacement: 3 단계, 이미지 2/2
    • Remove the two 1.6mm Phillips #0 screws from the heating element.

    • Lift up the heating element and remove the hot plate.

  4. Cuisinart DCC-1100 Heating Element Replacement: 4 단계, 이미지 1/2 Cuisinart DCC-1100 Heating Element Replacement: 4 단계, 이미지 2/2
    • Disconnect the heating element.

    • Pinch the tube clips and remove from tubes from the heating element.

결론

To reassemble your device, follow these instructions in reverse order.

다른 2명이 해당 안내서를 완성하였습니다.

Tanvirul Arafin

회원 가입일: 01/25/18

143 평판

안내서 1개 작성함

USF Tampa, Team S20-G4, Passmore Spring 2018 USF Tampa, Team S20-G4, Passmore Spring 2018 회원

USFT-PASSMORE-S18S20G4

4 회원들

안내서 7개 작성하였습니다

댓글 0개

댓글 쓰기

조회 통계:

24 시간 전: 3

7일 전: 6

30일 전: 22

전체 시간: 3,173