주요 콘텐츠로 건너뛰기

Cuisinart DLC-10S Pro Classic 7-Cup Food Processor Internal Wiring Replacement

필요한 것

  1. Cuisinart DLC-10S Pro Classic 7-Cup Food Processor Internal Wiring Replacement, Internal Wiring: 1 단계, 이미지 1/1
    • Remove the four screws from the bottom of the processor with a Philips Screwdriver.

  2. Cuisinart DLC-10S Pro Classic 7-Cup Food Processor Internal Wiring Replacement: 2 단계, 이미지 1/1
    • Remove the bottom casing of the processor.

  3. Cuisinart DLC-10S Pro Classic 7-Cup Food Processor Internal Wiring Replacement: 3 단계, 이미지 1/1
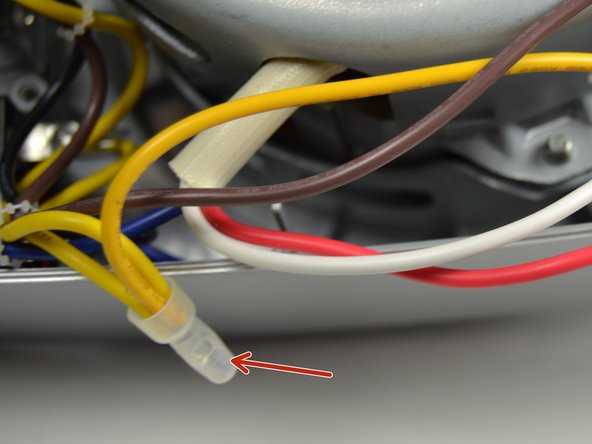
    • If any wires are frayed, cut them off where they are connected by wire nuts.

  4. Cuisinart DLC-10S Pro Classic 7-Cup Food Processor Internal Wiring Replacement: 4 단계, 이미지 1/1
    • Detach the wire nut from the other connected wires.

  5. Cuisinart DLC-10S Pro Classic 7-Cup Food Processor Internal Wiring Replacement: 5 단계, 이미지 1/1
    • Replace the bad wire with a new one of the same gauge.

  6. Cuisinart DLC-10S Pro Classic 7-Cup Food Processor Internal Wiring Replacement: 6 단계, 이미지 1/1
    • Strip the new wire to the same length as the other wires and connect them to a wire nut.

결론

To reassemble your device, follow these instructions in reverse order.

다른 한 분이 해당 안내서를 완성하였습니다.

Riley Carns

회원 가입일: 04/02/15

279 평판

안내서 2개 작성하였습니다

Cal Poly, Team 24-1, Lancaster Winter 2015 Cal Poly, Team 24-1, Lancaster Winter 2015 회원

CPSU-LANCASTER-W15S24G1

1 회원

안내서 2개 작성하였습니다

댓글 0개

댓글 쓰기

조회 통계:

24 시간 전: 1

7일 전: 5

30일 전: 13

전체 시간: 964