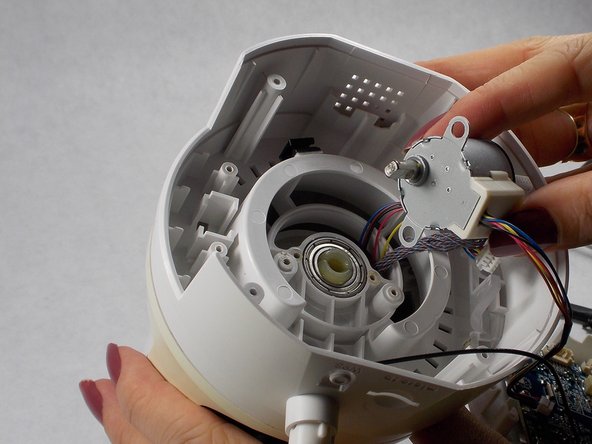
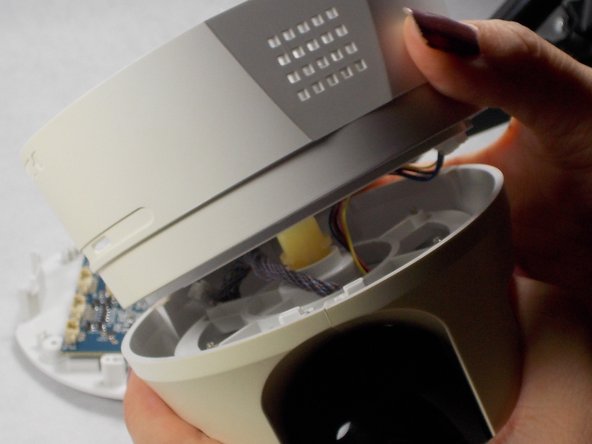
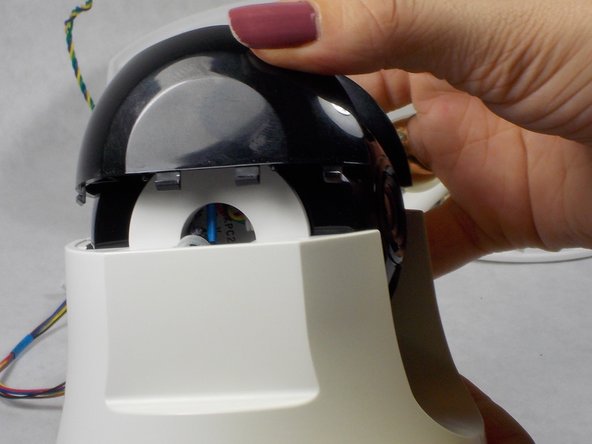
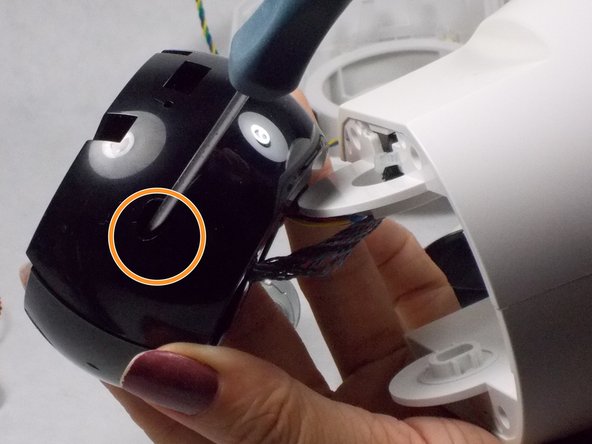
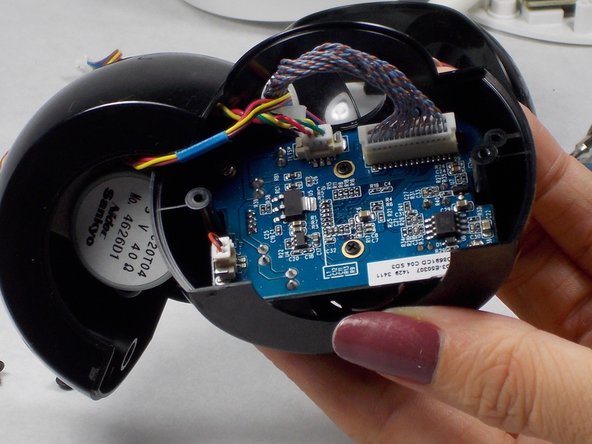
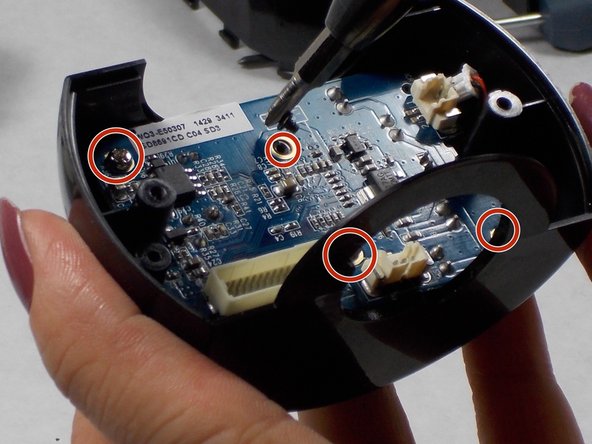
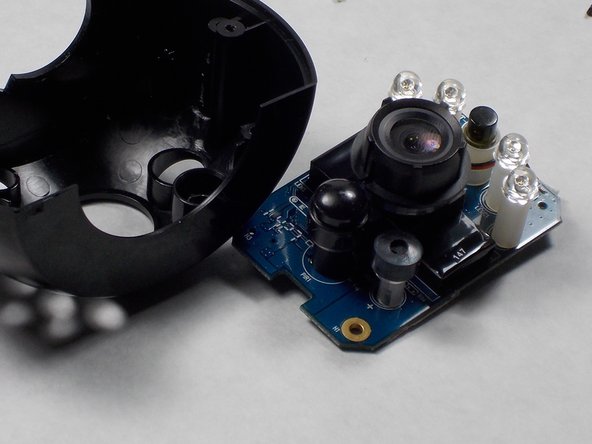
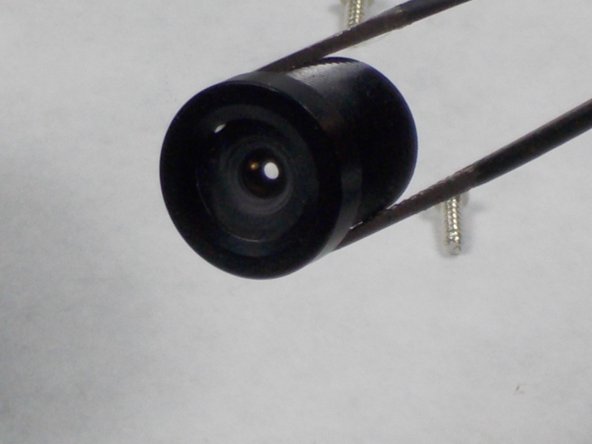
주요 콘텐츠로 건너뛰기

D-Link DCS-5222L Lens Replacement

필요한 것

  1. D-Link DCS-5222L Lens Replacement, Lens: 1 단계, 이미지 1/3 D-Link DCS-5222L Lens Replacement, Lens: 1 단계, 이미지 2/3 D-Link DCS-5222L Lens Replacement, Lens: 1 단계, 이미지 3/3
    • Remove the four rubber feet with tweezers to access the screws.

    • Remove all four 7mm screws by using a #1 Phillips screwdriver.

    • Then, with your hands, pull off the lower part of the camera body.

  2. D-Link DCS-5222L Lens Replacement: 2 단계, 이미지 1/3 D-Link DCS-5222L Lens Replacement: 2 단계, 이미지 2/3 D-Link DCS-5222L Lens Replacement: 2 단계, 이미지 3/3
    • On the base motherboard, there are five connecting cables. Disconnect all of them from the motherboard gently using safety tweezers.

    • Do not cut or damage the cables.

    • Disconnecting the antenna cable from motherboard is not necessary.

  3. D-Link DCS-5222L Lens Replacement: 3 단계, 이미지 1/3 D-Link DCS-5222L Lens Replacement: 3 단계, 이미지 2/3 D-Link DCS-5222L Lens Replacement: 3 단계, 이미지 3/3
    • Remove the two 7mm screws holding the motor using a #1 Phillips screwdriver.

    • Pull off the motor and lift away the midbody of the camera using your hands.

  4. D-Link DCS-5222L Lens Replacement: 4 단계, 이미지 1/2 D-Link DCS-5222L Lens Replacement: 4 단계, 이미지 2/2
    • Separate the black camera shroud from the upper body by prying loose the tabs with a plastic opening tool or spudger.

    • Use your hands to wiggle the shroud free.

  5. D-Link DCS-5222L Lens Replacement: 5 단계, 이미지 1/3 D-Link DCS-5222L Lens Replacement: 5 단계, 이미지 2/3 D-Link DCS-5222L Lens Replacement: 5 단계, 이미지 3/3
    • Use a #1 Phillips screwdriver to unscrew the four 5mm screws on both sides of the black camera housing to separate it from white body.

    • Unscrew the two 7mm #1 Phillips screws on both sides of the camera housing to open it.

  6. D-Link DCS-5222L Lens Replacement: 6 단계, 이미지 1/3 D-Link DCS-5222L Lens Replacement: 6 단계, 이미지 2/3 D-Link DCS-5222L Lens Replacement: 6 단계, 이미지 3/3
    • Gently disconnect the three cables from the small motherboard using safety tweezers.

    • Use a #0 Phillips screwdriver to remove the two black 2mm screws and a #1 Phillips screwdriver to remove the 2 silver 6mm screws.

    • Separate the board from the black housing.

  7. D-Link DCS-5222L Lens Replacement: 7 단계, 이미지 1/3 D-Link DCS-5222L Lens Replacement: 7 단계, 이미지 2/3 D-Link DCS-5222L Lens Replacement: 7 단계, 이미지 3/3
    • Using your fingers, remove the focus adjustment ring.

    • Twist the lens to unscrew it from the camera module.

    • Replace the broken lens with new one and reassemble all parts of the camera respectively.

결론

To reassemble your device, follow these instructions in reverse order.

다른 한 분이 해당 안내서를 완성하였습니다.

Atefeh Rahmani

회원 가입일: 10/27/18

172 평판

안내서 1개 작성함

UMass Dartmouth, Team S2-G5, Peak Fall 2018 UMass Dartmouth, Team S2-G5, Peak Fall 2018 회원

UMASSD-PEAK-F18S2G5

3 회원들

안내서 10개 작성하였습니다

댓글 0개

댓글 쓰기

조회 통계:

24 시간 전: 1

7일 전: 4

30일 전: 13

전체 시간: 933