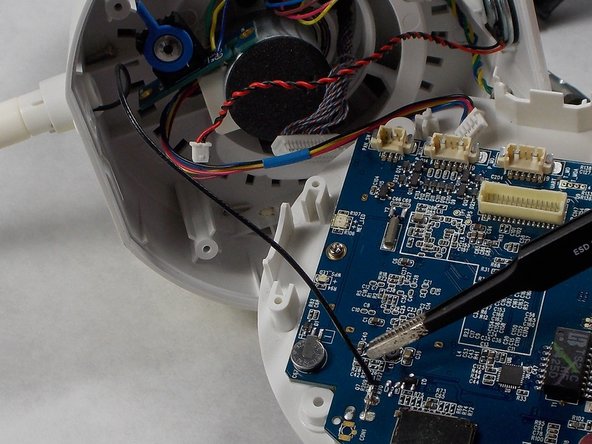
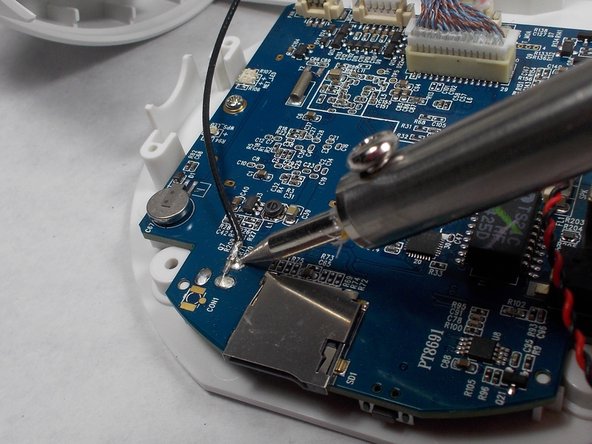
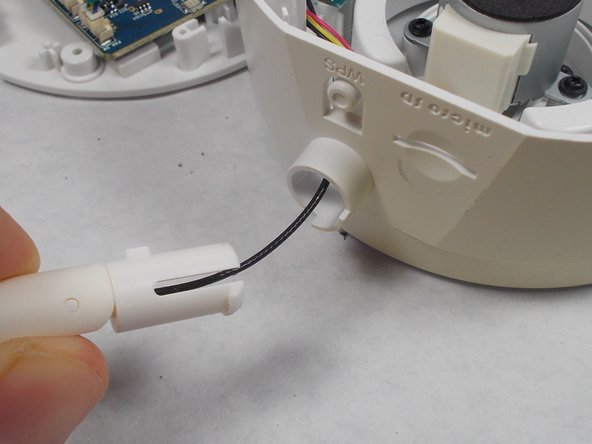
주요 콘텐츠로 건너뛰기

D-Link DCS-5222L WiFi Antenna Replacement

필요한 것

  1. D-Link DCS-5222L WiFi Antenna Replacement, WiFi Antenna: 1 단계, 이미지 1/3 D-Link DCS-5222L WiFi Antenna Replacement, WiFi Antenna: 1 단계, 이미지 2/3 D-Link DCS-5222L WiFi Antenna Replacement, WiFi Antenna: 1 단계, 이미지 3/3
    • Locate and remove the four rubber feet on the bottom of the camera using your fingers or a pair of tweezers.

  2. D-Link DCS-5222L WiFi Antenna Replacement: 2 단계, 이미지 1/2 D-Link DCS-5222L WiFi Antenna Replacement: 2 단계, 이미지 2/2
    • Using a #1 Phillips screwdriver, remove the four 7mm screws that are exposed by the removed feet.

  3. D-Link DCS-5222L WiFi Antenna Replacement: 3 단계, 이미지 1/2 D-Link DCS-5222L WiFi Antenna Replacement: 3 단계, 이미지 2/2
    • Using your hands, open the camera body by wiggling the bottom free from the upper shell.

    • Open the shell carefully, as the motherboard is attached to the bottom of the body; all of the components in the upper body are accordingly connected to the bottom. Likewise, the WiFi antenna is mounted to the upper shell, but a wire connects it to the motherboard on the bottom of the body.

  4. D-Link DCS-5222L WiFi Antenna Replacement: 4 단계, 이미지 1/2 D-Link DCS-5222L WiFi Antenna Replacement: 4 단계, 이미지 2/2
    • Using your soldering iron, heat the antenna contacts on the motherboard until the wire releases.

    • Soldering Irons are hot and can burn you and ignite flammable materials.

  5. D-Link DCS-5222L WiFi Antenna Replacement: 5 단계, 이미지 1/2 D-Link DCS-5222L WiFi Antenna Replacement: 5 단계, 이미지 2/2
    • Pinch the WiFi antenna's clip mount inside the upper part of the body with blunt ended tweezers while pulling the antenna from the outside.

결론

To reassemble your device, follow these instructions in reverse order.

Ryan Null

회원 가입일: 10/26/18

377 평판

안내서 2개 작성하였습니다

UMass Dartmouth, Team S2-G5, Peak Fall 2018 UMass Dartmouth, Team S2-G5, Peak Fall 2018 회원

UMASSD-PEAK-F18S2G5

3 회원들

안내서 10개 작성하였습니다

댓글 0개

댓글 쓰기

조회 통계:

24 시간 전: 1

7일 전: 3

30일 전: 14

전체 시간: 1,093