주요 콘텐츠로 건너뛰기

D-Link DCS-825L Back Casing Replacement

필요한 것

  1. D-Link DCS-825L Back Casing Replacement, Accent Ring: 1 단계, 이미지 1/1
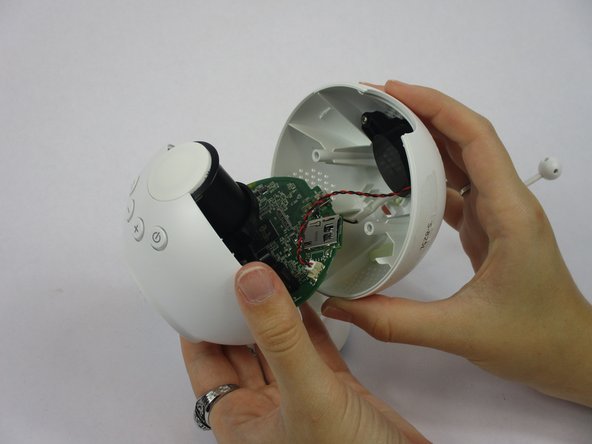
    • Grasp the side of the accent ring. There is a notch that your thumb will be able to grab ahold of.

  2. D-Link DCS-825L Back Casing Replacement: 2 단계, 이미지 1/1
    • Twist the accent ring until it pops off. You may need to use both hands if the accent ring is stuck.

  3. D-Link DCS-825L Back Casing Replacement: 3 단계, 이미지 1/1
    • Replace your accent ring with whichever color you choose.

  4. D-Link DCS-825L Back Casing Replacement, Back Casing: 4 단계, 이미지 1/2 D-Link DCS-825L Back Casing Replacement, Back Casing: 4 단계, 이미지 2/2
    • Remove one Phillips #2 screw from each side of the camera lens.

  5. D-Link DCS-825L Back Casing Replacement: 5 단계, 이미지 1/3 D-Link DCS-825L Back Casing Replacement: 5 단계, 이미지 2/3 D-Link DCS-825L Back Casing Replacement: 5 단계, 이미지 3/3
    • Pull the Wi-Fi Baby Camera open.

    • It should be easily done after the screws are removed.

  6. D-Link DCS-825L Back Casing Replacement: 6 단계, 이미지 1/2 D-Link DCS-825L Back Casing Replacement: 6 단계, 이미지 2/2
    • Take your tweezers and gently pull the white tip out from its plug that is connected to a red and black twisted wire.

  7. D-Link DCS-825L Back Casing Replacement: 7 단계, 이미지 1/3 D-Link DCS-825L Back Casing Replacement: 7 단계, 이미지 2/3 D-Link DCS-825L Back Casing Replacement: 7 단계, 이미지 3/3
    • Take your tweezers and gently pull the white tip that is on the end of the white wire (the antenna) out from its plug in.

결론

To reassemble your device, follow these instructions in reverse order.

April Ulrich

회원 가입일: 10/09/18

205 평판

안내서 2개 작성하였습니다

USF Tampa, Team S1-G5, Leahy Fall 2018 USF Tampa, Team S1-G5, Leahy Fall 2018 회원

USFT-LEAHY-F18S1G5

4 회원들

안내서 4개 작성하였습니다

댓글 0개

댓글 쓰기

조회 통계:

24 시간 전: 0

7일 전: 1

30일 전: 4

전체 시간: 385