이 버전에는 잘못된 편집 사항이 있을 수 있습니다. 최신 확인된 스냅샷으로 전환하십시오.
필요한 것
-
이 단계는 번역되지 않았습니다. 번역을 도와주십시오
-
Use your finger tips to pinch the damaged propeller.
-
Twist the propeller counterclockwise and pull up to remove.
-
-
이 단계는 번역되지 않았습니다. 번역을 도와주십시오
-
Remove the eight 7 mm hex screws by turning counterclockwise with a 2 mm hex bit.
-
-
이 단계는 번역되지 않았습니다. 번역을 도와주십시오
-
Remove the twelve 8.7 mm hex screws with a 2 mm hex bit from the motor bases.
-
-
-
이 단계는 번역되지 않았습니다. 번역을 도와주십시오
-
Flip the drone on its back
-
Remove the eight 4.5 mm hex screws by turning them counterclockwise with a 1.5 mm hex bit.
-
Separate the mesh from the drone by pulling up gently and rocking left to right.
-
-
이 단계는 번역되지 않았습니다. 번역을 도와주십시오
-
Remove two 1.2mm screws using the JIS #000 bit from the camera cable retaining bracket.
-
-
이 단계는 번역되지 않았습니다. 번역을 도와주십시오
-
Lift the camera connector at one end with your hand and remove the mesh.
-
-
이 단계는 번역되지 않았습니다. 번역을 도와주십시오
-
Remove the two 1.2 mm screws using a JIS #000 bit from the antenna retaining bracket.
-
Pull the four U.FL antennae up.
-
Remove the two 4 mm screws using a JIS #000 bit.
-
-
이 단계는 번역되지 않았습니다. 번역을 도와주십시오
-
Press the connector tabs with a spudger and pull on the wire simultaneously.
-
Remove the shell from the rest of the drone.
-
-
이 단계는 번역되지 않았습니다. 번역을 도와주십시오
-
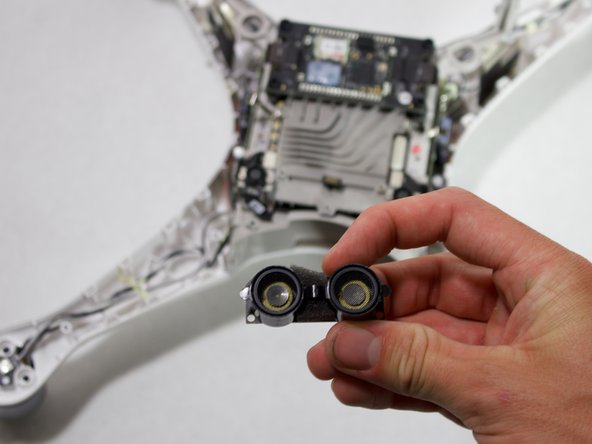
Pry the ribbon cable off the ultrasonic sensor using a plastic opening tool.
-


다른 한 분이 해당 안내서를 완성하였습니다.
팀

Cal Poly, Team S15-G6, White Fall 2018 Cal Poly, Team S15-G6, White Fall 2018 회원
CPSU-WHITE-F18S15G6
4 회원들
안내서 6개 작성하였습니다