주요 콘텐츠로 건너뛰기

DeLonghi Coffee Maker grindstones replacement

필요한 것

  1. DeLonghi Coffee Maker grindstones replacement, Grindstones: 1 단계, 이미지 1/3 DeLonghi Coffee Maker grindstones replacement, Grindstones: 1 단계, 이미지 2/3 DeLonghi Coffee Maker grindstones replacement, Grindstones: 1 단계, 이미지 3/3
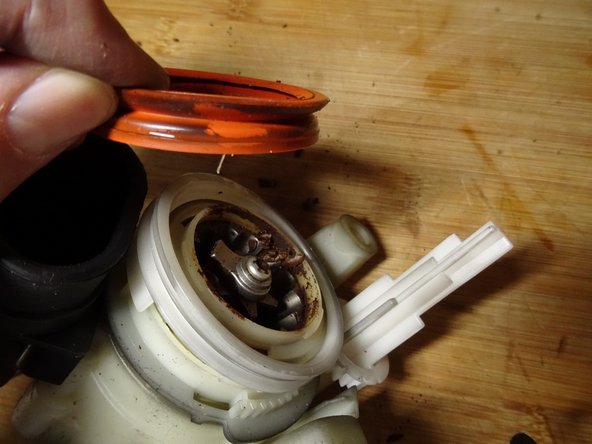
    • If the bean hopper is still attached, it must be removed.

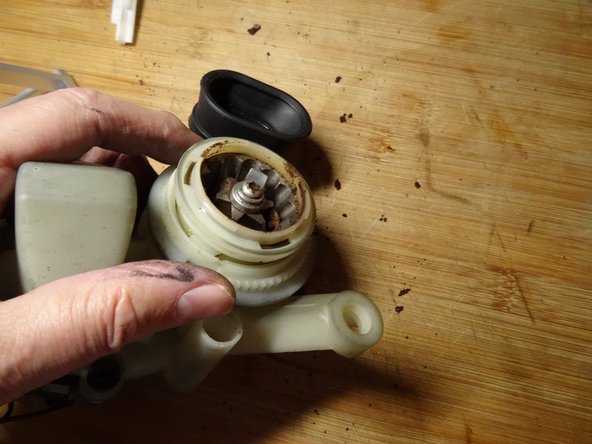
    • Use a pointed tool to remove the cap on the adjustment dial.

  2. DeLonghi Coffee Maker grindstones replacement: 2 단계, 이미지 1/3 DeLonghi Coffee Maker grindstones replacement: 2 단계, 이미지 2/3 DeLonghi Coffee Maker grindstones replacement: 2 단계, 이미지 3/3
    • There is a Phillips screw underneath. Unscrew it.

    • Note the position and pull the dial upwards.

    • Pull the bean container upwards.

    • On some models, there are two more Phillips screws in the bean hopper.

  3. DeLonghi Coffee Maker grindstones replacement: 3 단계, 이미지 1/3 DeLonghi Coffee Maker grindstones replacement: 3 단계, 이미지 2/3 DeLonghi Coffee Maker grindstones replacement: 3 단계, 이미지 3/3
    • Mark the settings of the wheels with a pencil.

    • Use a spatula to loosen the two detents on the sides.

    • Pull off the red silicone seal.

  4. DeLonghi Coffee Maker grindstones replacement: 4 단계, 이미지 1/3 DeLonghi Coffee Maker grindstones replacement: 4 단계, 이미지 2/3 DeLonghi Coffee Maker grindstones replacement: 4 단계, 이미지 3/3
    • Lift off the white plastic ring.

    • Turn the white ring with the ring gear counterclockwise as far as it will go.

    • The grinding ring is free and you can lift it out upwards.

  5. DeLonghi Coffee Maker grindstones replacement: 5 단계, 이미지 1/1
    • The grinding ring can be completely removed from the plastic holder. To do this, lift the three detents to the side and push the ring out.

    • The ring has three flattened sides. Unfortunately, such a ring is not commercially available anywhere. If it is still good, you may be able to use it in another mill.

  6. DeLonghi Coffee Maker grindstones replacement: 6 단계, 이미지 1/2 DeLonghi Coffee Maker grindstones replacement: 6 단계, 이미지 2/2
    • The grinding cone is fastened with a Torx T20 screw with left-hand thread.

    • Unscrew the screw clockwise, i.e. the wrong way round.

    • When assembling, make sure that the screw with its fastening part fits exactly into the intended groove.

  7. DeLonghi Coffee Maker grindstones replacement: 7 단계, 이미지 1/2 DeLonghi Coffee Maker grindstones replacement: 7 단계, 이미지 2/2
    • Carefully lift the grinding cone upwards.

    • This grinding cone is the same as on the Jura and can now be replaced.

    • There are three metal balls on springs under the grinding cone. They are stuck in three sleeves in the plastic driver. Make sure that none of these parts get lost.

    • Lift the driver up and out.

    • Now you can clean all parts thoroughly.

    • When reassembling, make sure that the metal balls fit into the corresponding recesses in the cone.

결론

Work through the steps in reverse order to reassemble your device.

다른 한 분이 해당 안내서를 완성하였습니다.

다음 번역가들에게 특별히 감사 드립니다:

de en

100%

oldturkey03님은 저희가 세상을 수리하는데 동참하신 분입니다! 기여하시겠습니까?
번역 시작하기 ›

VauWeh

회원 가입일: 10/19/15

203,705 평판

안내서 246개 작성하였습니다

Repair is War on Entropy Repair is War on Entropy 회원

Community

25 회원들

안내서 1,126개 작성하였습니다

댓글 0개

댓글 쓰기

조회 통계:

24 시간 전: 1

7일 전: 6

30일 전: 53

전체 시간: 854