소개
If no more coffee comes out, but hot water can still be drawn off, the upper piston may be blocked. You can replace it or try cleaning and descaling it. It is highly recommended to replace all seals. Buy an appropriate maintenance set before starting the repair.
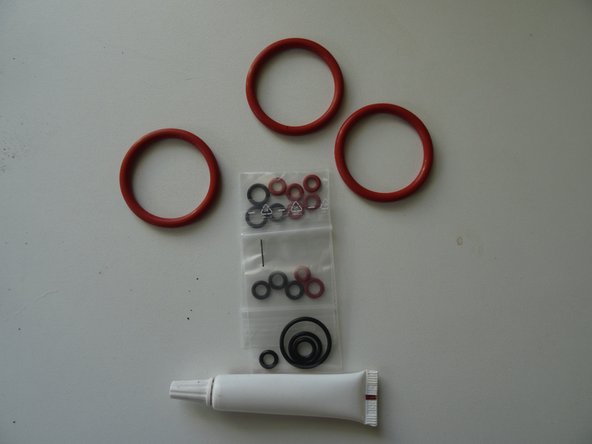
필요한 것
-
-
Remove all attachments such as water tank, pulp drawer, brew group.
-
Turn the machine with the back facing you.
-
Remove five Torx T20 security screws.
-
-
-
Push the side panel back about 1.5 cm.
-
Lift off the panel.
-
The following compononents are exposed:
-
Heater
-
Expansion chamber
-
Gear drive
-
Steam valve
-
-
-
Depending on the model, the steam tap/water spout must be removed, there are slight differences here.
-
Pull out the plastic clip on the steam nozzle.
-
Pull the steam nozzle out towards you.
-
-
-
If you haven't already done so, also detach the right-hand cover on the water tank.
-
Remove the four Phillips screws securing the top cover.
-
Lift the top cover up a bit. That might be a bit sticky.
-
If there is a cup warmer, then unscrew the nut SW7 with which the two green-yellow cables are connected and loosen it. The two brown cables on the other side can stay if you just put the cover on top.
-
Place the top cover on top, or remove it entirely.
-
-
-
The remaining front cover must also be removed.
-
Unscrew two screws on the left side.
-
Unscrew a screw on the right side.
-
Gently pull the front cover down. She might be a bit stuck.
-
-
-
-
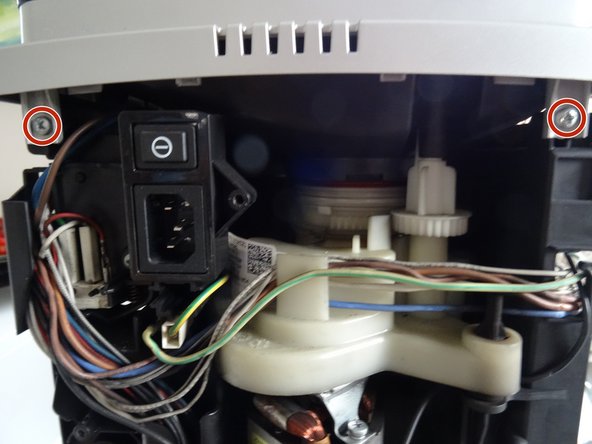
The support of the upper piston is fixed with two screws on the left side. Depending on the model, these screws must be uncovered.
-
The first picture shows a model with an additional steam heater. Here the steam heater has to be unscrewed (one short screw on top, one further down), then it can be pulled out a few centimetres.
-
The second picture shows a model with a manual steam tap. Here the two screws on the tap must be loosened, then the steam tap can be pushed a little to the side.
-
Once the two screws are exposed, unscrew them.
-
-
-
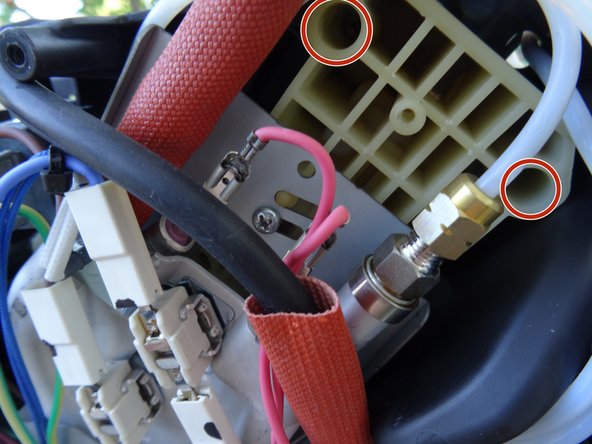
Pull out the clip at the top left and loosen the pressure line. Pay attention to the O-ring seal. It either hangs on the line or afterwards. When reassembling, replace it with a new one if possible.
-
Pull out the clamp in the middle and loosen the pressure line. Pay attention to the O-ring seal. It either hangs on the line or afterwards. When reassembling, replace it with a new one if possible.
-
Pull out the clamp on the bottom left and loosen the pressure line. Pay attention to the O-ring seal. It either hangs on the line or afterwards. When reassembling, replace it with a new one if possible.
-
-
-
Pull out the pressure hoses that are in the way through the openings on the left.
-
Detach any silicone hose that may be present.
-
The upper piston support plate is now free. However, it is very tight and it is tricky to get it out. Be patient and work carefully. Make sure that the ribbon cable to the control panel is not damaged.
-
-
-
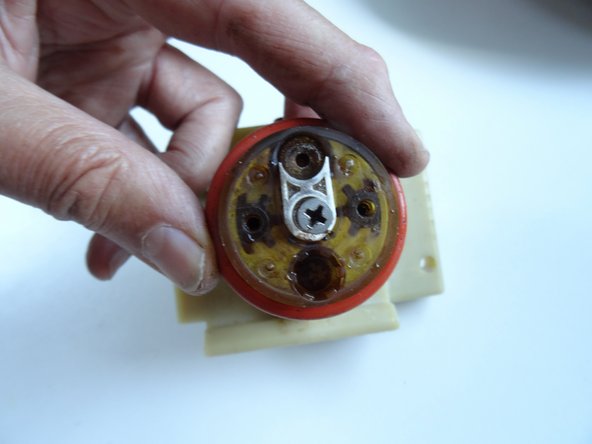
The piston is attached to the gray plastic part with a small ring retainer. Push the fuse to the side and store it well.
-
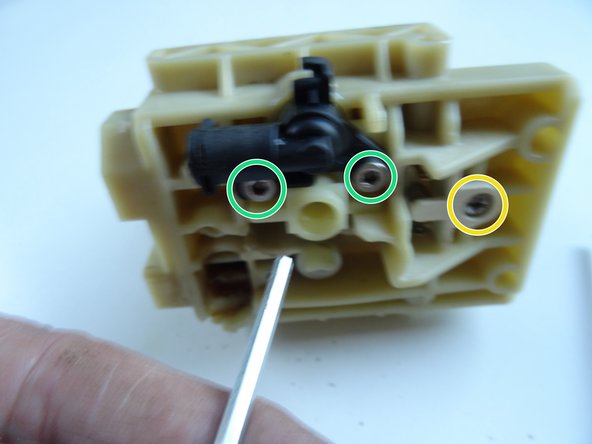
Turn the piston around. There is a recessed Torx T10 screw in the exact center. Unscrew it.
-


Work the steps in reverse order to reassemble your device.
Work the steps in reverse order to reassemble your device.
다음 번역가들에게 특별히 감사 드립니다:
100%

이 번역자 분들은 저희가 세상을 수리하는데 동참해 주시는 분입니다! 기여하시겠습니까?
번역 시작하기 ›
팀
