주요 콘텐츠로 건너뛰기

DeWalt DW938 Brush Head Replacement

필요한 것

  1. DeWalt DW938 Brush Head Replacement, Clam Shell: 1 단계, 이미지 1/3 DeWalt DW938 Brush Head Replacement, Clam Shell: 1 단계, 이미지 2/3 DeWalt DW938 Brush Head Replacement, Clam Shell: 1 단계, 이미지 3/3
    • Use a torque bit screw driver to remove the T10 18.3 mm screw on the handle.

    • Use a torque bit screw driver to remove 6 T10 21.5 mm screws on the handle.

    • Insure power source is removed from tool.

    • Insure blade is removed from tool.

  2. DeWalt DW938 Brush Head Replacement: 2 단계, 이미지 1/1
    • Carefully cut the safety sticker with a blade along the seam.

  3. DeWalt DW938 Brush Head Replacement: 3 단계, 이미지 1/1
    • Remove the Clam Shell from the handle unit.

  4. DeWalt DW938 Brush Head Replacement, Switch VSR: 4 단계, 이미지 1/1
    • Lift the mechanical device off the pins of the clam shell.

  5. DeWalt DW938 Brush Head Replacement: 5 단계, 이미지 1/2 DeWalt DW938 Brush Head Replacement: 5 단계, 이미지 2/2
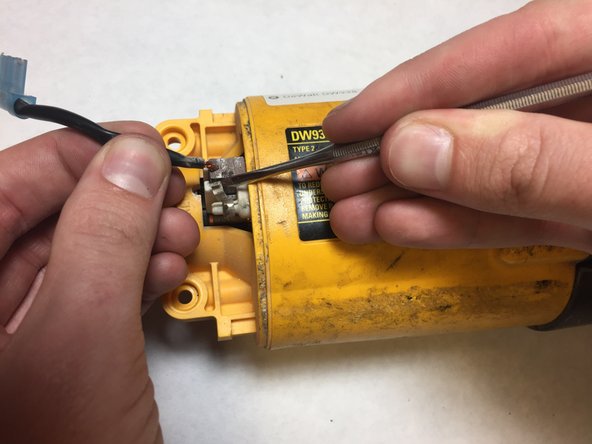
    • Remove the red and black trigger wires from the brush leads with the pliers.

  6. DeWalt DW938 Brush Head Replacement: 6 단계, 이미지 1/2 DeWalt DW938 Brush Head Replacement: 6 단계, 이미지 2/2
    • Remove the VSR trigger and the lock button.

  7. DeWalt DW938 Brush Head Replacement, Brush Head: 7 단계, 이미지 1/3 DeWalt DW938 Brush Head Replacement, Brush Head: 7 단계, 이미지 2/3 DeWalt DW938 Brush Head Replacement, Brush Head: 7 단계, 이미지 3/3
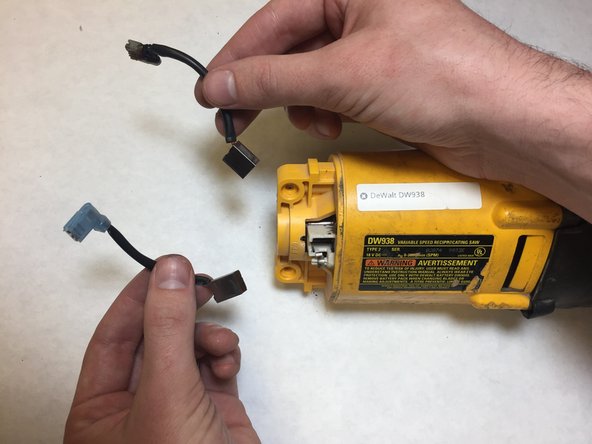
    • Push in locking clips to remove the brush head.

    • Repeat for the other brush.

결론

To reassemble your device, follow these instructions in reverse order.

다른 한 분이 해당 안내서를 완성하였습니다.

Christopher Chin

회원 가입일: 03/08/17

316 평판

안내서 3개 작성하였습니다

IUPUI, Team S4-G4, Baechle Spring 2017 IUPUI, Team S4-G4, Baechle Spring 2017 회원

IUPUI-BAECHLE-S17S4G4

4 회원들

안내서 3개 작성하였습니다

댓글 0개

댓글 쓰기

조회 통계:

24 시간 전: 0

7일 전: 1

30일 전: 12

전체 시간: 1,196