주요 콘텐츠로 건너뛰기

DeWalt DWE4011 Power Switch Replacement

필요한 것

  1. DeWalt DWE4011 Power Switch Replacement, Power Switch: 1 단계, 이미지 1/1
    • Turn to the bottom of the device and remove the 1 1/4" screw shown using a T15 Torx Screwdriver.

  2. DeWalt DWE4011 Power Switch Replacement: 2 단계, 이미지 1/1
    • Remove the outer casing by pulling the end handle away from the field case.

  3. DeWalt DWE4011 Power Switch Replacement: 3 단계, 이미지 1/1
    • Unscrew the pin that is holding the main power cord in place and remove the cord.

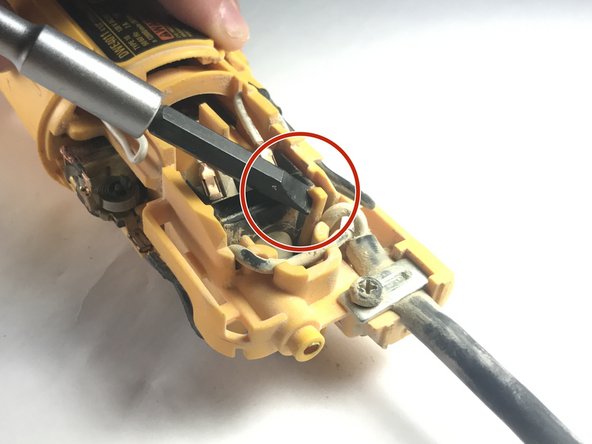
  4. DeWalt DWE4011 Power Switch Replacement: 4 단계, 이미지 1/2 DeWalt DWE4011 Power Switch Replacement: 4 단계, 이미지 2/2
    • Pull back the tab holding the switch box in place using a nylon spudger. There is one on top and bottom shown in the image.

  5. DeWalt DWE4011 Power Switch Replacement: 5 단계, 이미지 1/1
    • Remove the switch box entirely from its normal position. Gently pull off the connections from the switch box to the motor.

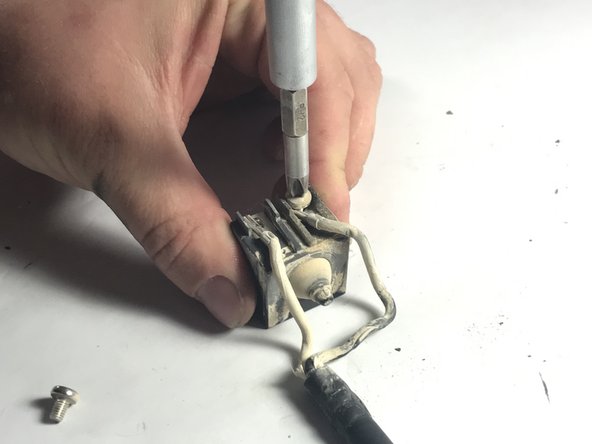
  6. DeWalt DWE4011 Power Switch Replacement: 6 단계, 이미지 1/2 DeWalt DWE4011 Power Switch Replacement: 6 단계, 이미지 2/2
    • Using a small Phillips head screwdriver, remove the screws that hold the white colored wires from the power cord in place.

결론

To reassemble your device, follow these instructions in reverse order.

다른 한 분이 해당 안내서를 완성하였습니다.

Kory Dalesky

회원 가입일: 04/04/19

339 평판

안내서 2개 작성하였습니다

댓글 0개

댓글 쓰기

조회 통계:

24 시간 전: 0

7일 전: 3

30일 전: 28

전체 시간: 1,121