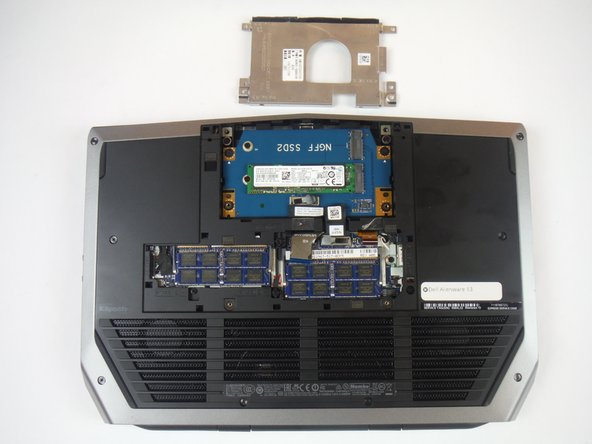
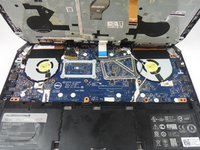
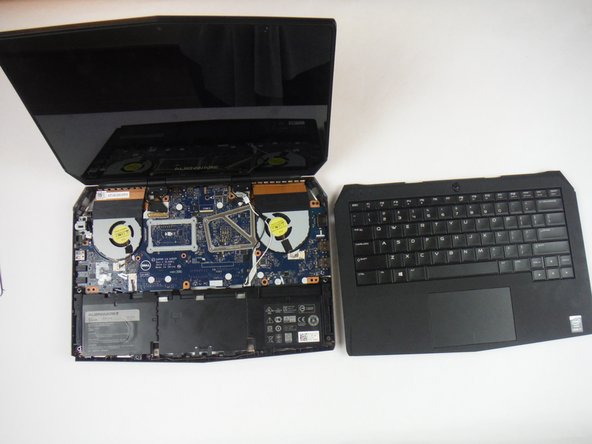
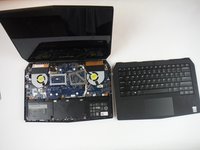
주요 콘텐츠로 건너뛰기

Dell Alienware 13 Computer Base Replacement

필요한 것

  1. Dell Alienware 13 Computer Base Replacement, Base Panel: 1 단계, 이미지 1/1
    • Working on an electrical device while plugged in can cause injury due to electrical shock. Ensure that all external power is disconnected from the device.

    • Close the device and turn the device over.

  2. Dell Alienware 13 Computer Base Replacement: 2 단계, 이미지 1/1
    • Remove (2) 5 mm Phillips head screws attaching the small access panel to the base using a Phillips # 1 screwdriver.

    • The (2) screws are attached to the base panel with retaining clips and won't completely detach from the panel.

  3. Dell Alienware 13 Computer Base Replacement: 3 단계, 이미지 1/3 Dell Alienware 13 Computer Base Replacement: 3 단계, 이미지 2/3 Dell Alienware 13 Computer Base Replacement: 3 단계, 이미지 3/3
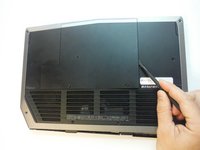
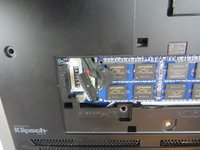
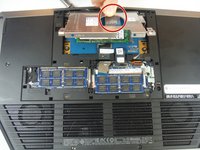
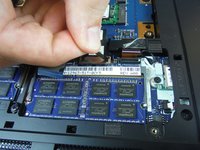
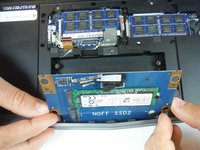
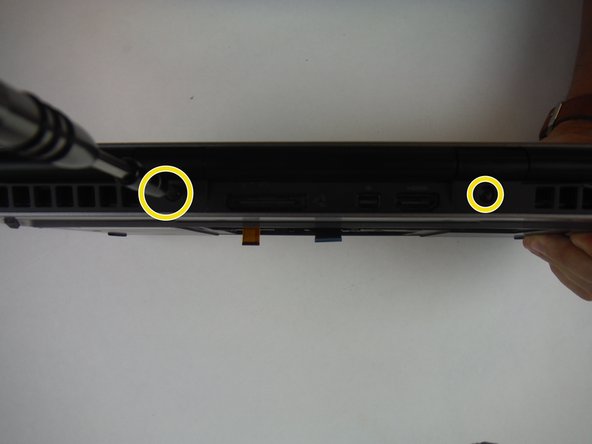
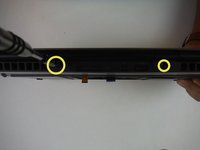
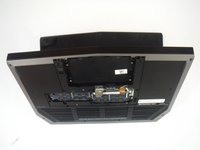
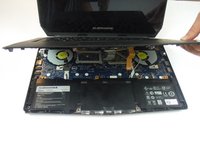
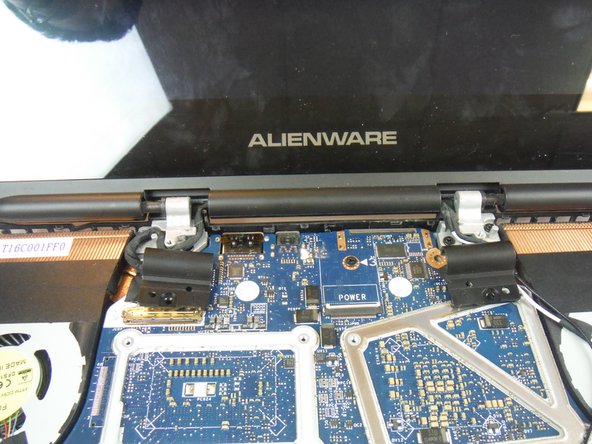
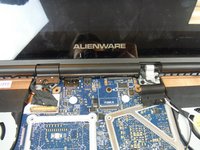
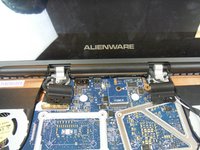
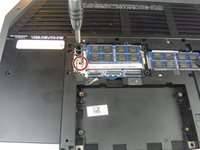
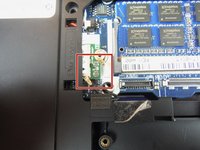
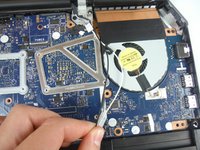
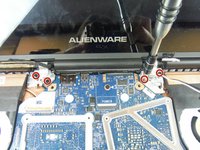
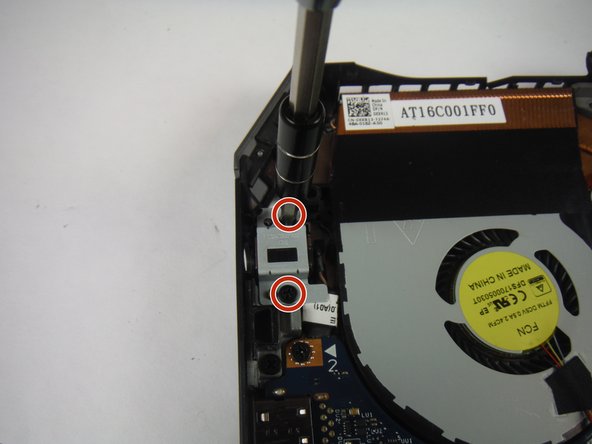
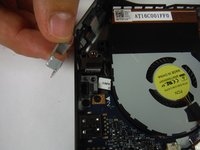
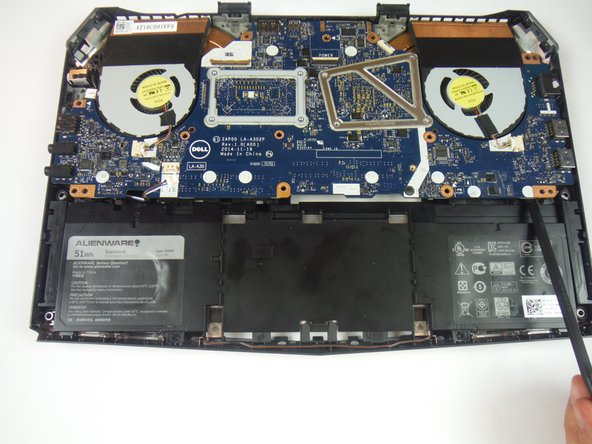
    • Remove the small access panel using a heavy duty spudger.

  4. Dell Alienware 13 Computer Base Replacement, Computer Base: 4 단계, 이미지 1/2 Dell Alienware 13 Computer Base Replacement, Computer Base: 4 단계, 이미지 2/2
    • Disconnect the battery cable from the battery cable terminal.

  5. Dell Alienware 13 Computer Base Replacement: 5 단계, 이미지 1/1
    • Remove (4) 6 mm Phillips head screws from the solid-state metal drive bracket, using a Phillips # 1 screwdriver.

  6. Dell Alienware 13 Computer Base Replacement: 6 단계, 이미지 1/2 Dell Alienware 13 Computer Base Replacement: 6 단계, 이미지 2/2
    • Grab the pull tab to pivot the solid-state drive bracket upwards. Remove the bracket from the computer base.

  7. Dell Alienware 13 Computer Base Replacement: 7 단계, 이미지 1/2 Dell Alienware 13 Computer Base Replacement: 7 단계, 이미지 2/2
    • Using the pull tab, disconnect the black solid-state drive cable from the system board.

  8. Dell Alienware 13 Computer Base Replacement: 8 단계, 이미지 1/1
    • Remove (2) 3 mm Phillips head screws, using a Phillips # 0 screwdriver, that connect the solid-state drive assembly to the computer base.

  9. Dell Alienware 13 Computer Base Replacement: 9 단계, 이미지 1/2 Dell Alienware 13 Computer Base Replacement: 9 단계, 이미지 2/2
    • Lift up on the solid-state drive assembly to remove it from the computer base.

  10. Dell Alienware 13 Computer Base Replacement: 10 단계, 이미지 1/2 Dell Alienware 13 Computer Base Replacement: 10 단계, 이미지 2/2
    • Locate two cables labeled, "KB Backlight" (orange) and "KB Membrane" (black). Lift up on the latches to disconnect the cables from the system board.

    • The latches that connect the cables to the system board are very delicate. Handle with care to avoid damaging them.

  11. Dell Alienware 13 Computer Base Replacement: 11 단계, 이미지 1/3 Dell Alienware 13 Computer Base Replacement: 11 단계, 이미지 2/3 Dell Alienware 13 Computer Base Replacement: 11 단계, 이미지 3/3
    • Remove (8) 9 mm Phillips head screws using a Phillips # 1 screwdriver, that secures the palm-rest assembly to the computer base.

    • Remove (4) 8 mm Phillips head screws using a Phillips # 1 screwdriver.

    • Remove (2) 7 mm Phillips head screws using a Phillips # 1 screwdriver.

  12. Dell Alienware 13 Computer Base Replacement: 12 단계, 이미지 1/2 Dell Alienware 13 Computer Base Replacement: 12 단계, 이미지 2/2
    • Lift the computer base slightly towards you and push the release tabs on the palm-rest assembly until it pops out using a spudger.

  13. Dell Alienware 13 Computer Base Replacement: 13 단계, 이미지 1/3 Dell Alienware 13 Computer Base Replacement: 13 단계, 이미지 2/3 Dell Alienware 13 Computer Base Replacement: 13 단계, 이미지 3/3
    • Turn the computer over and open the display as far as possible.

    • Using a plastic spudger, pry up along the edges of the palm-rest assembly.

    • Gently lift the palm-rest assembly.

  14. Dell Alienware 13 Computer Base Replacement: 14 단계, 이미지 1/3 Dell Alienware 13 Computer Base Replacement: 14 단계, 이미지 2/3 Dell Alienware 13 Computer Base Replacement: 14 단계, 이미지 3/3
    • Lift the connector latch and disconnect the power-button board cable from the system board. Identified as a cable with a blue tab.

    • Lift the palm-rest assembly off the computer base.

  15. Dell Alienware 13 Computer Base Replacement: 15 단계, 이미지 1/3 Dell Alienware 13 Computer Base Replacement: 15 단계, 이미지 2/3 Dell Alienware 13 Computer Base Replacement: 15 단계, 이미지 3/3
    • Open the display as far as possible.

    • Remove (2) 3 mm Phillips head screws, using a Phillips head #0 screwdriver, that secure the hinge caps to the display hinges.

    • Slide and lift the hinge caps off the display hinges.

  16. Dell Alienware 13 Computer Base Replacement: 16 단계, 이미지 1/2 Dell Alienware 13 Computer Base Replacement: 16 단계, 이미지 2/2
    • Close the display and turn the computer over.

    • Remove (1) 2 mm Phillips head screw, using a Phillips head # 0 screwdriver, that secures the wireless-card bracket to the wireless card.

  17. Dell Alienware 13 Computer Base Replacement: 17 단계, 이미지 1/2 Dell Alienware 13 Computer Base Replacement: 17 단계, 이미지 2/2
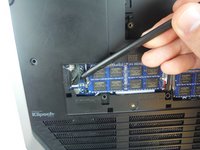
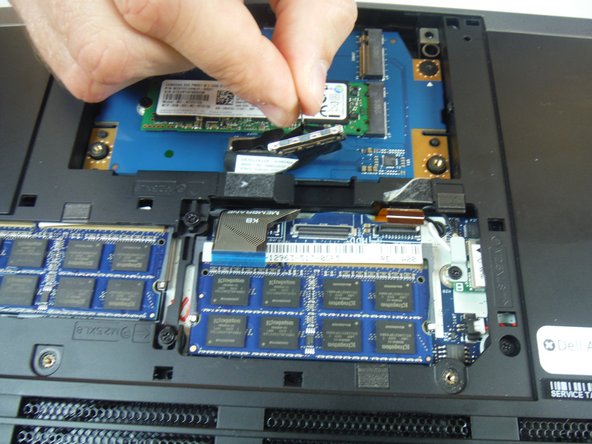
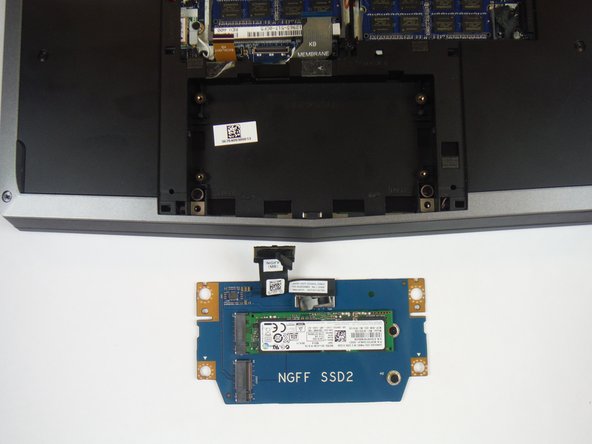
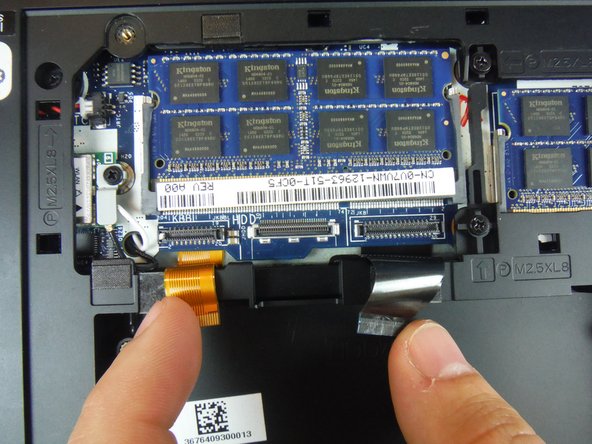
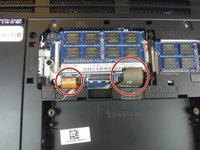
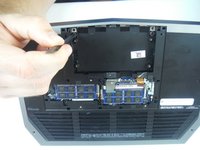
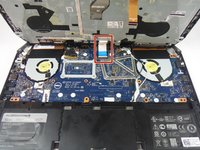
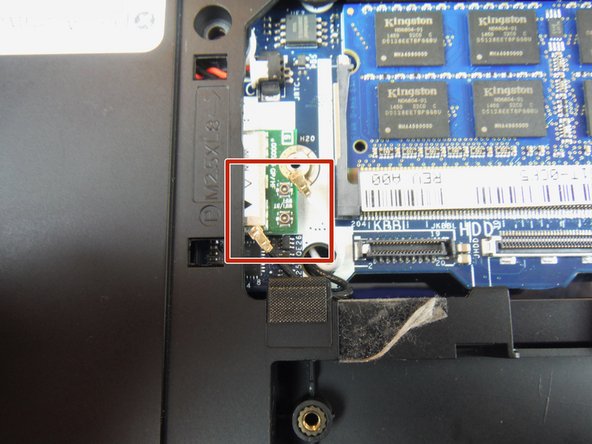
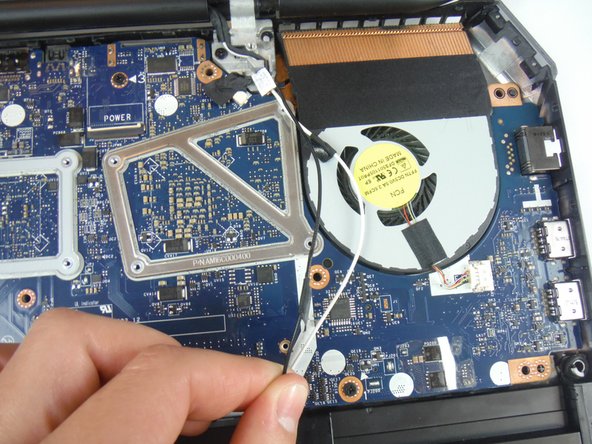
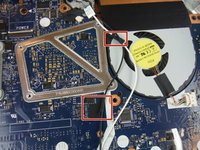
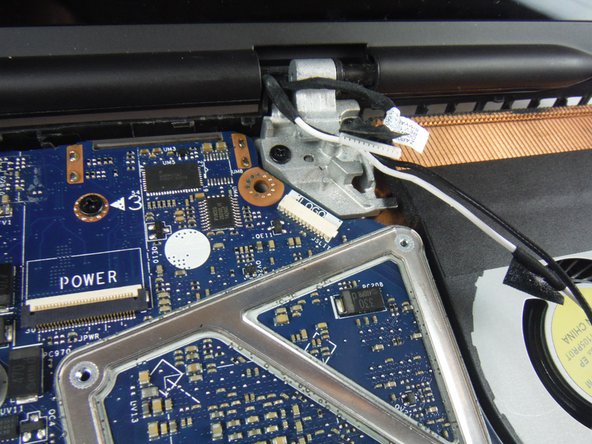
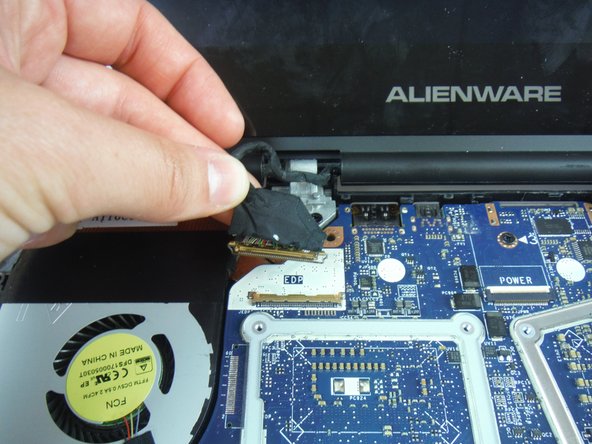
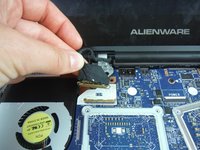
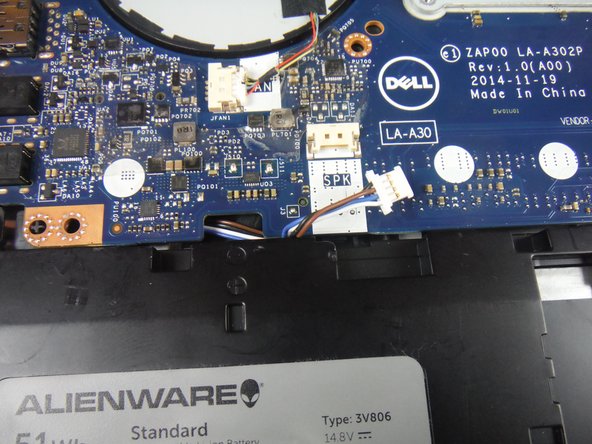
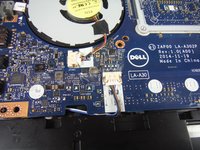
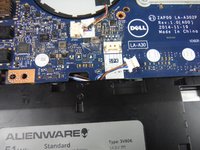
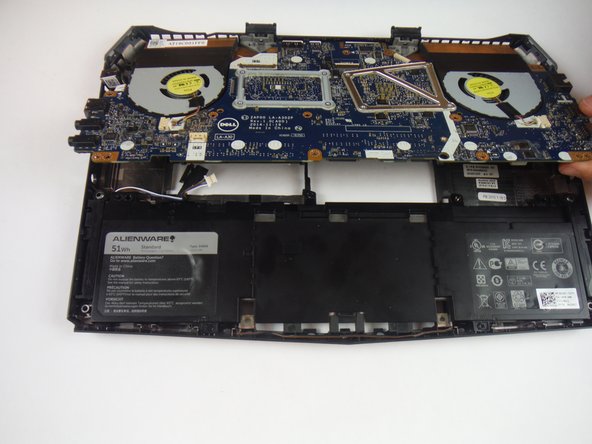
    • Disconnect the antenna cables from the wireless card using a heavy duty spudger. The wires can be removed by applying a force directed upward, away from the device.

  18. Dell Alienware 13 Computer Base Replacement: 18 단계, 이미지 1/3 Dell Alienware 13 Computer Base Replacement: 18 단계, 이미지 2/3 Dell Alienware 13 Computer Base Replacement: 18 단계, 이미지 3/3
    • Turn the computer over and open the display.

    • Peel off the adhesive tapes that secure the antenna cables to the system board.

    • Make note of how the cables are routed before removing any cables from their routing guide.

  19. Dell Alienware 13 Computer Base Replacement: 19 단계, 이미지 1/3 Dell Alienware 13 Computer Base Replacement: 19 단계, 이미지 2/3 Dell Alienware 13 Computer Base Replacement: 19 단계, 이미지 3/3
    • Lift the connector latch and disconnect the display cable from the system board.

    • Disconnect the logo-board cable from the system board.

    • Remove the antenna cables, display cable, and logo-board cable from the routing guides on the display hinges.

  20. Dell Alienware 13 Computer Base Replacement: 20 단계, 이미지 1/3 Dell Alienware 13 Computer Base Replacement: 20 단계, 이미지 2/3 Dell Alienware 13 Computer Base Replacement: 20 단계, 이미지 3/3
    • Remove (4) 8 mm Phillips head screws, using a Phillips # 1 screwdriver, that secure the display assembly to the computer base.

    • Lift the display assembly off the computer base.

  21. Dell Alienware 13 Computer Base Replacement: 21 단계, 이미지 1/2 Dell Alienware 13 Computer Base Replacement: 21 단계, 이미지 2/2
    • Remove the (2) 6 mm Phillips head screws securing the power adapter port bracket with a #1 Phillips screwdriver.

    • Lift and remove the power adapter port bracket.

  22. Dell Alienware 13 Computer Base Replacement: 22 단계, 이미지 1/1
    • Lift up and remove the power adapter port from the computer base.

  23. Dell Alienware 13 Computer Base Replacement: 23 단계, 이미지 1/2 Dell Alienware 13 Computer Base Replacement: 23 단계, 이미지 2/2
    • Disconnect the speaker cable connector from the service board.

  24. Dell Alienware 13 Computer Base Replacement: 24 단계, 이미지 1/3 Dell Alienware 13 Computer Base Replacement: 24 단계, 이미지 2/3 Dell Alienware 13 Computer Base Replacement: 24 단계, 이미지 3/3
    • Remove (3) 6 mm Phillips head screws securing the service board with a #1 Phillips screwdriver.

    • Lift up on the service board assembly using a heavy duty spudger and slide the board towards the battery to remove from the base.

결론

To reassemble your device, follow these instructions in reverse order.

다른 2명이 해당 안내서를 완성하였습니다.

Adam Russell

회원 가입일: 09/26/16

898 평판

안내서 6개 작성하였습니다

USF Tampa, Team 14-2, Eyestone Fall 2016 USF Tampa, Team 14-2, Eyestone Fall 2016 회원

USFT-EYESTONE-F16S14G2

3 회원들

안내서 7개 작성하였습니다

댓글 0개

댓글 쓰기

조회 통계:

24 시간 전: 0

7일 전: 2

30일 전: 5

전체 시간: 971