주요 콘텐츠로 건너뛰기

Dell Alienware 15 R3 Touchpad Replacement

필요한 것

  1. Dell Alienware 15 R3 Touchpad Replacement, Touchpad: 1 단계, 이미지 1/1
    • Remove the 6 M2.5x13 screws holding on the back cover.

    • Remove the 1 M2x3 at the rear of the device that is holding the back cover on.

    • Gently pry on sides of the back cover with the iFixit Opening Tool to release tabs.

    • Pull up and backwards to remove the cover from the computer.

  2. Dell Alienware 15 R3 Touchpad Replacement: 2 단계, 이미지 1/1
    • Disconnect the battery cable located above the hard drive case.

  3. Dell Alienware 15 R3 Touchpad Replacement: 3 단계, 이미지 1/1
    • Remove the M2x3 screw holding the wireless card into place.

    • Lift and slide the wireless card from its slot.

  4. Dell Alienware 15 R3 Touchpad Replacement: 4 단계, 이미지 1/3 Dell Alienware 15 R3 Touchpad Replacement: 4 단계, 이미지 2/3 Dell Alienware 15 R3 Touchpad Replacement: 4 단계, 이미지 3/3
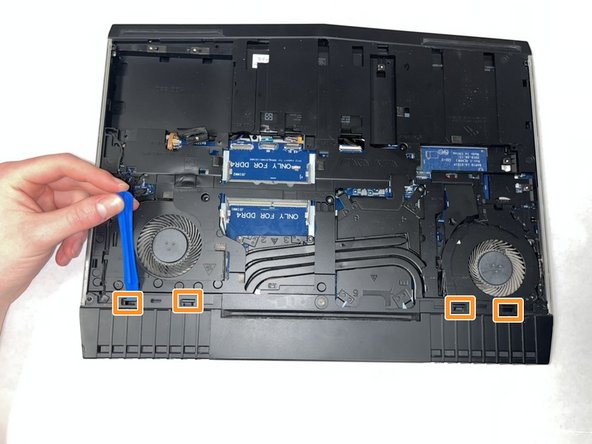
    • Remove the two M2.5x6 screws connecting the rear cover to the computer.

    • Gently pry the rear cover with the iFixit Opening Tool to release the 2 tabs on each side.

    • Slide the rear cover from the computer.

  5. Dell Alienware 15 R3 Touchpad Replacement: 5 단계, 이미지 1/3 Dell Alienware 15 R3 Touchpad Replacement: 5 단계, 이미지 2/3 Dell Alienware 15 R3 Touchpad Replacement: 5 단계, 이미지 3/3
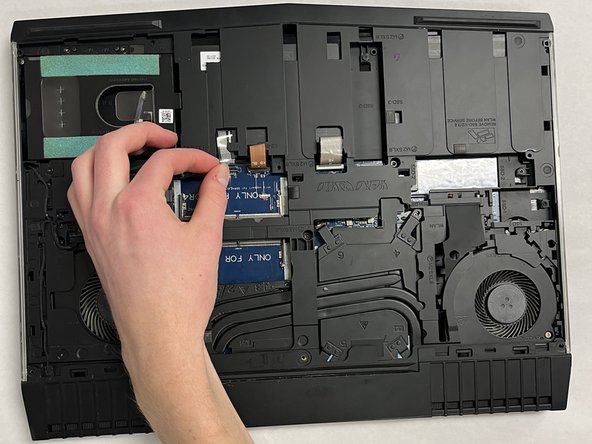
    • Remove the light cable between the hard drive port and fan.

    • Open the latch and remove the keyboard cable. Open the latch and remove the keyboard backlight cable. Open the latch and remove macro keys cable.

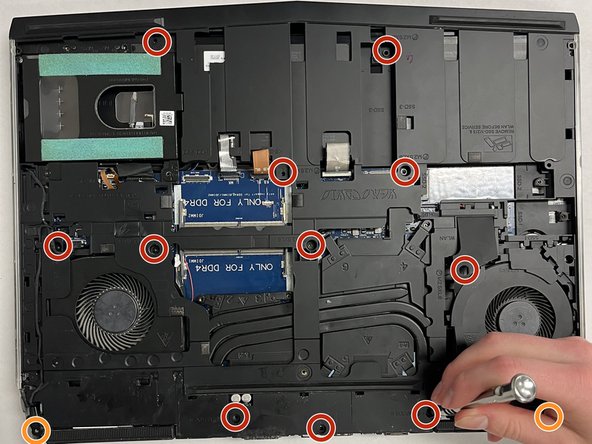
    • Remove the 11 M2.5x8 screws holding the base to the computer.

    • Remove the 2 M2x3 screws.

    • Lift the computer base from the computer. Use the iFixit Opening tool to pry the base off the computer. The base should separate with ease be carful not to break it.

  6. Dell Alienware 15 R3 Touchpad Replacement: 6 단계, 이미지 1/2 Dell Alienware 15 R3 Touchpad Replacement: 6 단계, 이미지 2/2
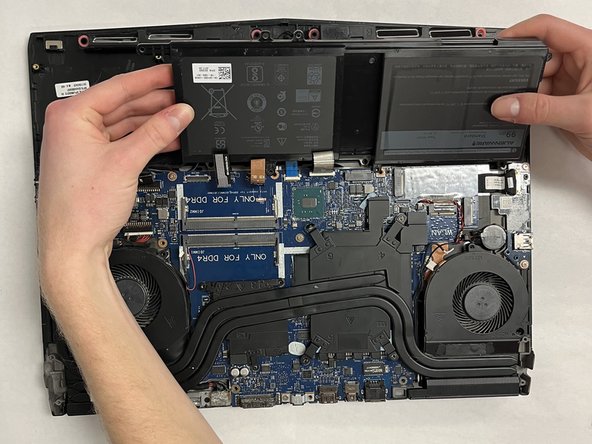
    • Remove the M2.5x5 screw holding the battery to the computer.

    • Remove the battery from the computer.

  7. Dell Alienware 15 R3 Touchpad Replacement: 7 단계, 이미지 1/2 Dell Alienware 15 R3 Touchpad Replacement: 7 단계, 이미지 2/2
    이 단계에 사용된 도구:
    Tweezers
    $4.99
    구매
    • Lift the latches and disconnect the blue touchpad cable from the motherboard.

    • Lift the latch and disconnect the touchpad cable from the touchpad.

    • Lift the latch and disconnect the smaller touchpad cable from the touchpad using the iFixit Tweezers.

  8. Dell Alienware 15 R3 Touchpad Replacement: 8 단계, 이미지 1/3 Dell Alienware 15 R3 Touchpad Replacement: 8 단계, 이미지 2/3 Dell Alienware 15 R3 Touchpad Replacement: 8 단계, 이미지 3/3
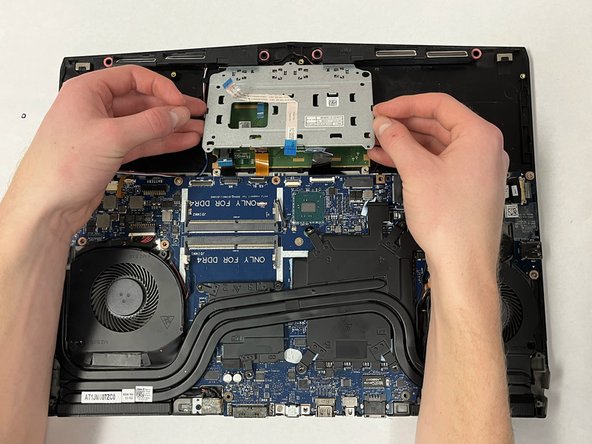
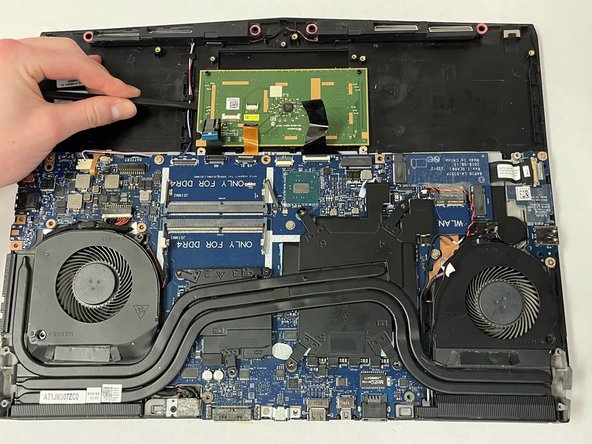
    • Remove five M2x3 screws securing the touchpad bracket to the computer.

    • Lift the touchpad housing from the computer.

    • Gently pry the touchpad to remove adhesive from between touchpad and computer. Lift the touchpad from the computer.

결론

To reassemble your device, follow these instructions in reverse order.

Andrew M

회원 가입일: 03/28/23

433 평판

안내서 3개 작성하였습니다

IUPUI, Team 2-4, Harley Spring 2023 IUPUI, Team 2-4, Harley Spring 2023 회원

IUPUI-HARLEY-S23S2G4

3 회원들

안내서 3개 작성하였습니다

댓글 0개

댓글 쓰기

조회 통계:

24 시간 전: 0

7일 전: 9

30일 전: 24

전체 시간: 232