소개
This guide will show you how to replace the battery in a Dell Chromebook 11.
필요한 것
-
-
Remove the 7 screws from the back cover with a Phillips #0 screwdriver
-
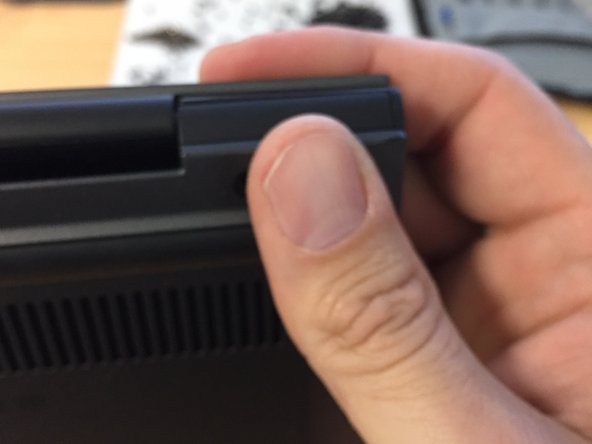
Once all 7 screws have been removed, you can start to pry apart the back cover with your fingers/nails or use a plastic opening tool and carefully start to seprate the back cover from the main chromebook. See pic
-
-
-
Remove the 4 battery screws with a phillips #0 screwdriver.
-
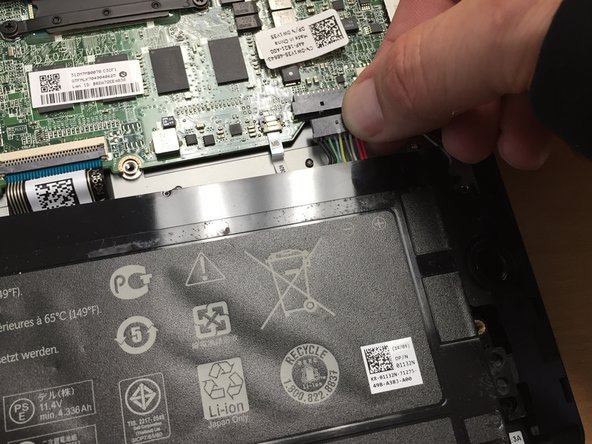
Remove the battery connector from the motherboard either with a Spudger or your finger. Be careful and try not to pull connector out by the wires.
-
-
-
-
Get your new battery ready for install.
-
Plug in new battery connector into the motherboard connector port.
-
-
-
On each side of the battery there are 2 holes. Line up the holes with the gold plated screw port threads and black notches underneath them. See video.
-
Make sure the battery lies flat and secure within the bay before replacing the bottom cover/shell.
-
When maneuvering the battery back into place, keep an eye on the speaker wires that cross over the top right corner of the battery. These wires can get stuck behind the battery which therefore may not allow the battery to sit flat and secure in the bay. Makes sure the battery sits underneath the speaker wires.
-
-
-
Set the bottom cover/shell on top of the chromebook and line it up the best you can
-
Start in the top right corner and squeeze the chromebook together. You will hear "snapping"sounds which means that you are properly connecting the bottom cover clips to the main chromebook frame.
-
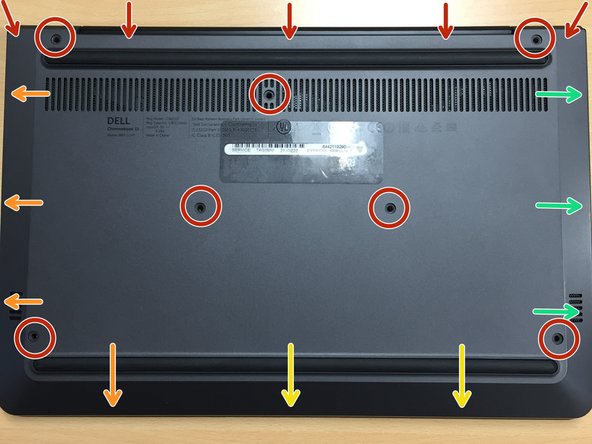
Continue to snap together the sides of the chromebook in a rotating fashion starting with the red arrows and moving along to the green, yellow, then orange arrows. Listen for the snapping sounds. See 3rd pic. You do not have to follow the order of colored arrows, but it seems the easiest.
-
Replace all 7 screws using a Phillips #0 screwdriver. See red circles in pic. Done!
-


다른 한 분이 해당 안내서를 완성하였습니다.