주요 콘텐츠로 건너뛰기

Dell Inspiron 11-3168 Screen Replacement

필요한 것

  1. Dell Inspiron 11-3168 Screen Replacement, Battery: 1 단계, 이미지 1/2 Dell Inspiron 11-3168 Screen Replacement, Battery: 1 단계, 이미지 2/2
    • Before you begin, be sure to turn off your laptop and unplug it from the outlet.

    • Using a Phillips #00 screwdriver, remove all nine 7.5mm screws from the bottom case of the laptop.

  2. Dell Inspiron 11-3168 Screen Replacement: 2 단계, 이미지 1/3 Dell Inspiron 11-3168 Screen Replacement: 2 단계, 이미지 2/3 Dell Inspiron 11-3168 Screen Replacement: 2 단계, 이미지 3/3
    • Remove the bottom case of the laptop by gently prying along the seam with a plastic opening tool.

  3. Dell Inspiron 11-3168 Screen Replacement: 3 단계, 이미지 1/2 Dell Inspiron 11-3168 Screen Replacement: 3 단계, 이미지 2/2
    • Remove the one 7.5mm screw that is holding the battery in place.

  4. Dell Inspiron 11-3168 Screen Replacement: 4 단계, 이미지 1/2 Dell Inspiron 11-3168 Screen Replacement: 4 단계, 이미지 2/2
    • Disconnect the battery cable from its motherboard socket by gently pulling it towards the battery.

    • Pull parallel to the battery, not straight up.

  5. Dell Inspiron 11-3168 Screen Replacement: 5 단계, 이미지 1/3 Dell Inspiron 11-3168 Screen Replacement: 5 단계, 이미지 2/3 Dell Inspiron 11-3168 Screen Replacement: 5 단계, 이미지 3/3
    • Remove the battery.

  6. Dell Inspiron 11-3168 Screen Replacement, Screen: 6 단계, 이미지 1/3 Dell Inspiron 11-3168 Screen Replacement, Screen: 6 단계, 이미지 2/3 Dell Inspiron 11-3168 Screen Replacement, Screen: 6 단계, 이미지 3/3
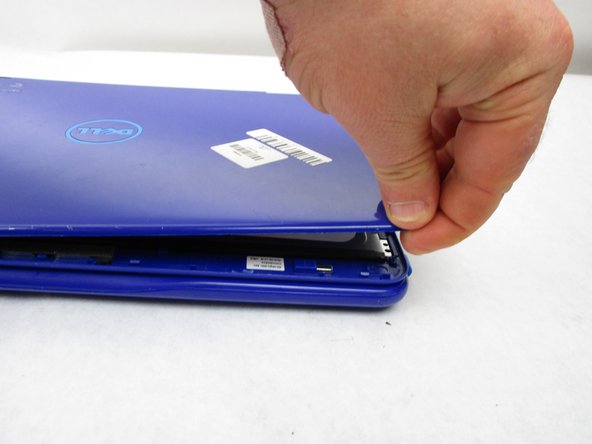
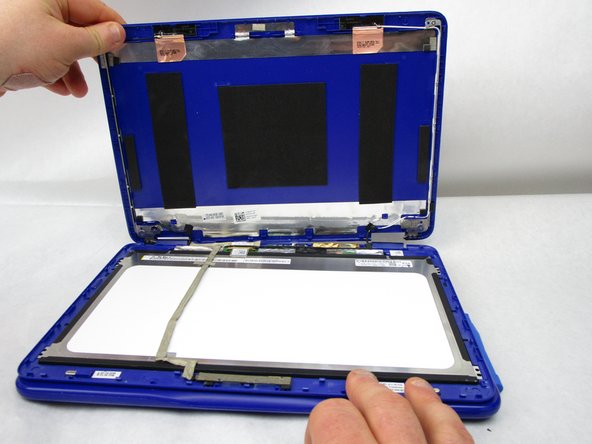
    • Carefully flip the laptop over so that the top case is facing up.

    • Remove the top case of the laptop by gently prying along the seam with a plastic opening tool.

  7. Dell Inspiron 11-3168 Screen Replacement: 7 단계, 이미지 1/3 Dell Inspiron 11-3168 Screen Replacement: 7 단계, 이미지 2/3 Dell Inspiron 11-3168 Screen Replacement: 7 단계, 이미지 3/3
    이 단계에 사용된 도구:
    Tweezers
    $4.99
    구매
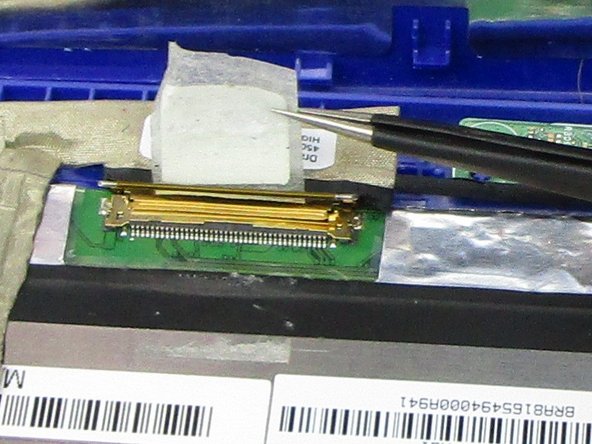
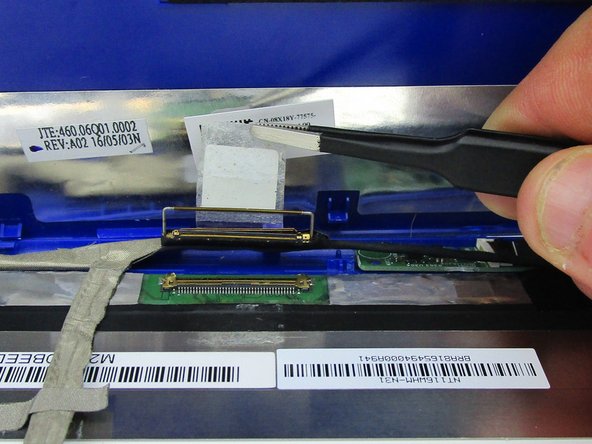
    • Use a pair of tweezers to grip the tape that is holding down the display cable clip.

    • Gently unpeel the tape. This will release the clip that locks over the display connector socket.

    • Once unclipped, remove the display cable from the socket.

  8. Dell Inspiron 11-3168 Screen Replacement: 8 단계, 이미지 1/3 Dell Inspiron 11-3168 Screen Replacement: 8 단계, 이미지 2/3 Dell Inspiron 11-3168 Screen Replacement: 8 단계, 이미지 3/3
    • Find the smaller ZIF connector. Using tweezers, carefully lift the black flap on the connector to release the ribbon cable.

  9. Dell Inspiron 11-3168 Screen Replacement: 9 단계, 이미지 1/2 Dell Inspiron 11-3168 Screen Replacement: 9 단계, 이미지 2/2
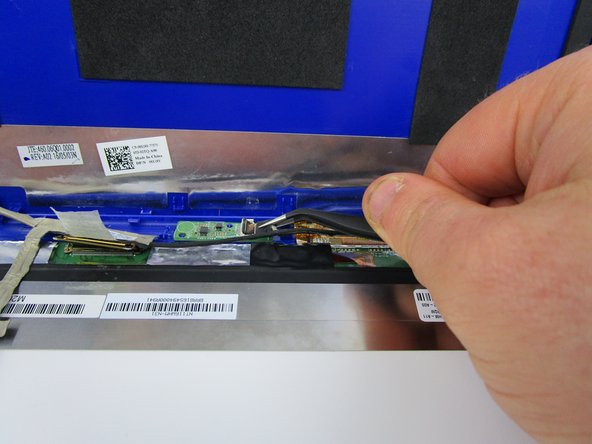
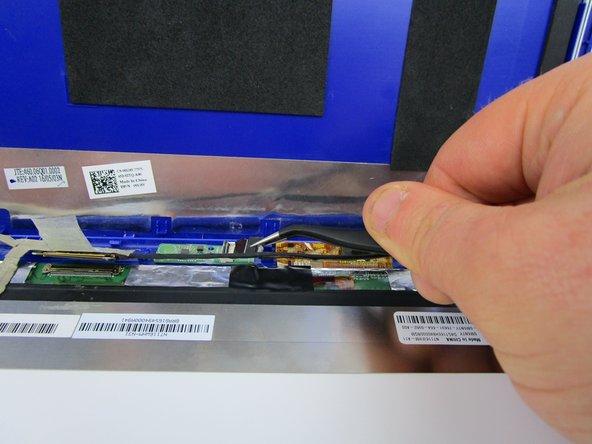
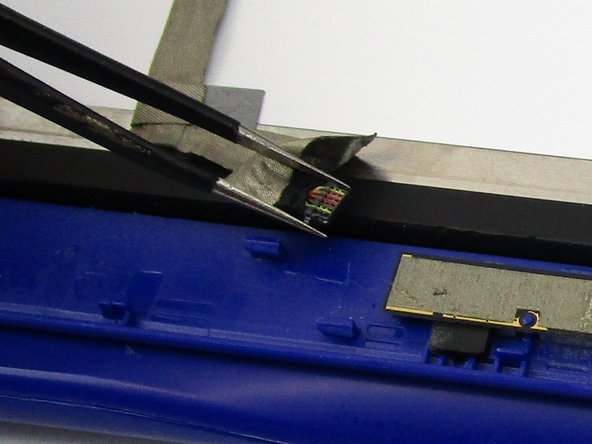
    • Disconnect the webcam module located at the top of the monitor.

  10. Dell Inspiron 11-3168 Screen Replacement: 10 단계, 이미지 1/2 Dell Inspiron 11-3168 Screen Replacement: 10 단계, 이미지 2/2
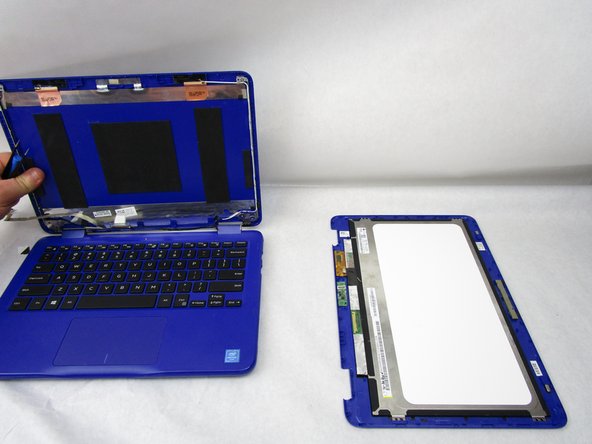
    • Lift and remove the display screen from the top case.

결론

To reassemble your device, follow these instructions in reverse order.

다른 한 분이 해당 안내서를 완성하였습니다.

Tyson Pace

회원 가입일: 01/17/19

464 평판

안내서 3개 작성하였습니다

댓글 한 개

how much did this display cost?

Ibrahim Ahmed Mohamed - 답글

댓글 쓰기

조회 통계:

24 시간 전: 1

7일 전: 1

30일 전: 5

전체 시간: 735