주요 콘텐츠로 건너뛰기

Dell Inspiron 13-7353 RAM Replacement

필요한 것

  1. Dell Inspiron 13-7353 RAM Replacement, Flip the Computer: 1 단계, 이미지 1/1
    • WARNING: Please read the safety information shipped with your computer and follow recommended steps before working inside your computer. When finished working inside your computer, follow the instructions included in the safety information.

    • Close the computer display and turn the computer over so that the base of the computer is facing up.

  2. Dell Inspiron 13-7353 RAM Replacement, Secure the Base: 2 단계, 이미지 1/1
    • Remove the ten screws that secure the base cover to the base of the computer.

  3. Dell Inspiron 13-7353 RAM Replacement, Pry the Base cover: 3 단계, 이미지 1/1
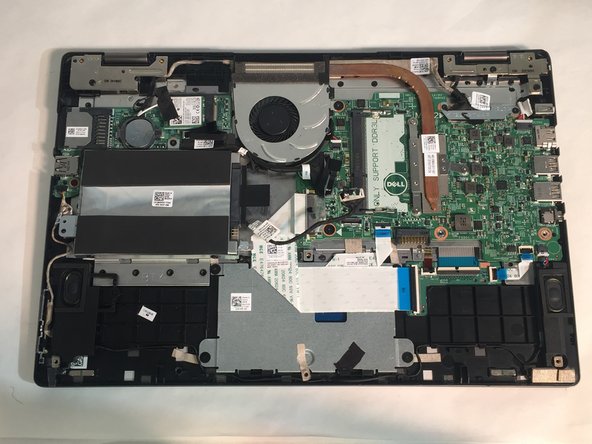
    • Using a plastic scribe (plastic opening tool), pry the base cover off of the base of the computer.

  4. Dell Inspiron 13-7353 RAM Replacement, RAM: 4 단계, 이미지 1/2 Dell Inspiron 13-7353 RAM Replacement, RAM: 4 단계, 이미지 2/2
    • Before opening your device, ensure that all data is backed up on a hard drive to prevent data loss.

    • Loosen and then unplug the hard drive cable.

  5. Dell Inspiron 13-7353 RAM Replacement: 5 단계, 이미지 1/2 Dell Inspiron 13-7353 RAM Replacement: 5 단계, 이미지 2/2
    • Remove the two M2 3mm screws attaching the battery using the Phillips #1 screwdriver.

    • Remove the battery.

  6. Dell Inspiron 13-7353 RAM Replacement: 6 단계, 이미지 1/3 Dell Inspiron 13-7353 RAM Replacement: 6 단계, 이미지 2/3 Dell Inspiron 13-7353 RAM Replacement: 6 단계, 이미지 3/3
    • Pry open the two clips.

    • Gently lift the RAM stick and pull it out of the motherboard.

결론

To reassemble your device, follow these instructions in reverse order.

다른 한 분이 해당 안내서를 완성하였습니다.

Stephany Marin Restrepo

회원 가입일: 03/19/18

613 평판

안내서 5개 작성하였습니다

University of Memphis, Team S2-G2, Kim Spring 2018 University of Memphis, Team S2-G2, Kim Spring 2018 회원

UM-KIM-S18S2G2

3 회원들

안내서 5개 작성하였습니다

댓글 0개

댓글 쓰기

조회 통계:

24 시간 전: 0

7일 전: 1

30일 전: 9

전체 시간: 688