이 버전에는 잘못된 편집 사항이 있을 수 있습니다. 최신 확인된 스냅샷으로 전환하십시오.
필요한 것
-
이 단계는 번역되지 않았습니다. 번역을 도와주십시오
-
Remove the ten 7.5mm Phillips #00 screws from the bottom of the laptop.
-
Use an opening tool to remove the bottom half of the case from the laptop.
-
-
이 단계는 번역되지 않았습니다. 번역을 도와주십시오
-
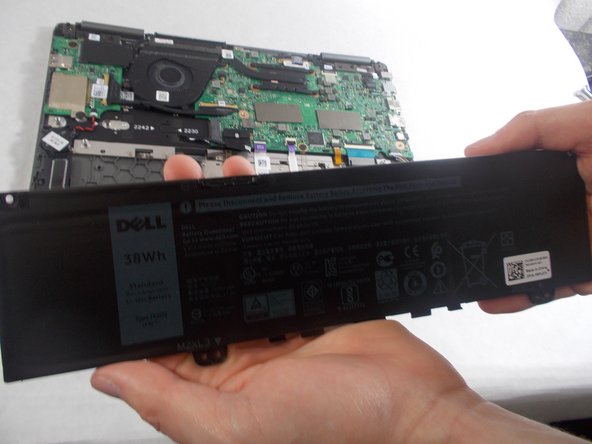
Use a Phillips screwdriver to remove the four screws holding the battery in place.
-
-
이 단계는 번역되지 않았습니다. 번역을 도와주십시오
-
Pull the plastic tab on the battery cable to disconnect the cable from the battery.
-
-
-
이 단계는 번역되지 않았습니다. 번역을 도와주십시오
-
Unplug the connector holding the fan’s wires.
-
Remove the fan from the laptop.
-
-
이 단계는 번역되지 않았습니다. 번역을 도와주십시오
-
Use the Phillips #00 screwdriver to remove the single screw holding in the network card.
-
Remove the network card from the laptop.
-
-
이 단계는 번역되지 않았습니다. 번역을 도와주십시오
-
Use the Phillips #00 screwdriver to remove the two 1mm screws holding in the daughterboard.
-
Remove the metal piece holding in the daughterboard.
-
Disconnect the two cable connectors from the daughterboard.
-
If the cables are stuck, gently wiggle them until they disconnect.
-
-
이 단계는 번역되지 않았습니다. 번역을 도와주십시오
-
Release the IO Board Cable.
-
Release the Touchpad cable.
-
Release the keyboard back-light cable.
-
Release the keyboard cable.
-
Release the eDP cable.
-
Release the dc-in cable.
-
Release the cable for the LED charging indicator by gently pulling up on the connector.
-


다른 한 분이 해당 안내서를 완성하였습니다.
팀

UMass Dartmouth, Team S1-G4, O'Connell Fall 2019 UMass Dartmouth, Team S1-G4, O'Connell Fall 2019 회원
UMASSD-O'CONNELL-F19S1G4
3 회원들
안내서 5개 작성하였습니다