주요 콘텐츠로 건너뛰기

Dell Inspiron 15-5552 Memory Replacement

필요한 것

  1. Dell Inspiron 15-5552 Memory Replacement, Battery: 1 단계, 이미지 1/1
    • Make sure the laptop is powered down before you remove the battery.

  2. Dell Inspiron 15-5552 Memory Replacement: 2 단계, 이미지 1/1
    • Locate the battery release switch on the bottom of the laptop.

  3. Dell Inspiron 15-5552 Memory Replacement: 3 단계, 이미지 1/1
    • Slide the battery release switch away from the lock symbol towards the “unlock” position.

    • You can tell that the battery is unlocked once you hear a "click."

  4. Dell Inspiron 15-5552 Memory Replacement: 4 단계, 이미지 1/2 Dell Inspiron 15-5552 Memory Replacement: 4 단계, 이미지 2/2
    • Rotate the battery outward by lifting the bottom lip that pops out.

    • Continue rotating the battery towards the top of the laptop until the battery is completely removed.

  5. Dell Inspiron 15-5552 Memory Replacement, Screw Location: 5 단계, 이미지 1/1
    • Flip the device on its back, locate the screws circled.

  6. Dell Inspiron 15-5552 Memory Replacement, Screw Removal: 6 단계, 이미지 1/1
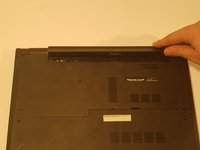
    • Use a J0 screwdriver to unscrew the two, 6mm Phillips screw on the rear-cover.

  7. Dell Inspiron 15-5552 Memory Replacement, Removing Cover: 7 단계, 이미지 1/3 Dell Inspiron 15-5552 Memory Replacement, Removing Cover: 7 단계, 이미지 2/3 Dell Inspiron 15-5552 Memory Replacement, Removing Cover: 7 단계, 이미지 3/3
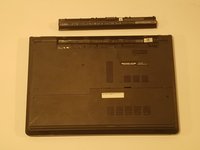
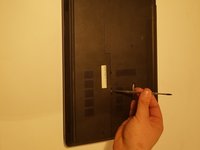
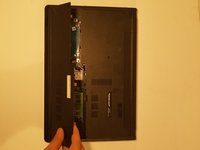
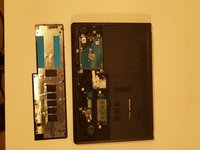
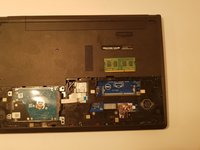
    • Using a spudger, Lightly lift the rear-cover up and at an angle, away from the computer.

  8. Dell Inspiron 15-5552 Memory Replacement, RAM Removal: 8 단계, 이미지 1/2 Dell Inspiron 15-5552 Memory Replacement, RAM Removal: 8 단계, 이미지 2/2
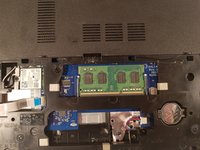
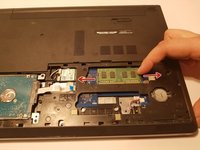
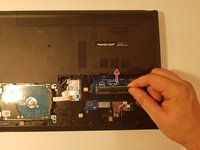
    • Use your fingers to carefully pull the securing clips on the RAM away from each other.

    • The RAM should pop up when the clips are released.

  9. Dell Inspiron 15-5552 Memory Replacement, RAM Removal Contiuned: 9 단계, 이미지 1/2 Dell Inspiron 15-5552 Memory Replacement, RAM Removal Contiuned: 9 단계, 이미지 2/2
    • Remove the dislodged up RAM by pulling it away from the connection.

    • If it does not pop up, pry it out in a steady and straight direction.

결론

To reassemble your device, follow these instructions in reverse order.

Chandler Champion

회원 가입일: 01/23/18

364 평판

안내서 3개 작성하였습니다

댓글 0개

댓글 쓰기

조회 통계:

24 시간 전: 0

7일 전: 0

30일 전: 2

전체 시간: 266